A Beautiful Stress-Free Christmas Mantel in Under 30 Minutes
Looking for a fast and easy Christmas mantel option? Here is my easy 30 Minute Mantel tutorial that has been my go to for years!
Are you combing Pinterest for Christmas Mantel ideas like I am? Wow, there are some amazing designs, but if you are like me you may not have the budget or even the time to craft something so extravagant.
The pressure of the holidays is pretty intense, so I am here to show you how I put up my Christmas mantel in under 30 minutes! I think it’s beautiful and hope you do too 🙂
Contains hand selected products, with affiliate marketing links where I may earn a small commission if a purchase is made. {full disclosure here}
Stress-Free
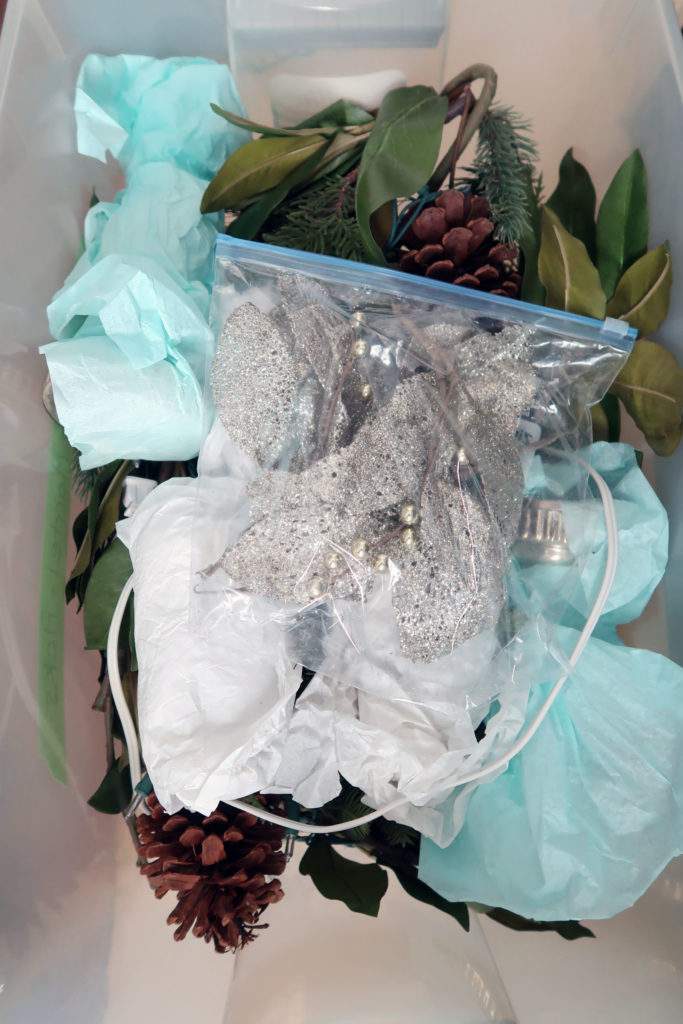
This is key to the “stress-free” BE ORGANIZED. Ok, I’m sorry but it’s true. How I’ve made this easy on myself is by storing all items that go on my mantel in a clear tote labeled “Family Room Christmas Mantel”.
That way I can find it quickly in the attic and truth be told it’s the first thing I put up for Christmas because it’s packaged and ready to go! I’ll cover exactly what I do at the end of this article.
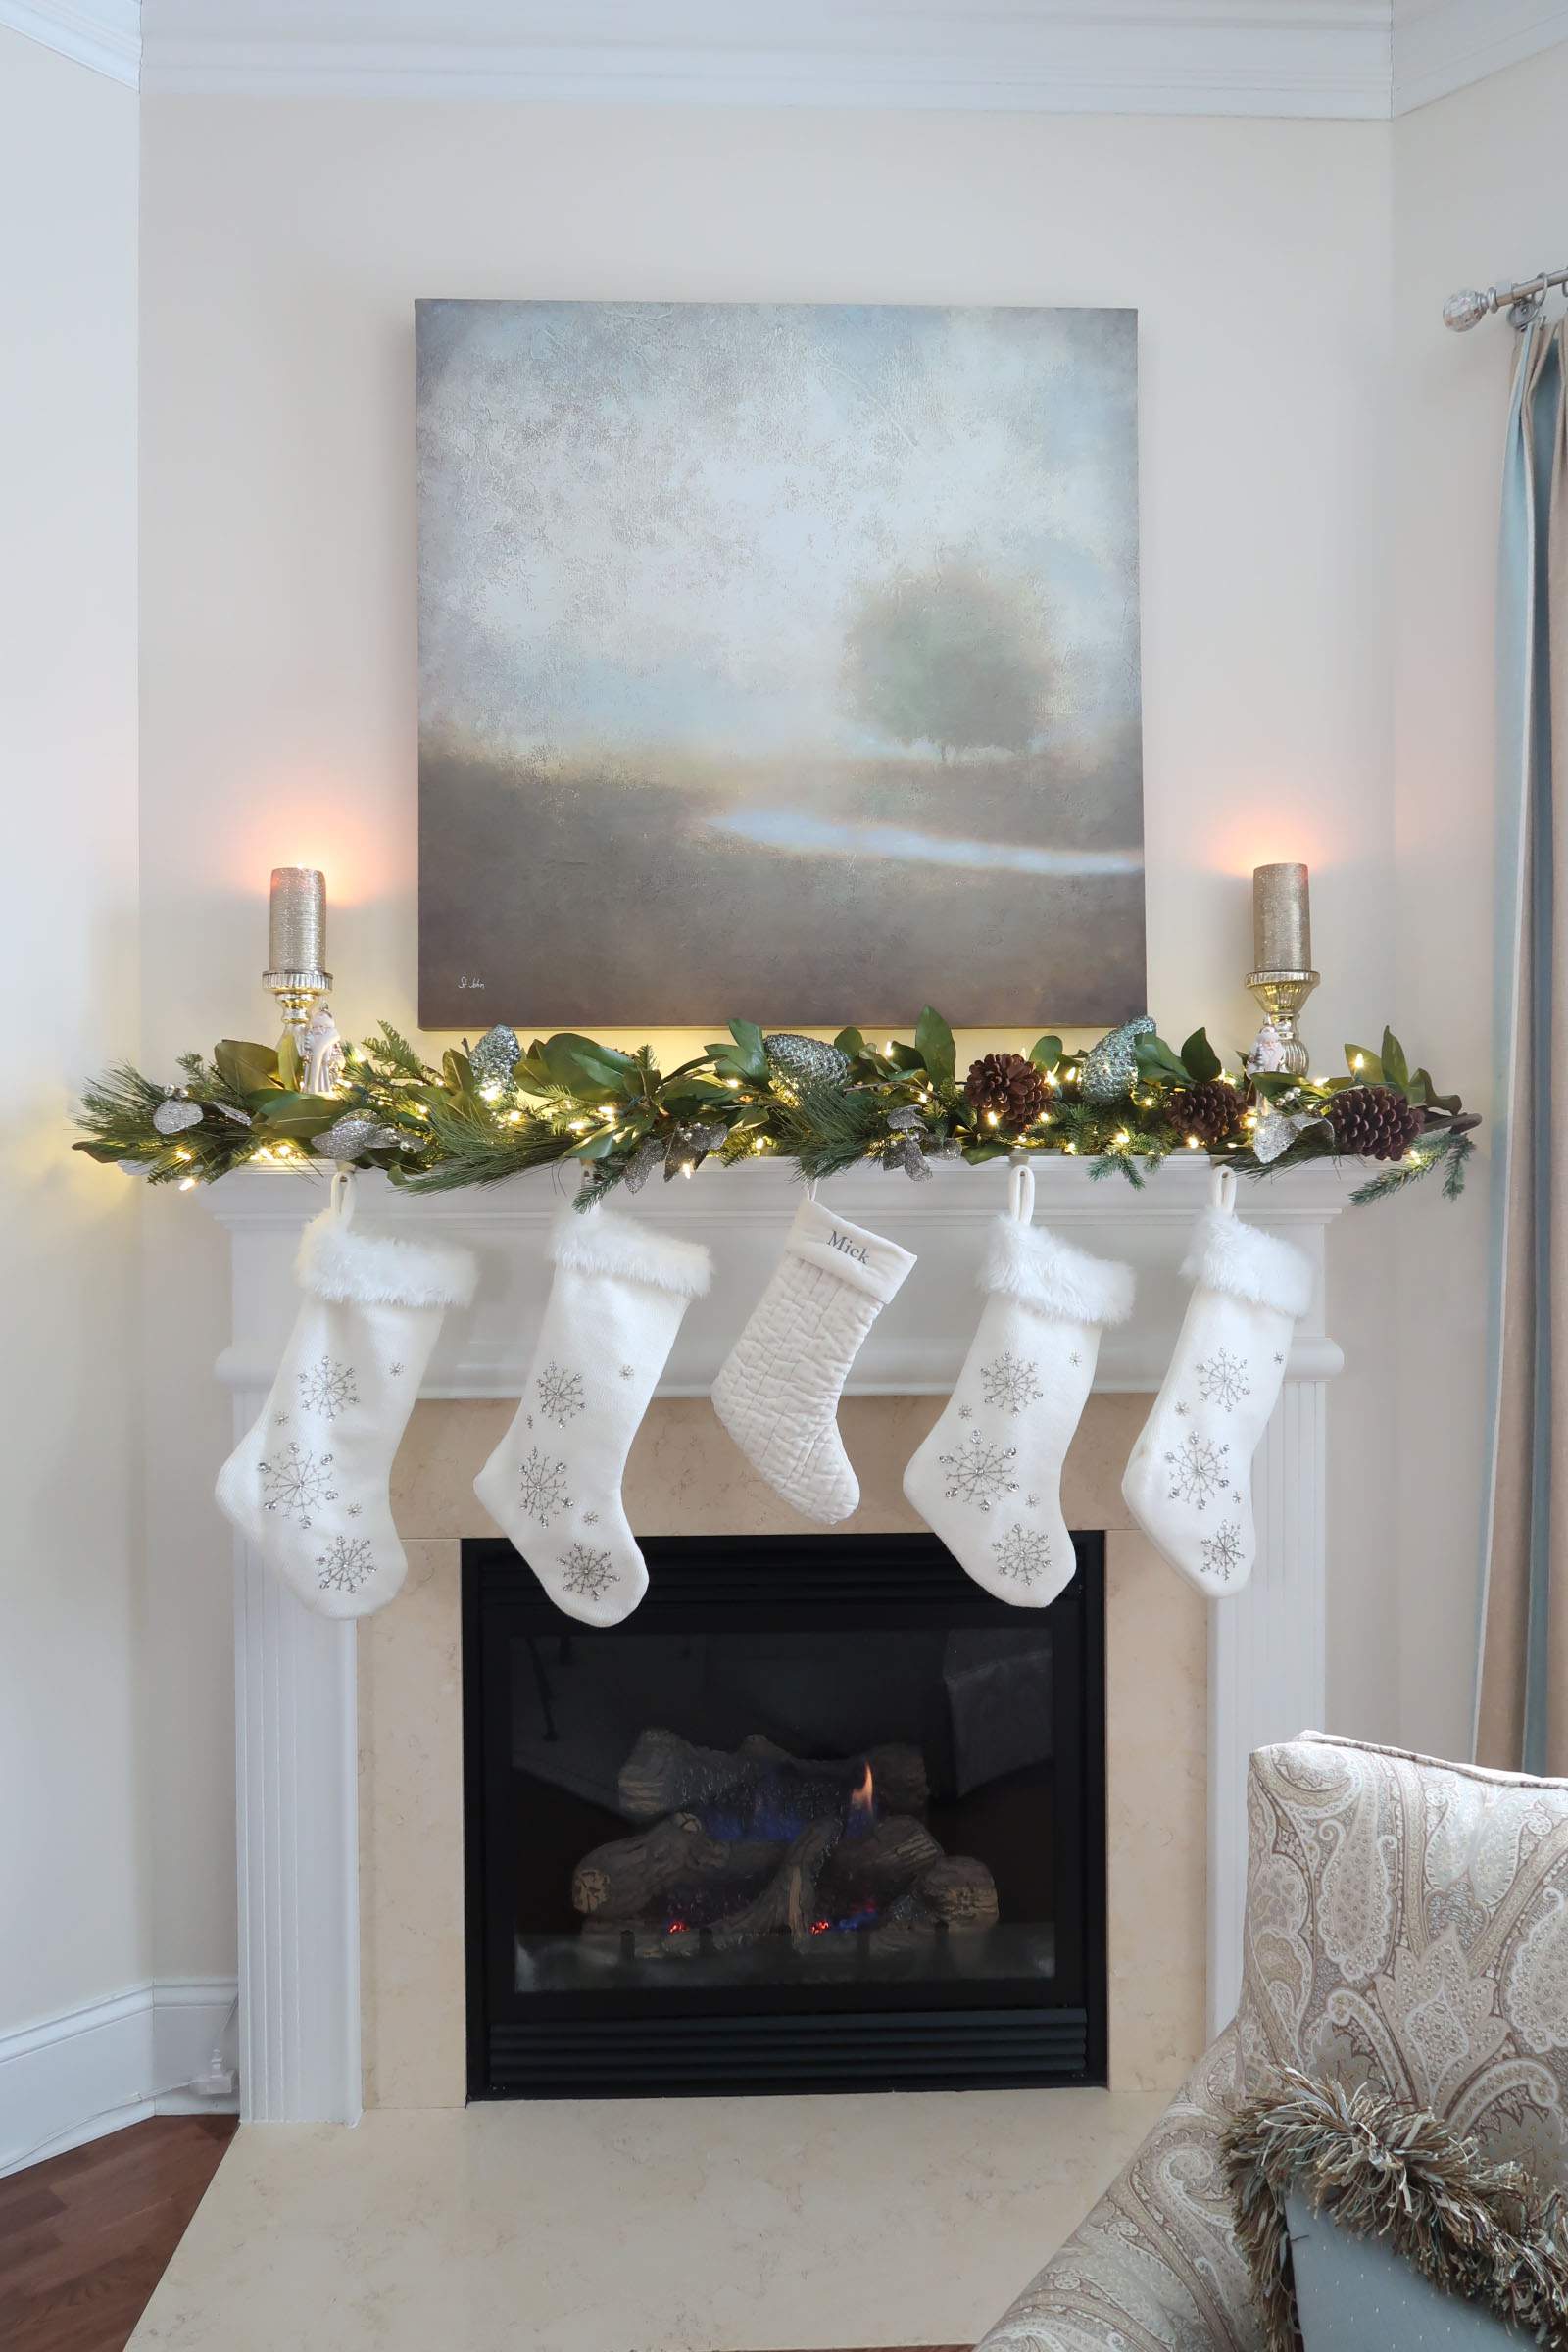
A Beautiful Christmas Mantel in Under 30 Minutes
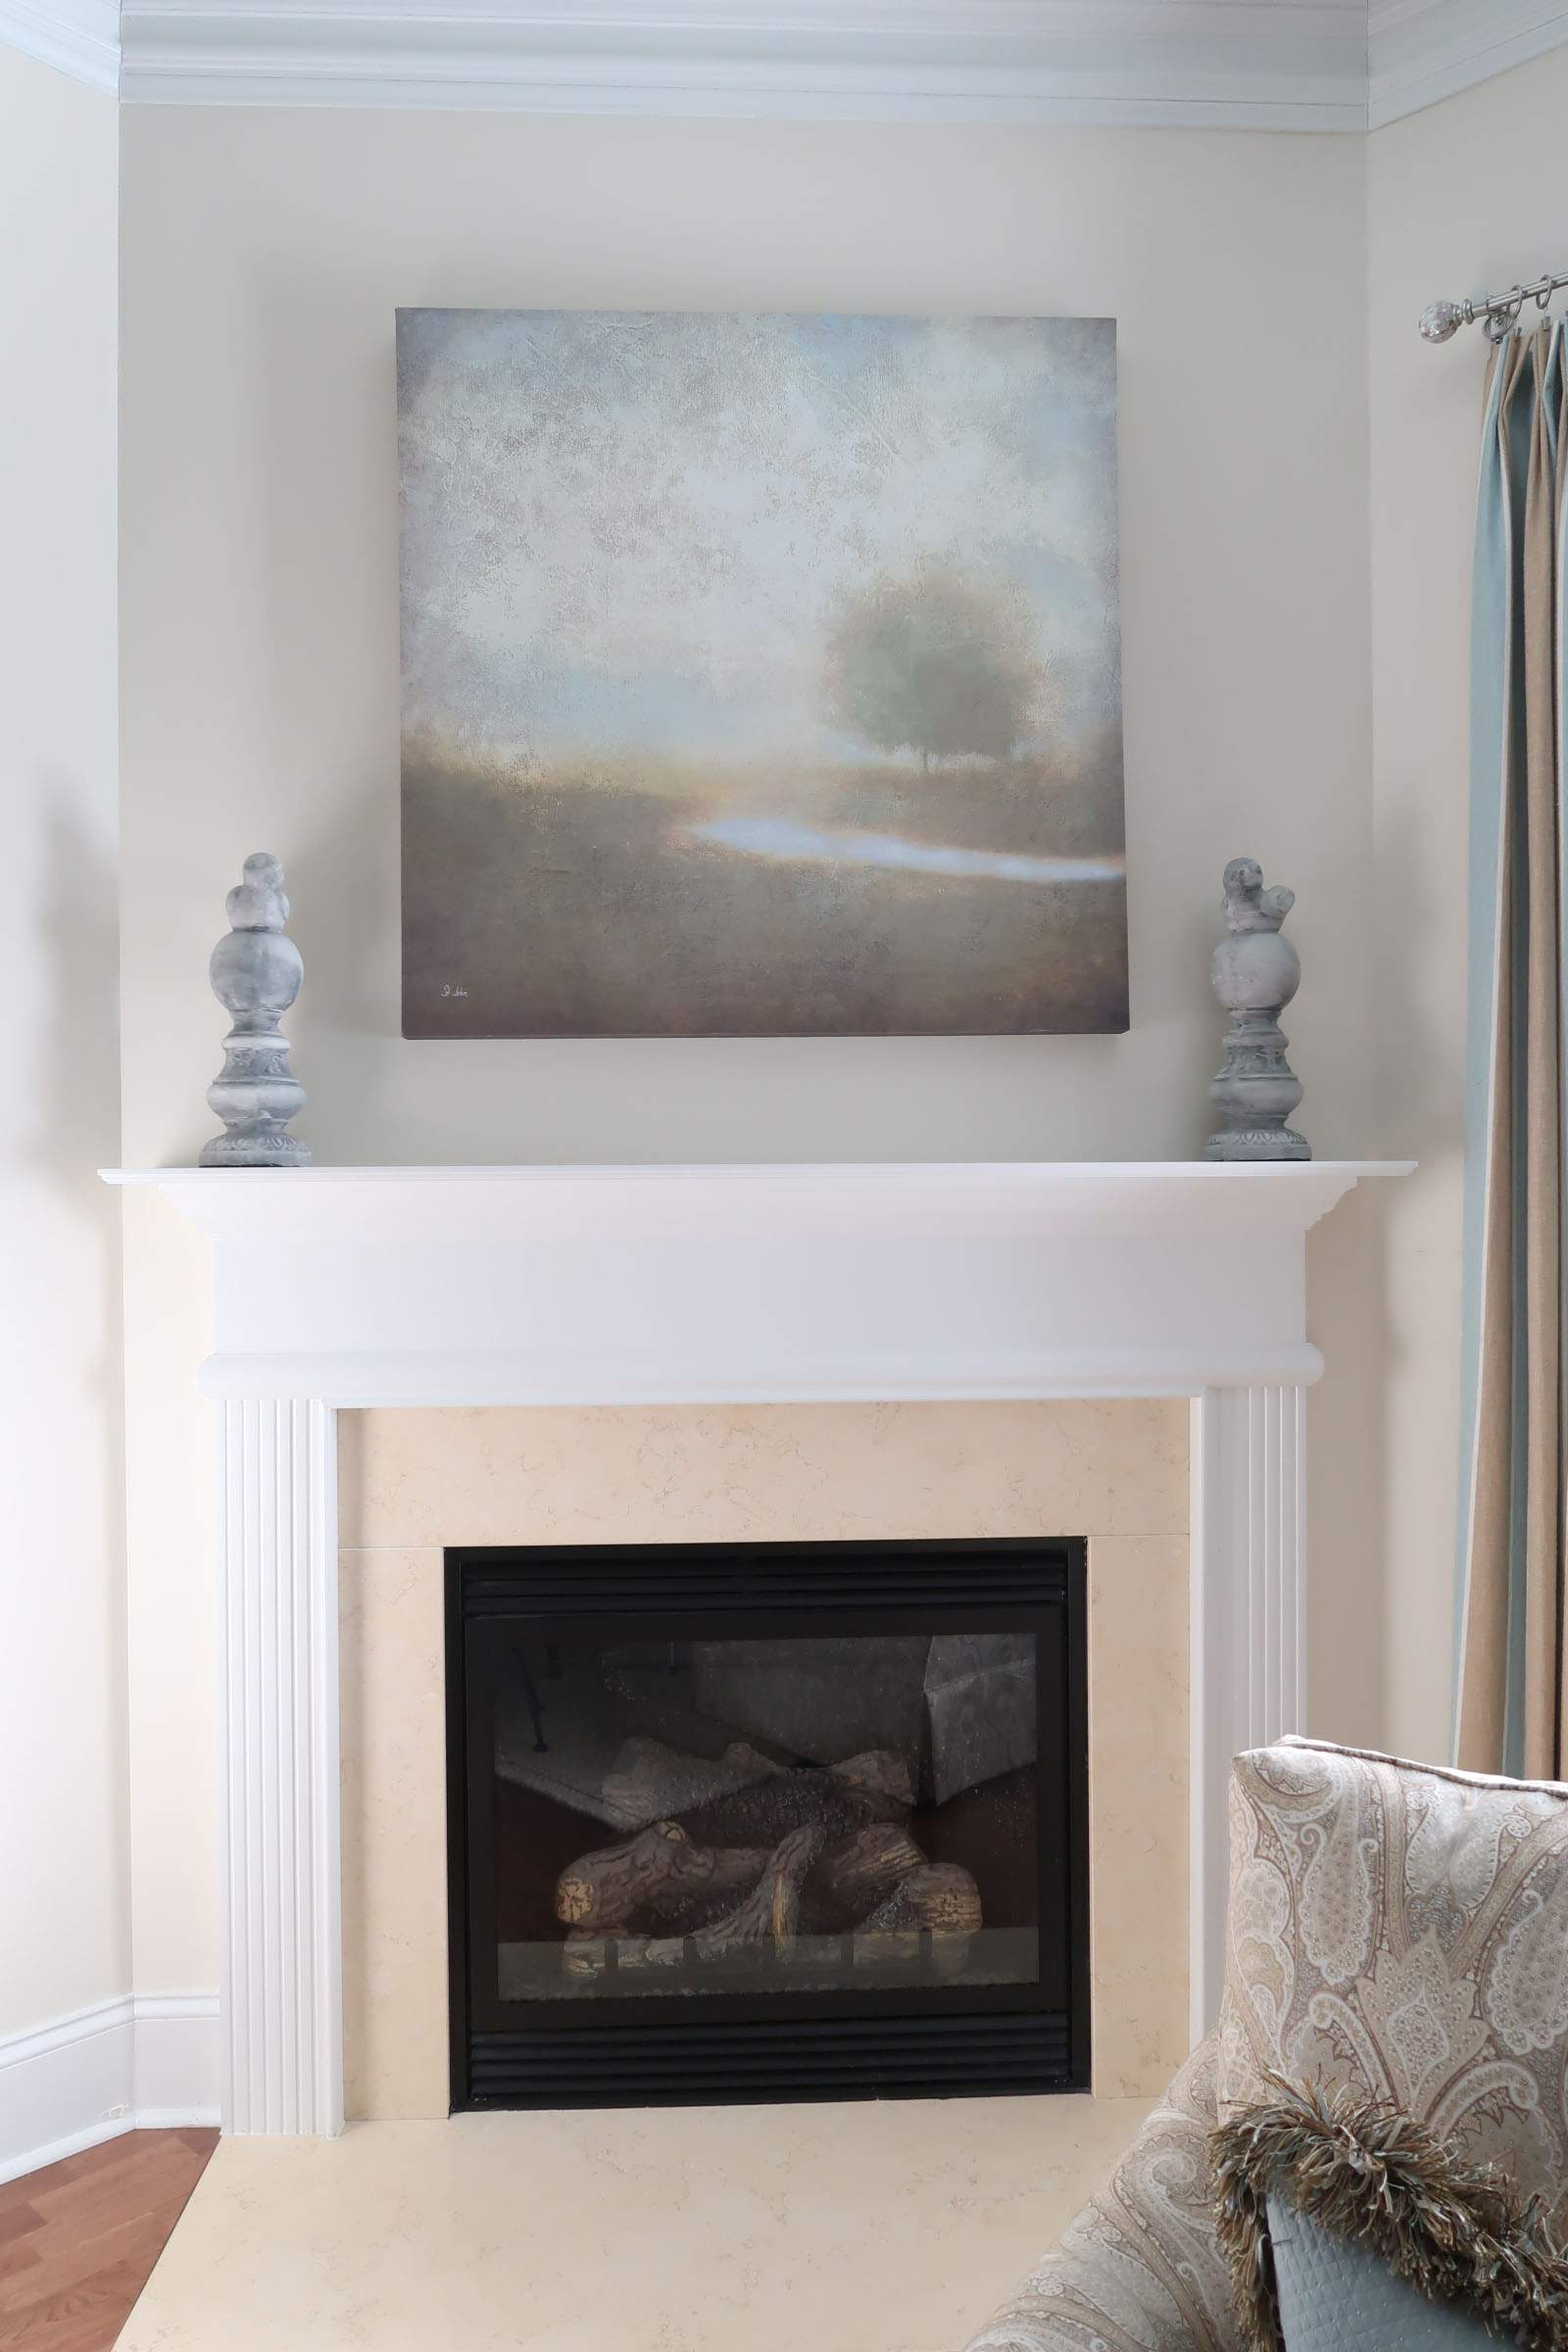
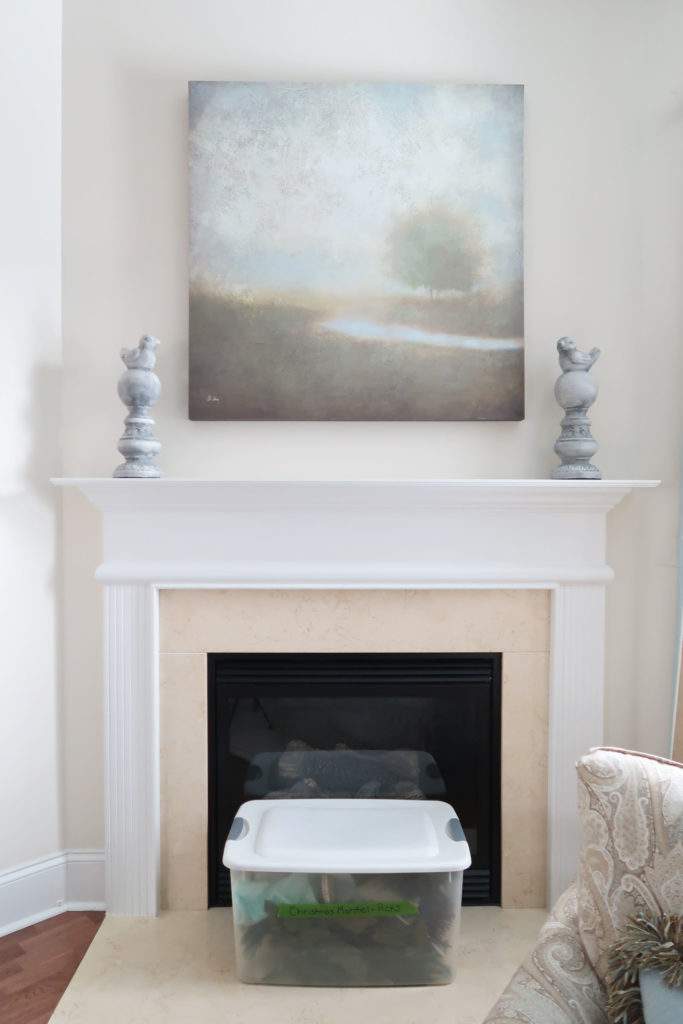
Let’s start from the top! The first thing I do is pull down the current decor and set to the side. That gets packed and sent to the attic in the Christmas mantel tote.
1). Prepare the Mantel
Pull off any current decor and set aside. Clean off mantel. Here is what my everyday mantel looks like and is as basic as it gets!
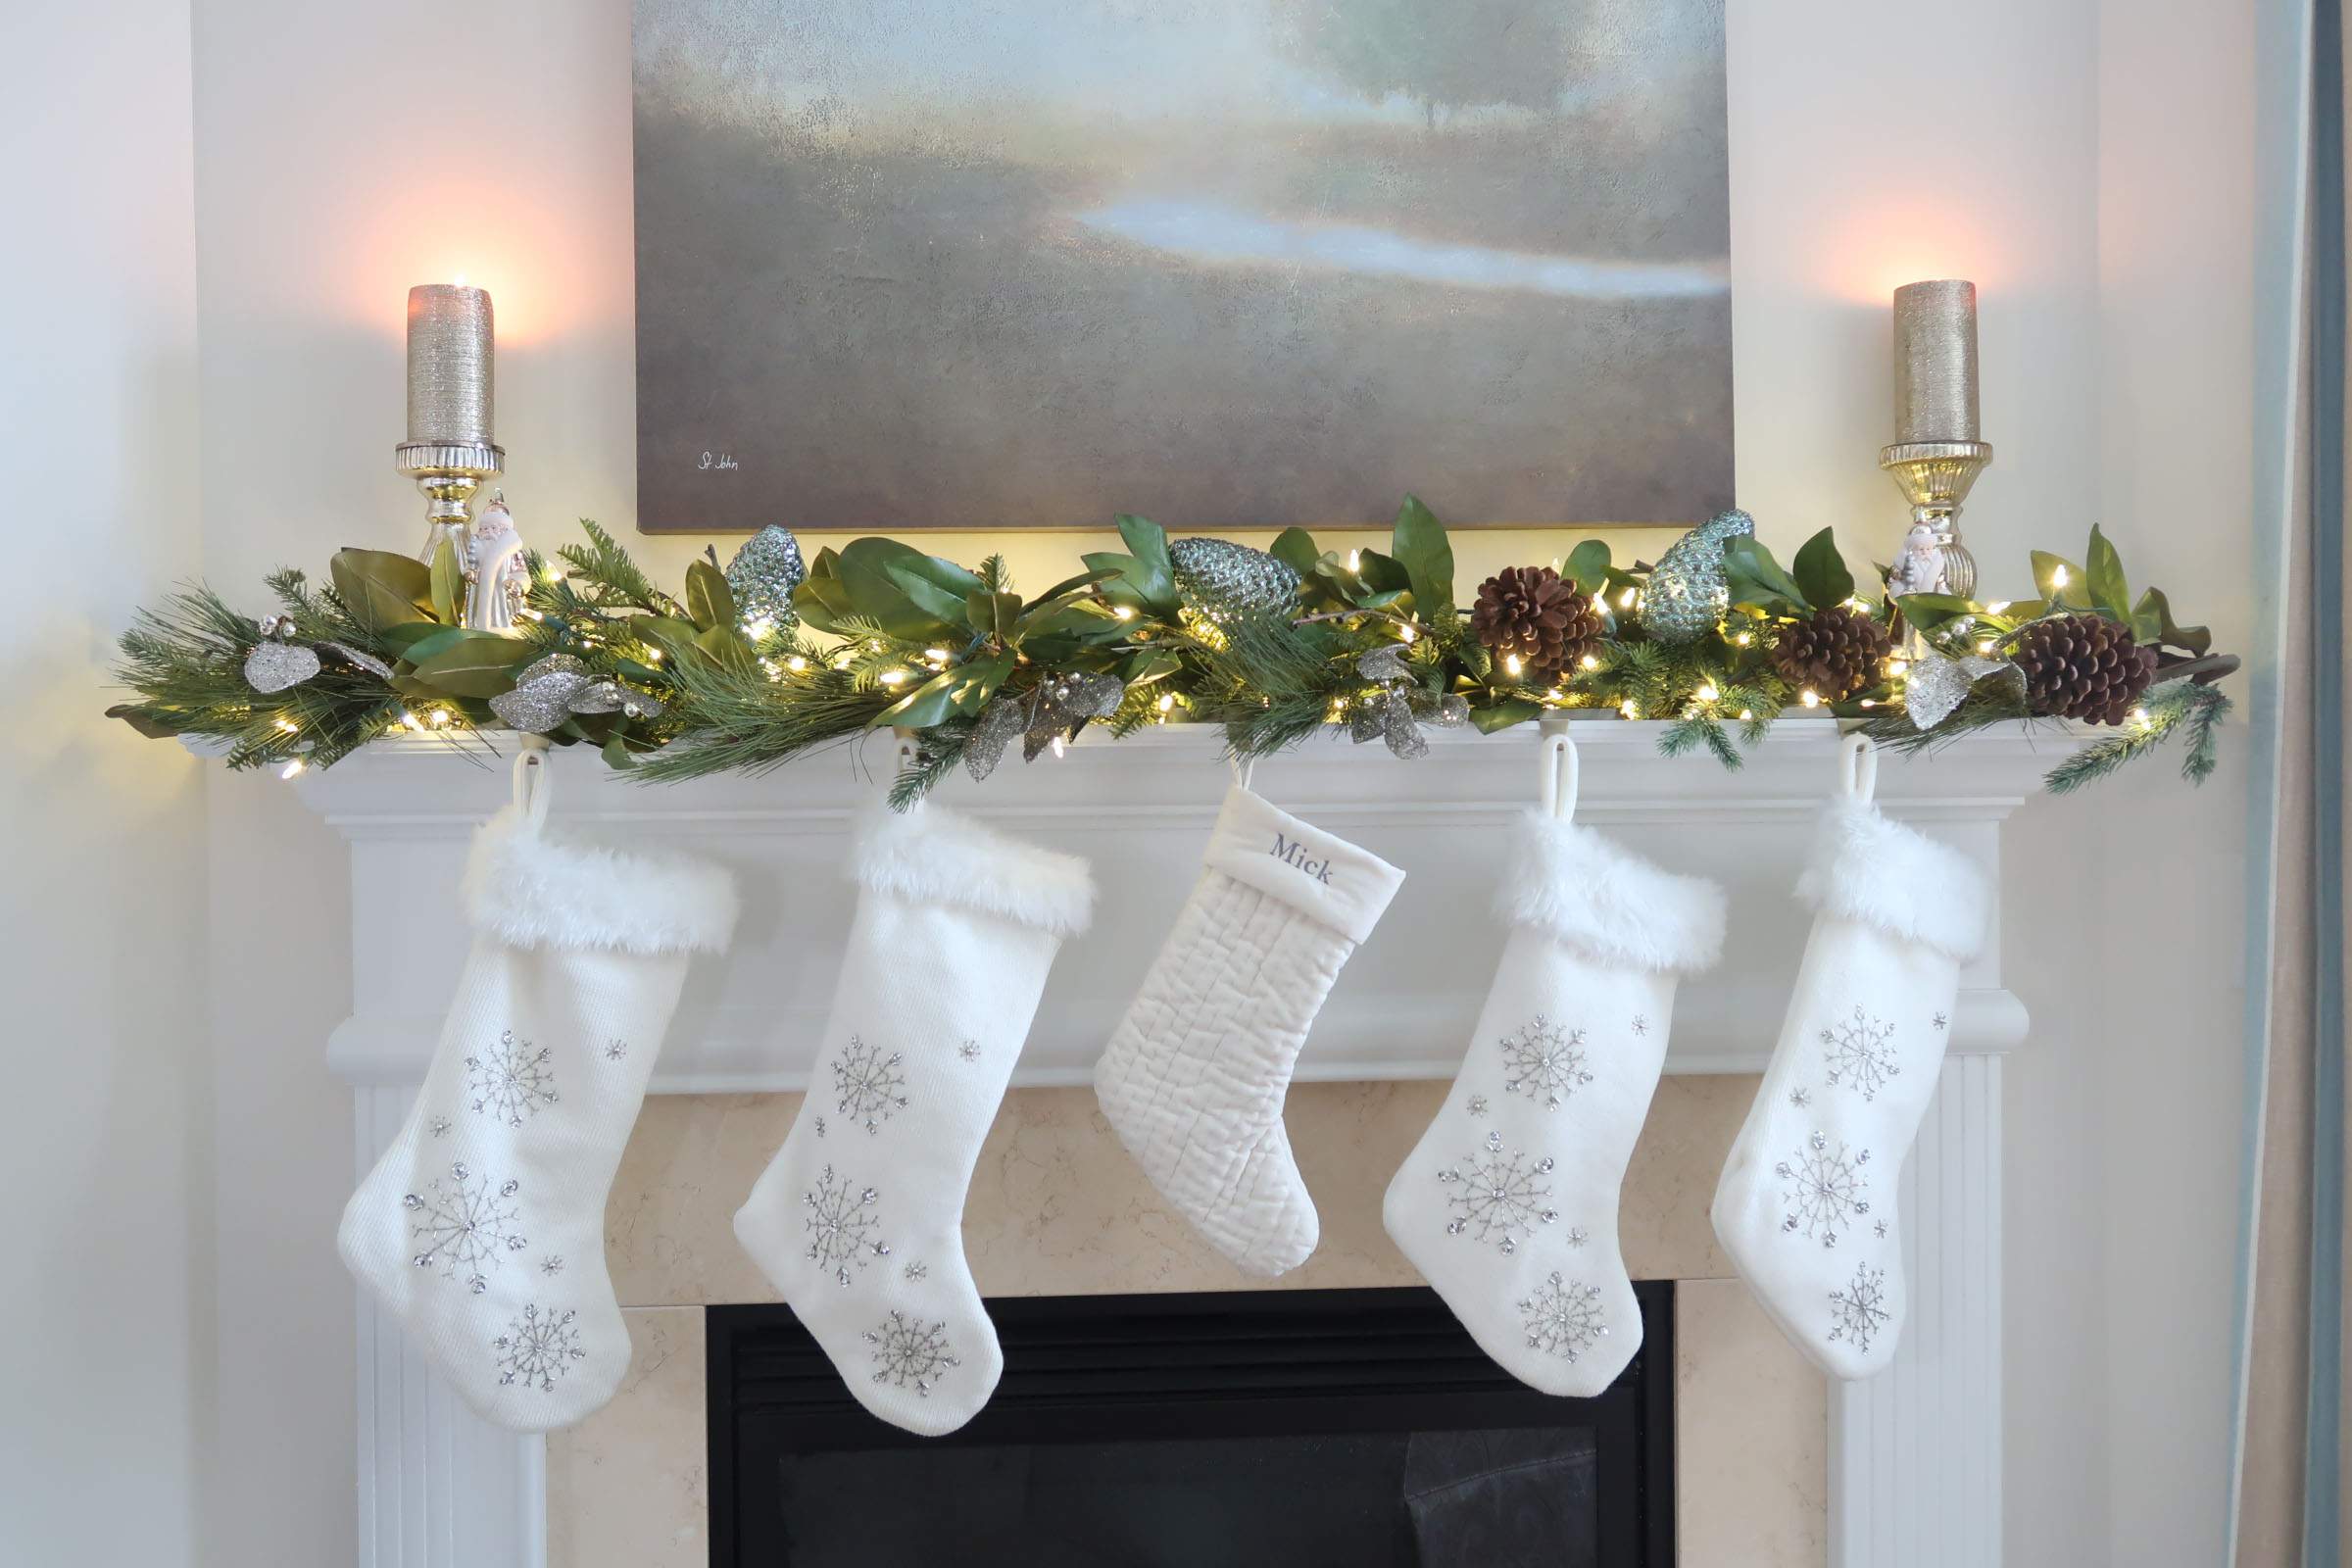
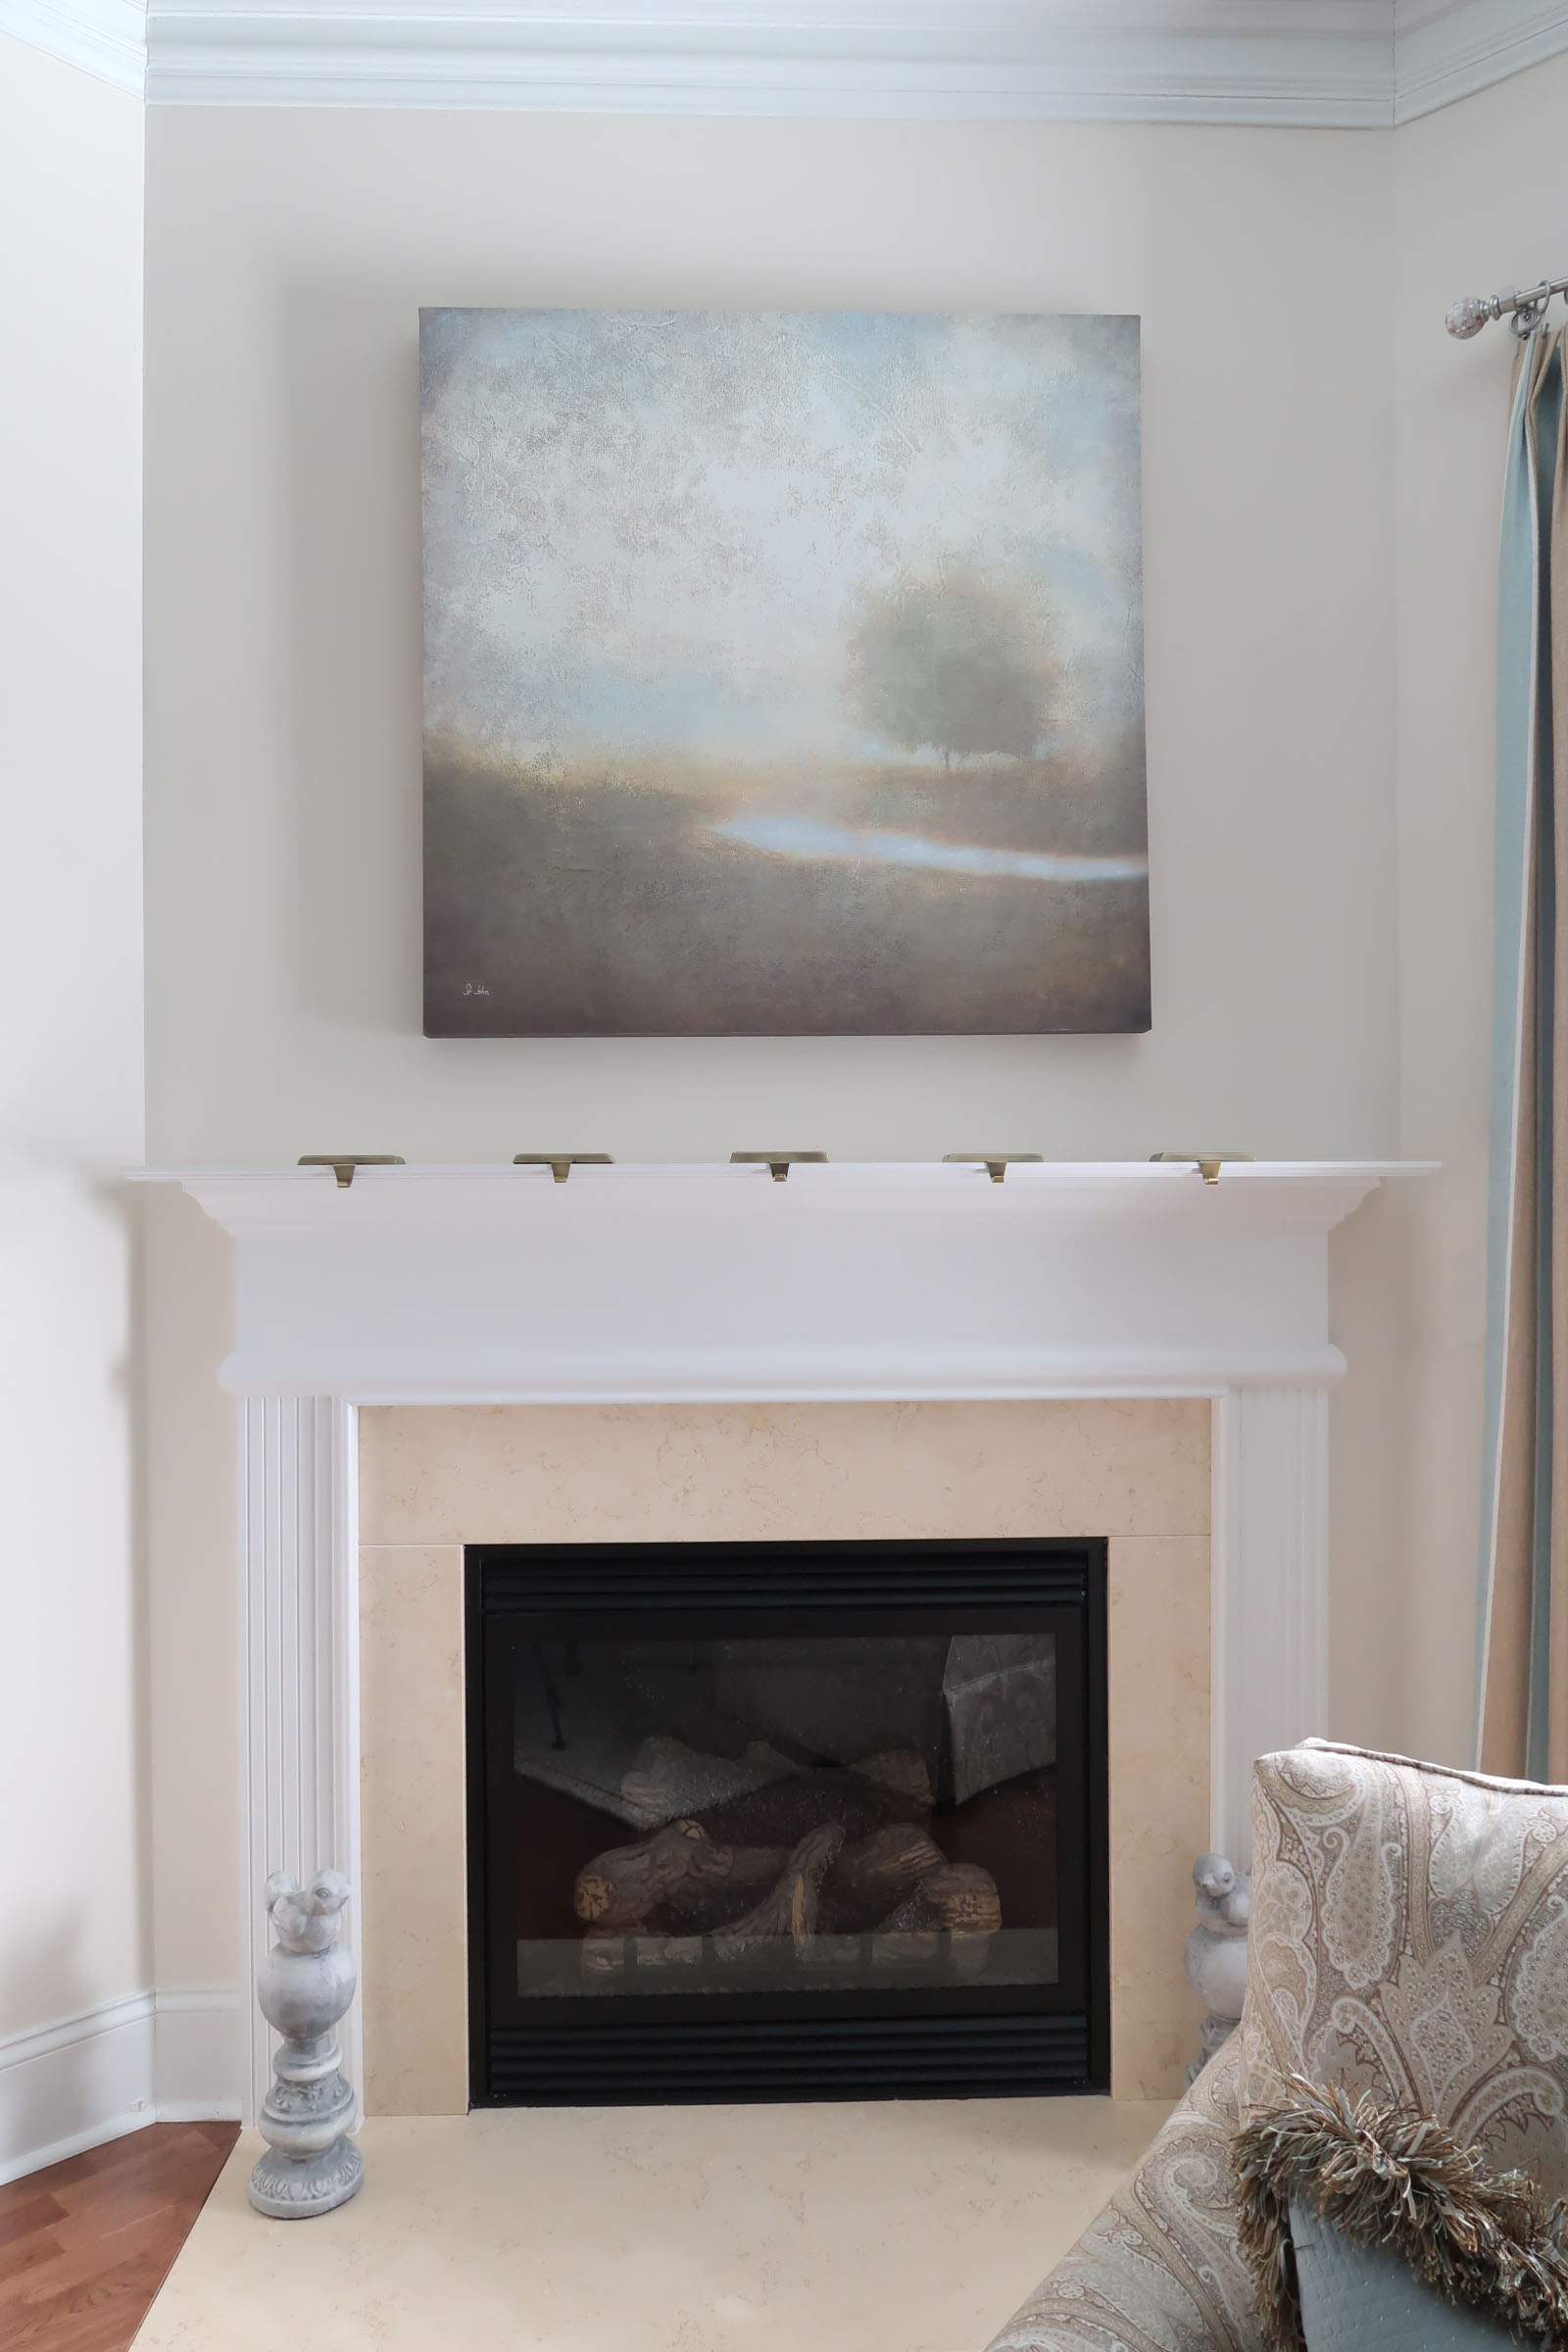
2) Add stocking holders
Since my mantel is only 8 inches deep, I use the flat basic stocking holders. Luckily Target still carries them in multiple finishes: Basic Stocking Holder 2 PK Gold
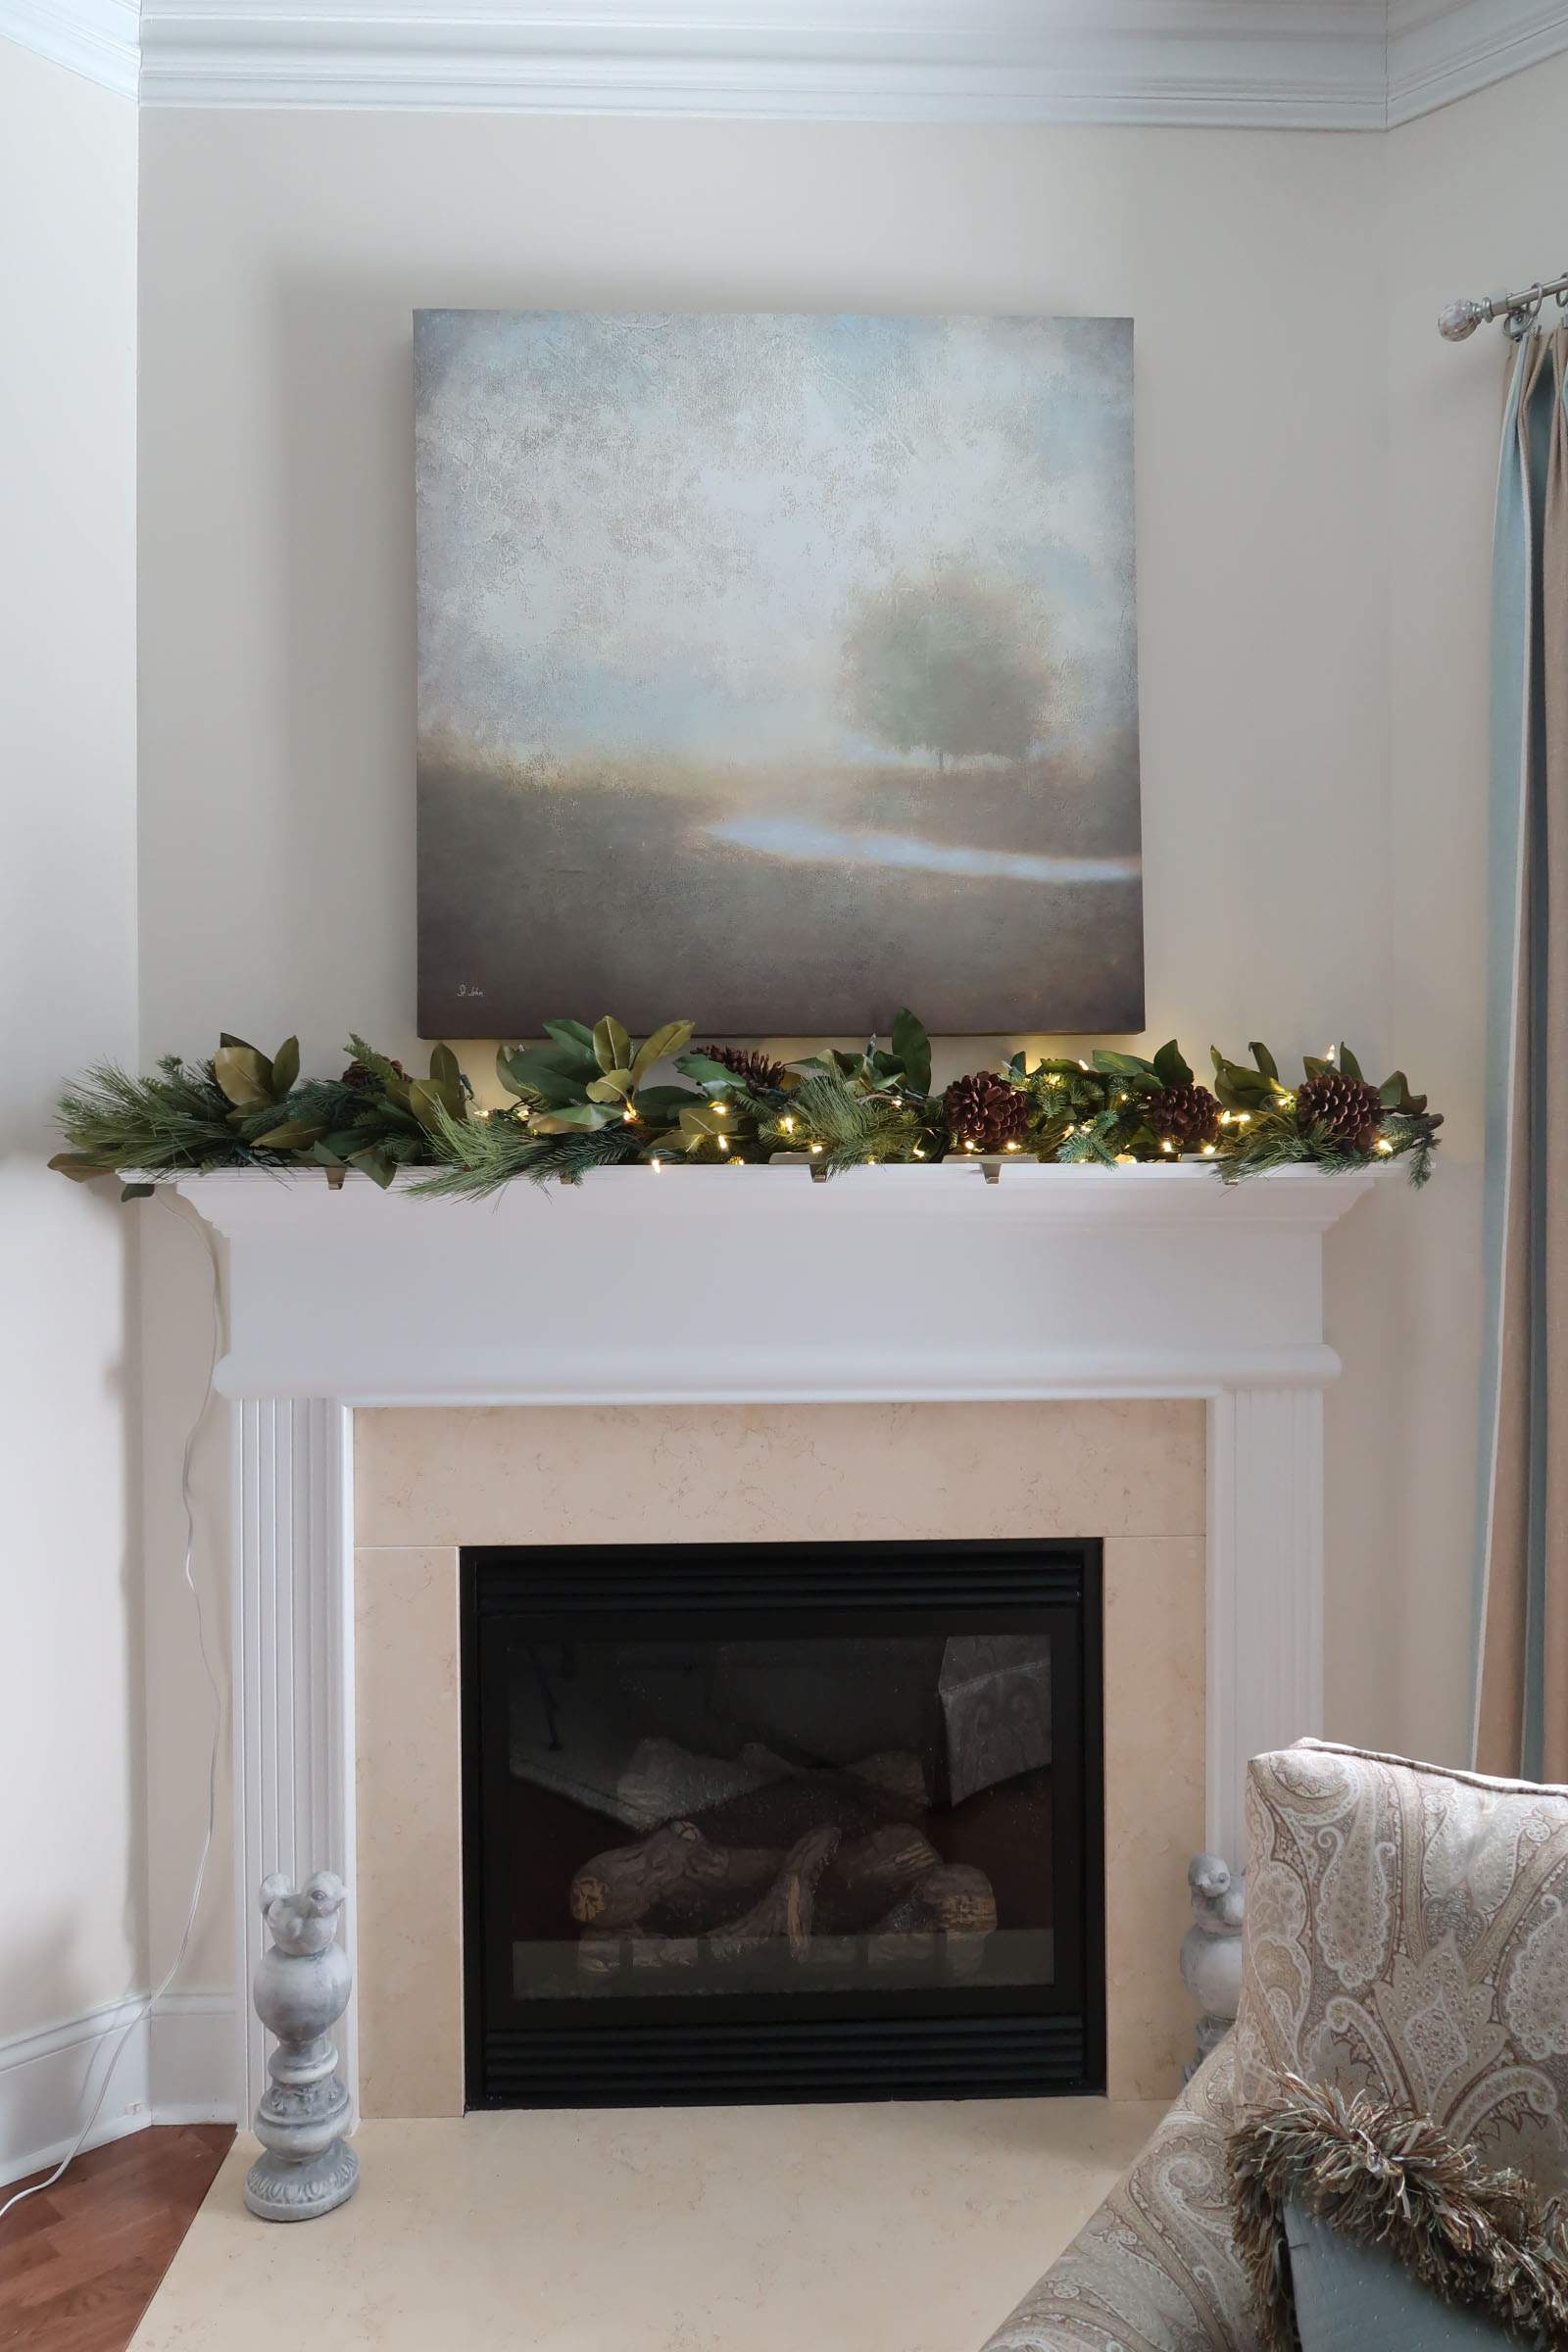
3) Place the garland on the mantel
Plug in lights and look for any burned out bulbs and replace. Here are the lights I use: GE Mini Clear Lights 100 Count. A similar garland to mine with Magnolia leaves.
Shop Garland

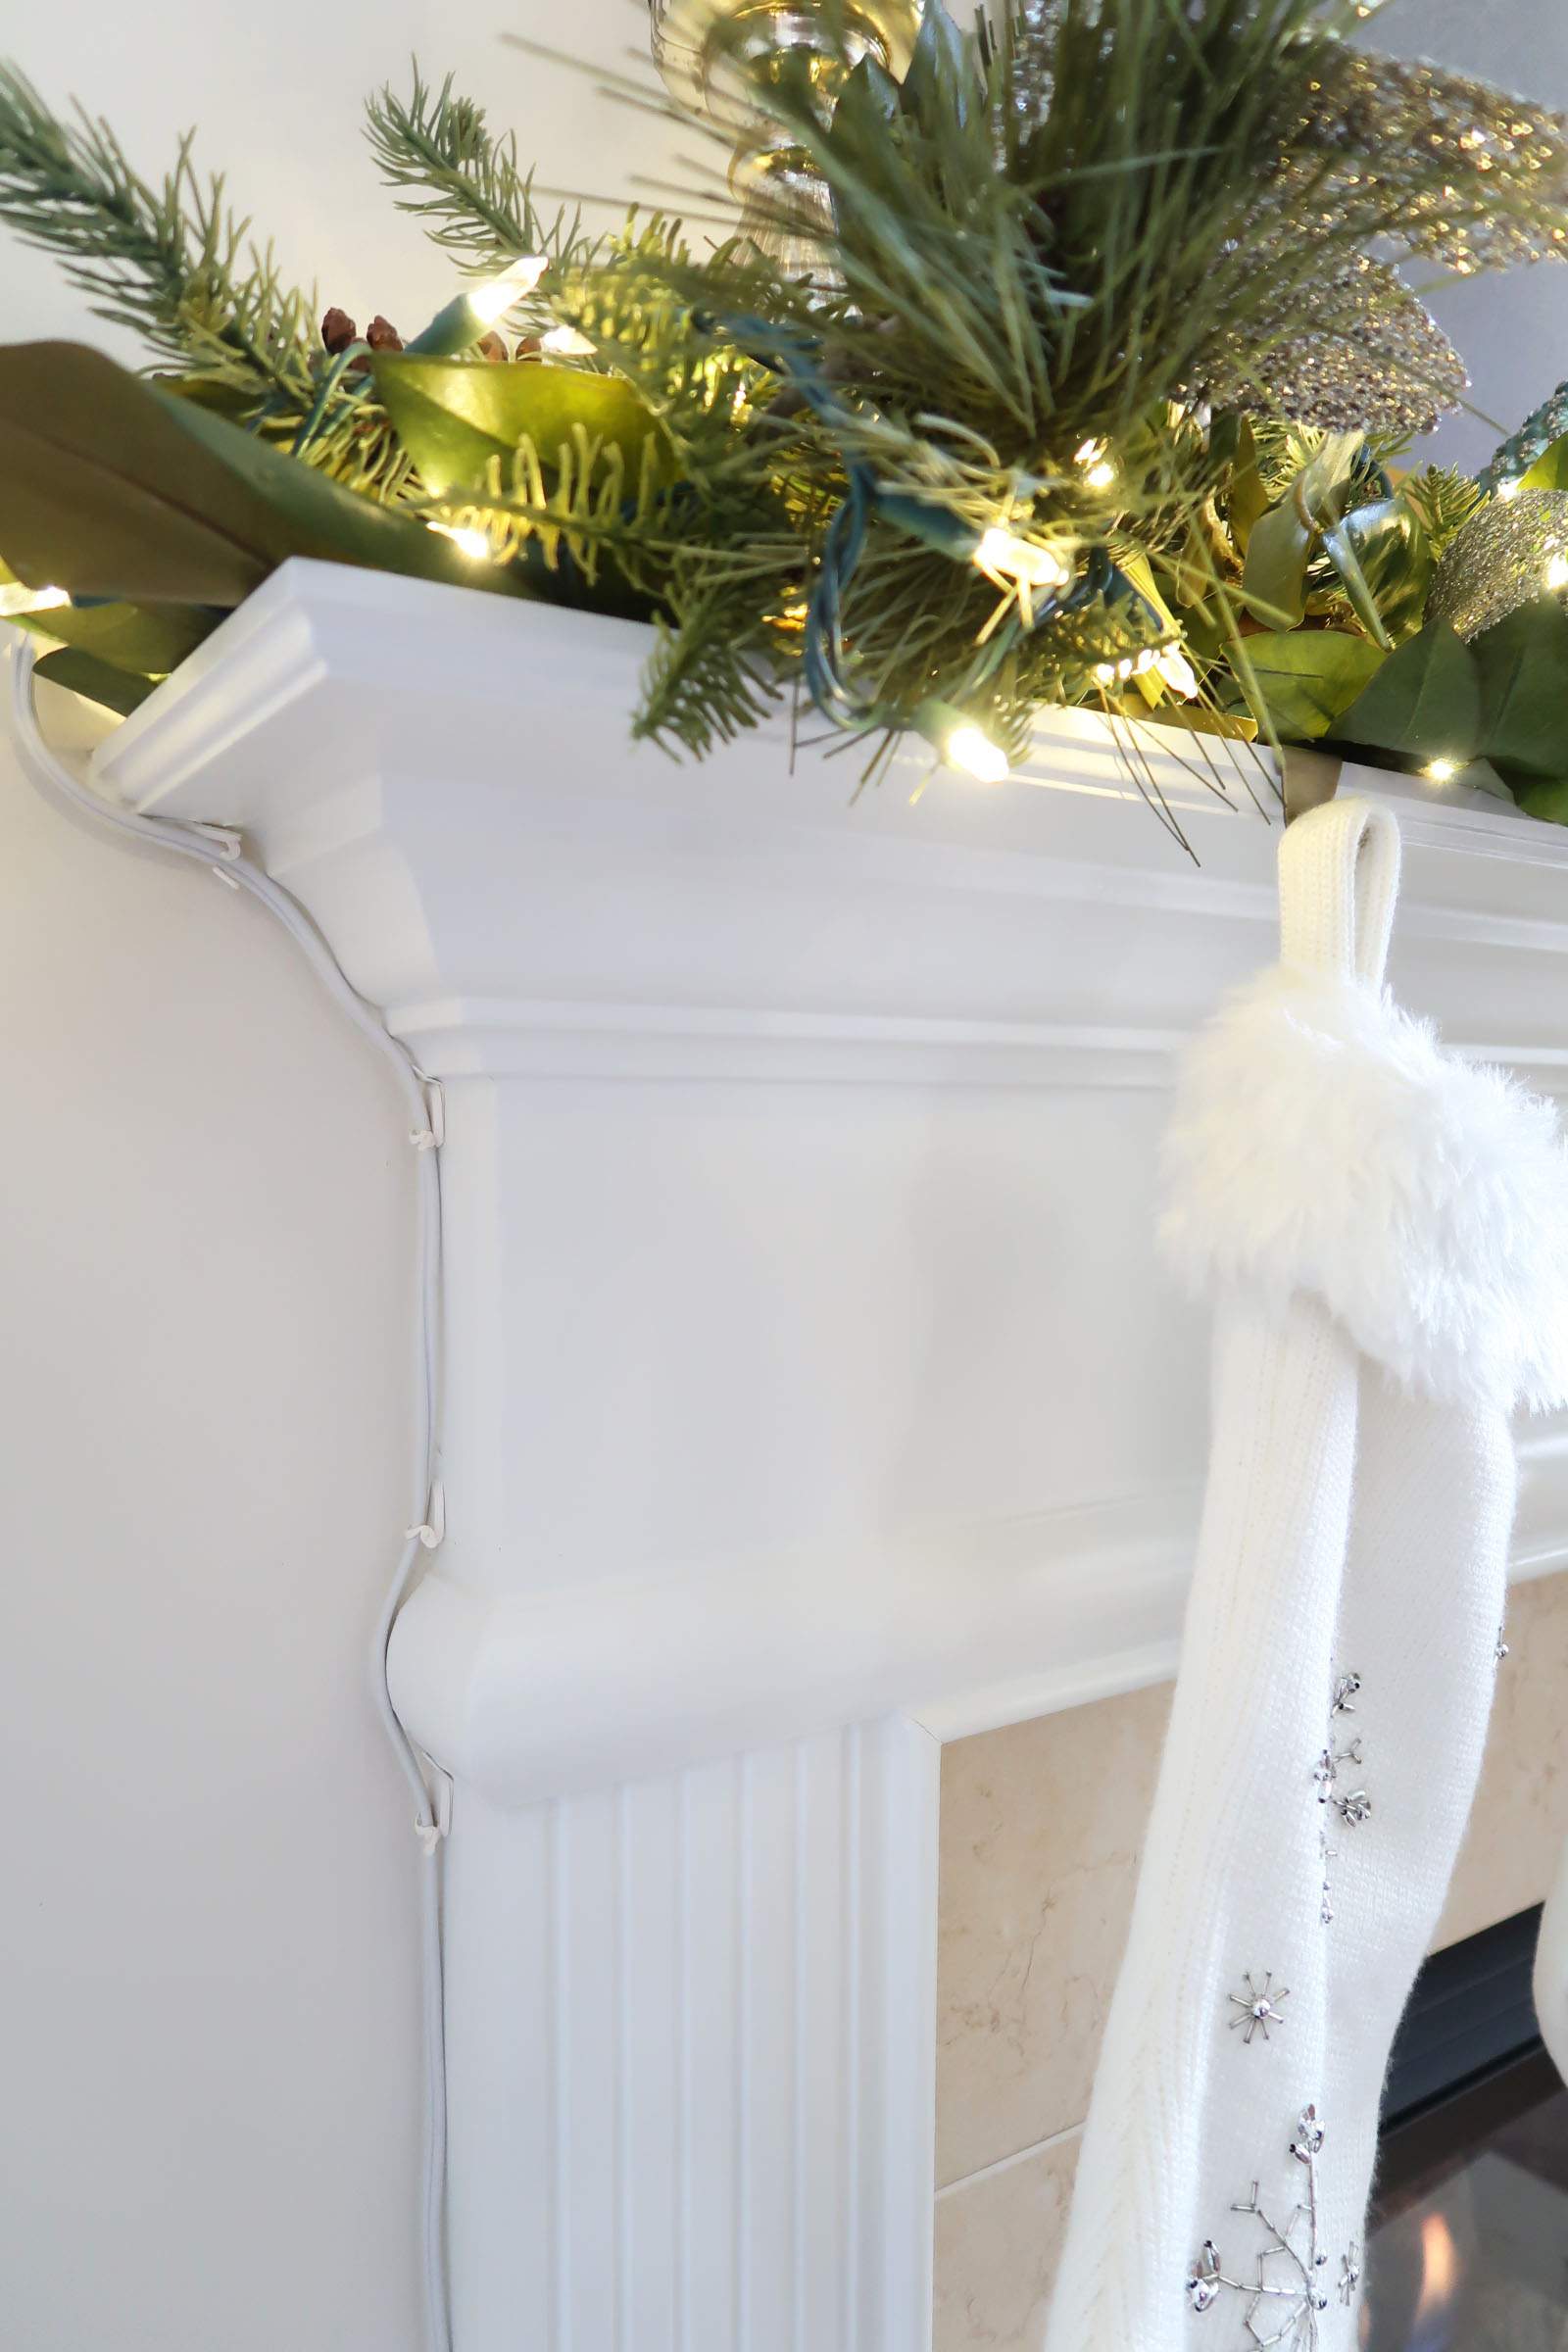
4) Hide the cord
To keep things simple I use a short 3 foot extension cord that stays attached to the garland. If you need one, here is an option: 3 Feet Flat Plug Cord .
Command Adhesive clips are the best option and barely visible along the edge of the mantel to hold the cord in place. The white clips I have stay there all year! They now sell clear clips: Command Adhesive Small Clear Cord Clips
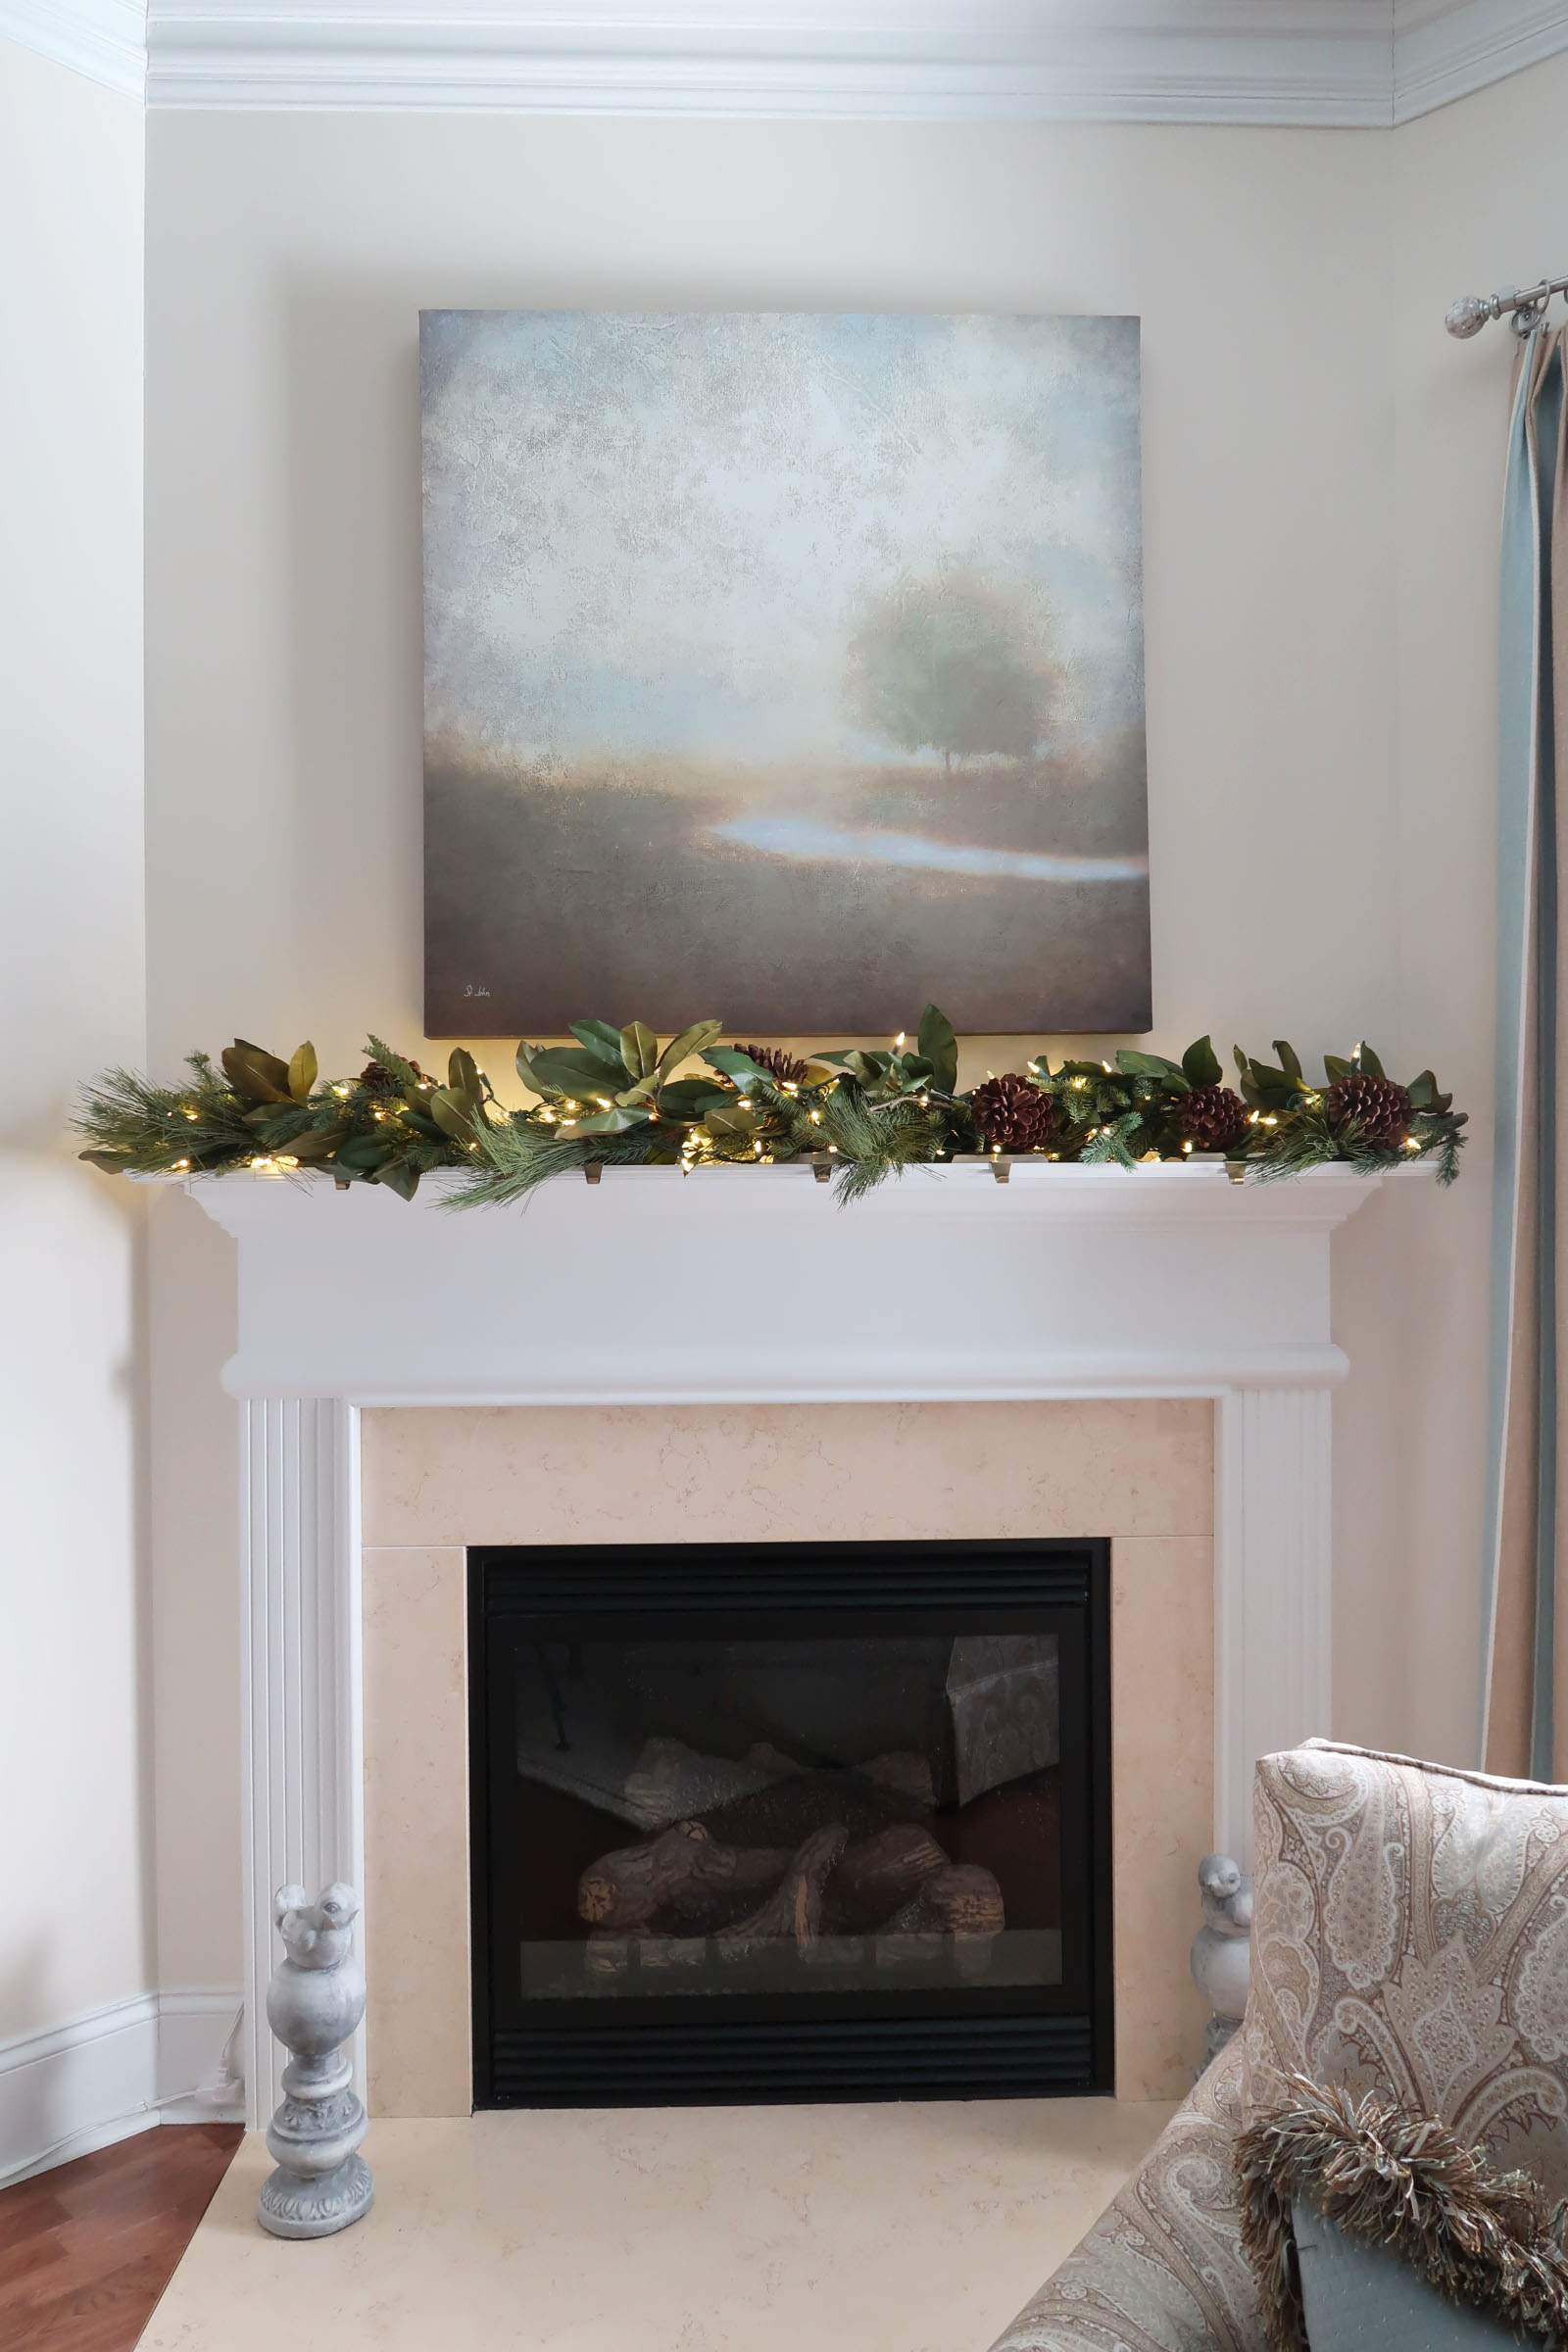
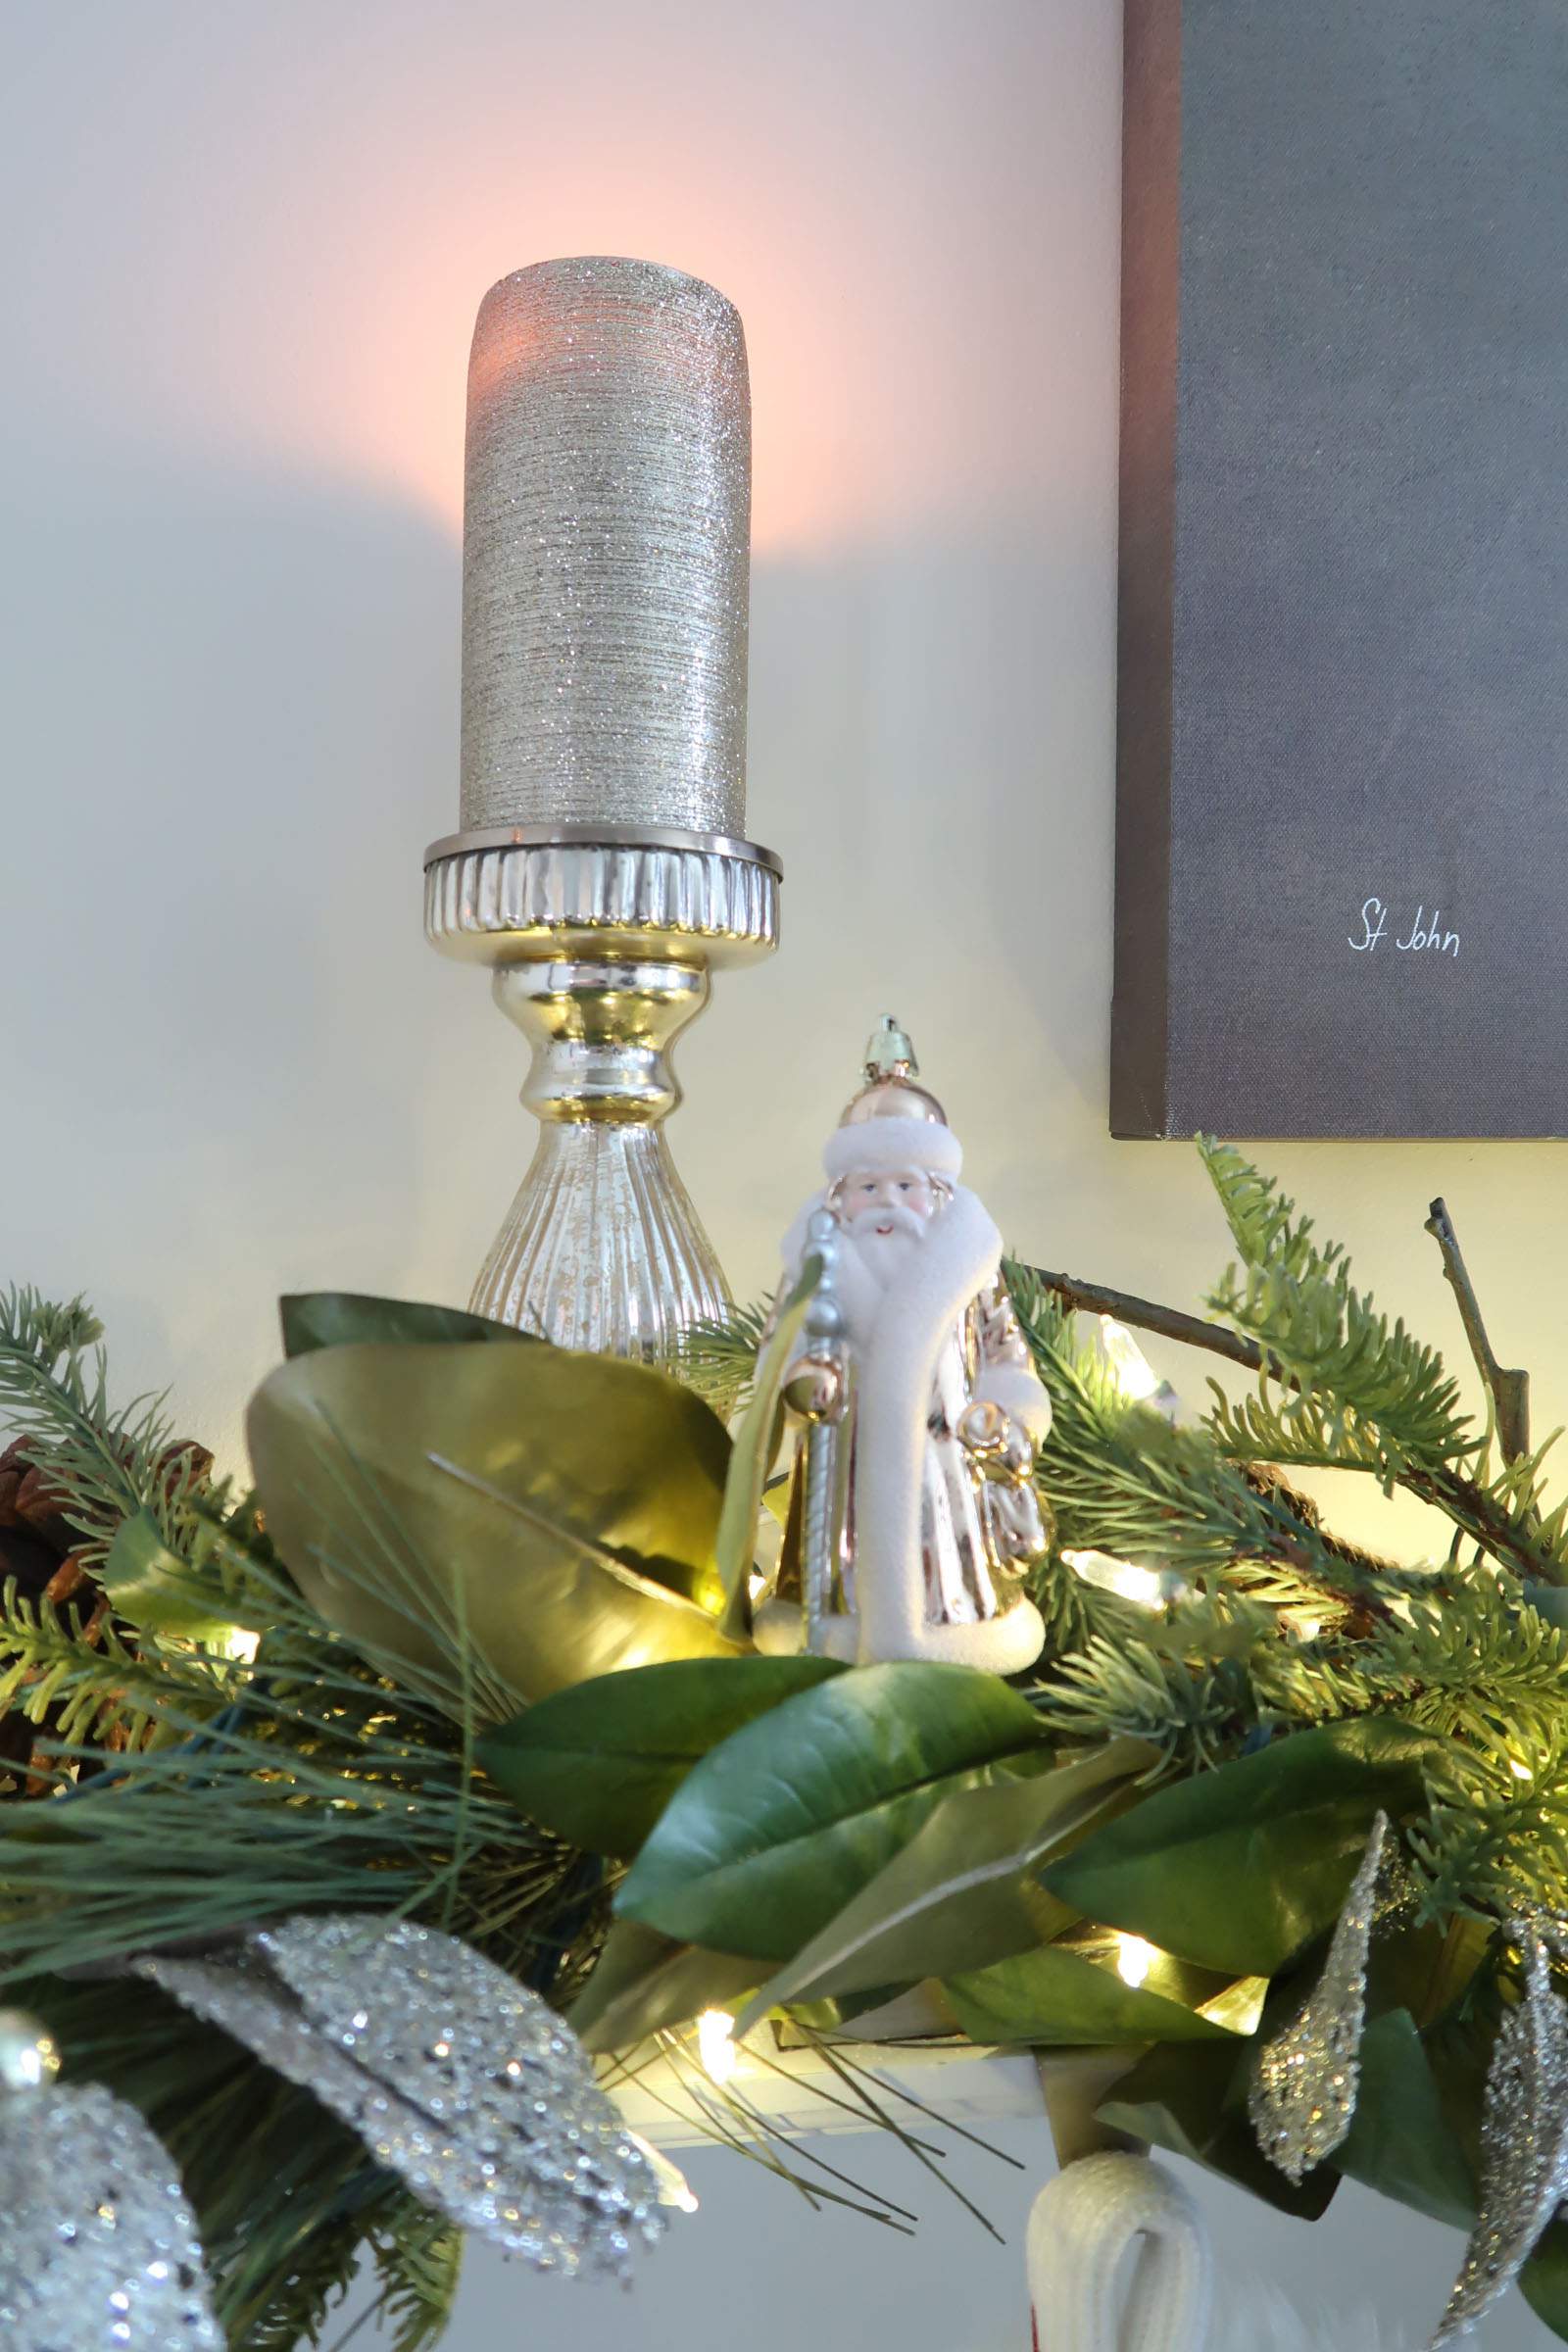
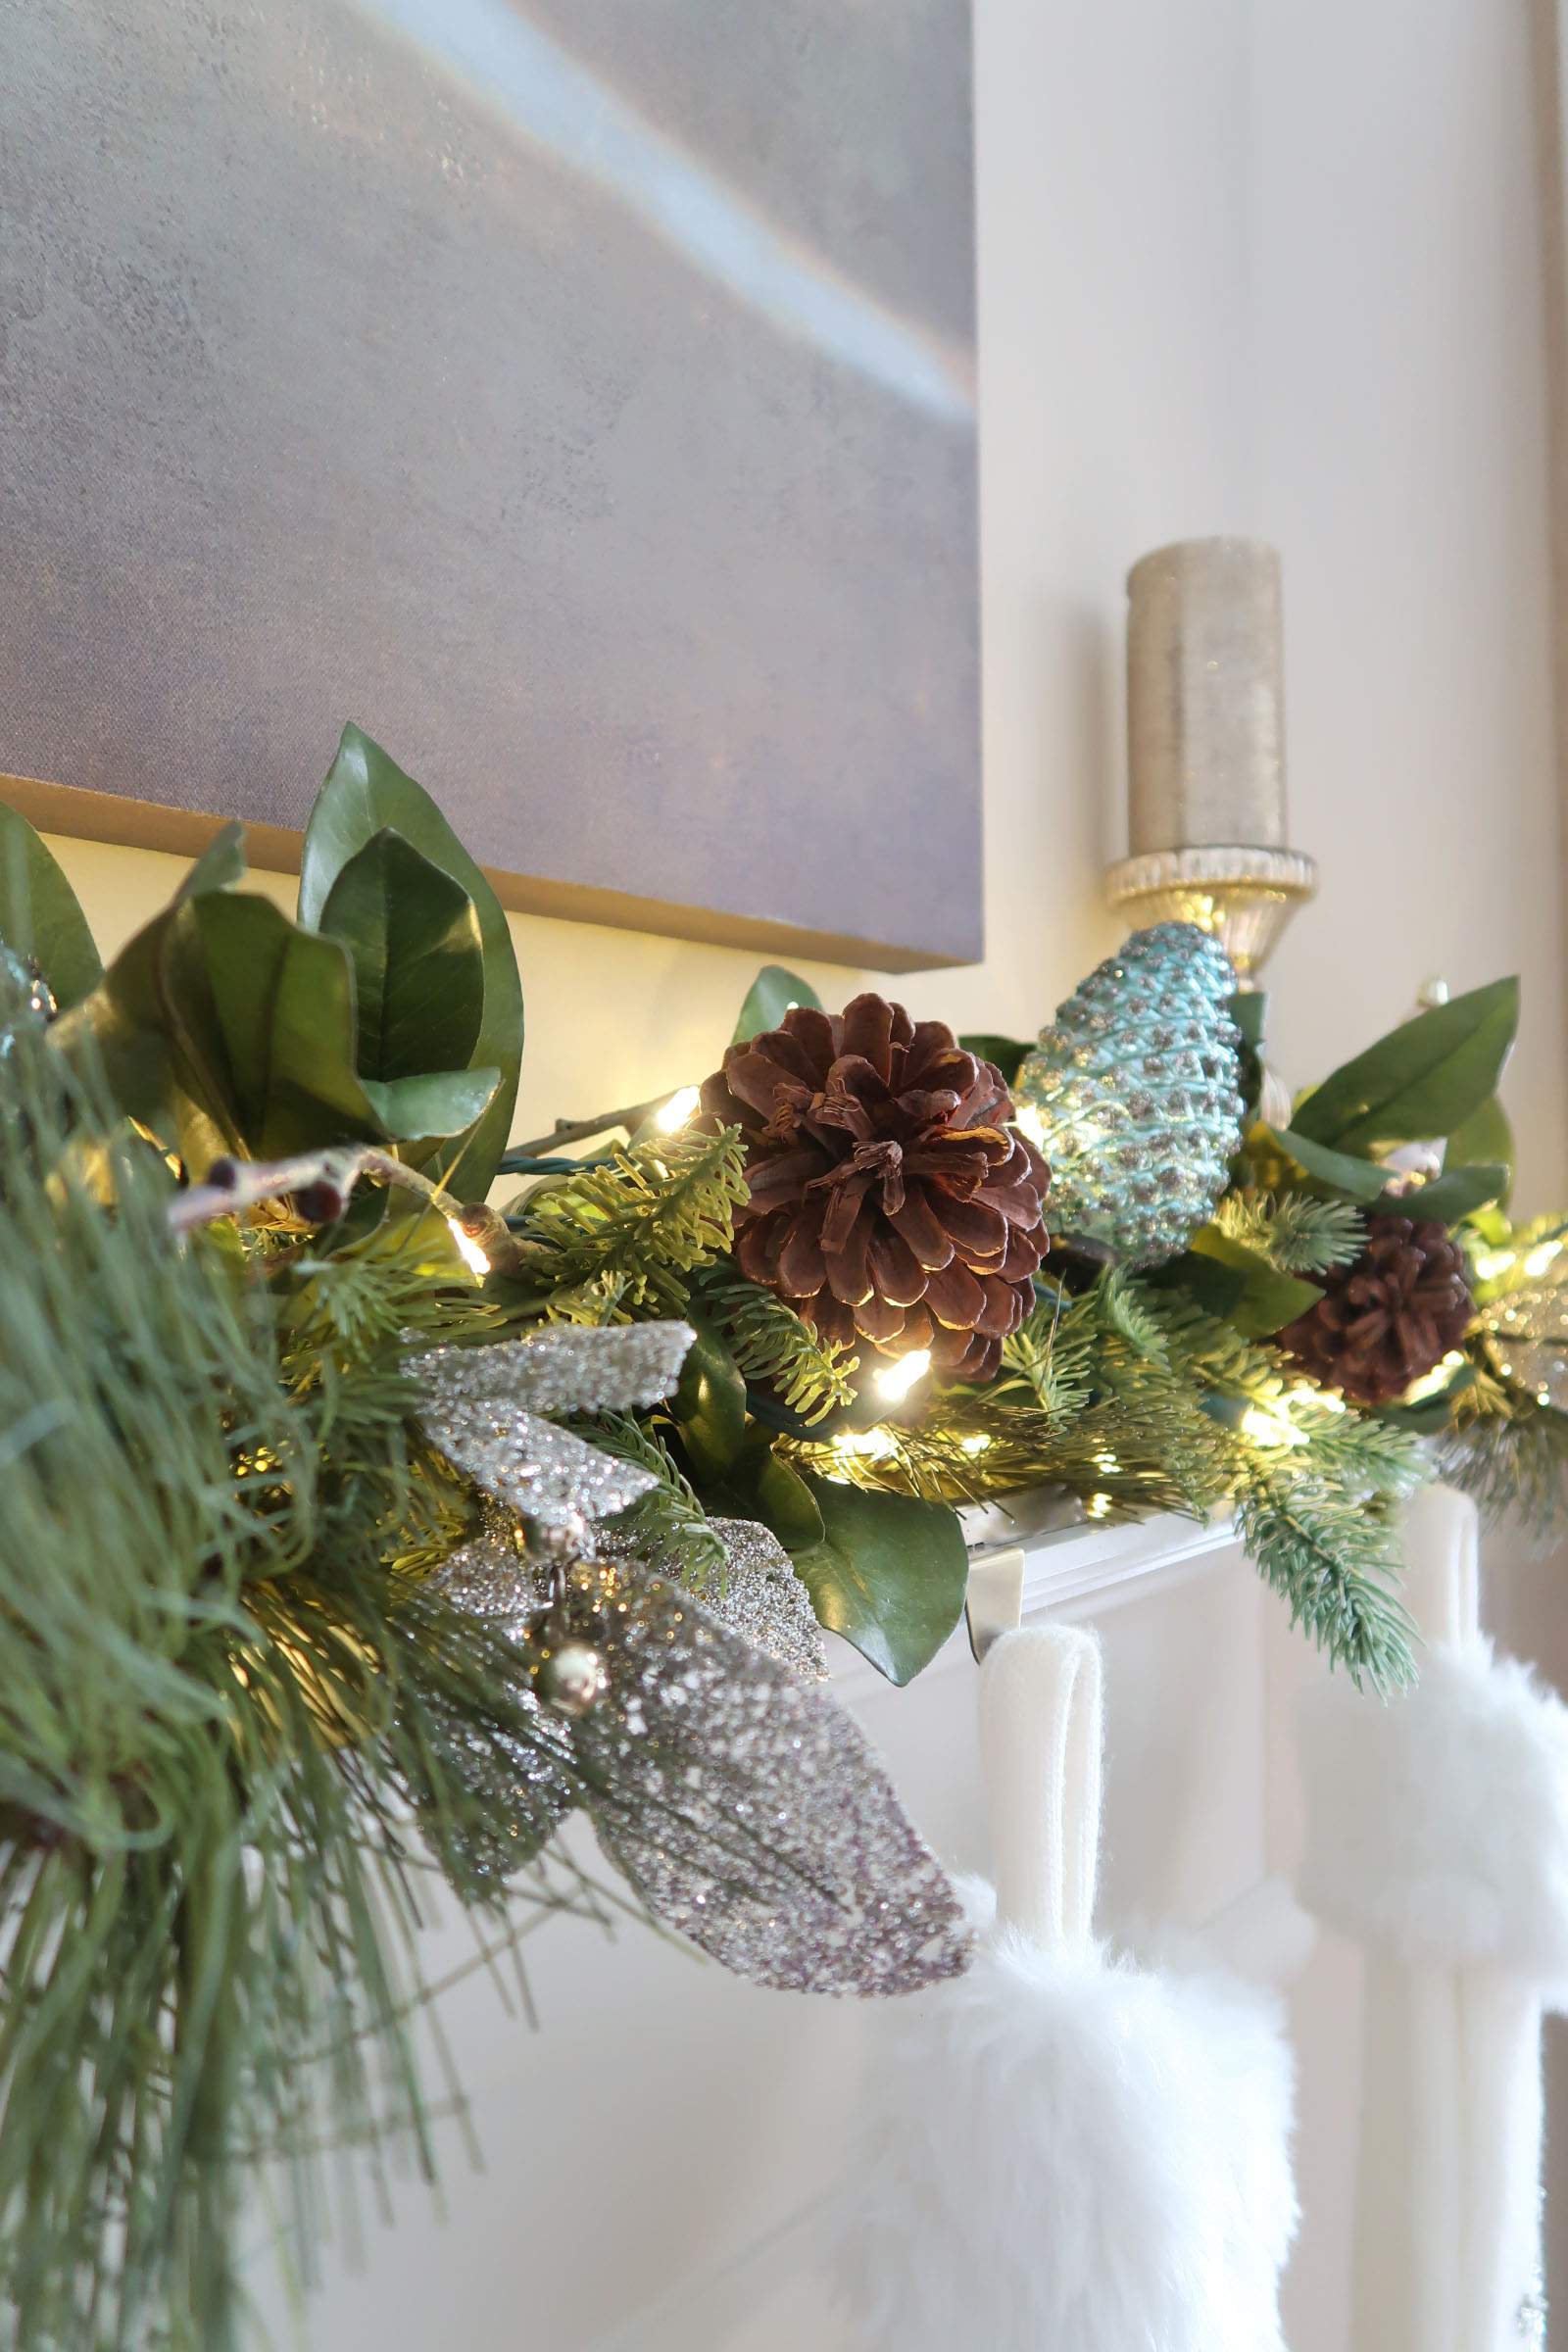
5) Create height with candle holders and candles
The glitter gold pillar candles are amazing and add so much sparkle to the mantel! They were purchased years ago and I haven’t seen the same ones since – sorry 🙁 Here is a close match: Gold Pillar Candle . A narrow mantel only allows for simple gold pillar candle holders. Here is a similar inexpensive option: Gold Pillar Candle Holder
Then, of course if you have some smaller ornaments (I recommend non-breakable) add them into the mantel near the candle holders for more visual interest.
6) Add Color to the Mantel
My home is filled with a pale blue and has a coastal feel. So the blue glass pine cone ornaments are the perfect color to reflect the rest of my decor in the room. They were purchased years ago, but here is a similar ornament: Blue Glass Turquoise Beaded Pinecone Christmas Ornament or another darker blue option from Target: 10 Inch Midnight Blue Pine Cone Ornament.
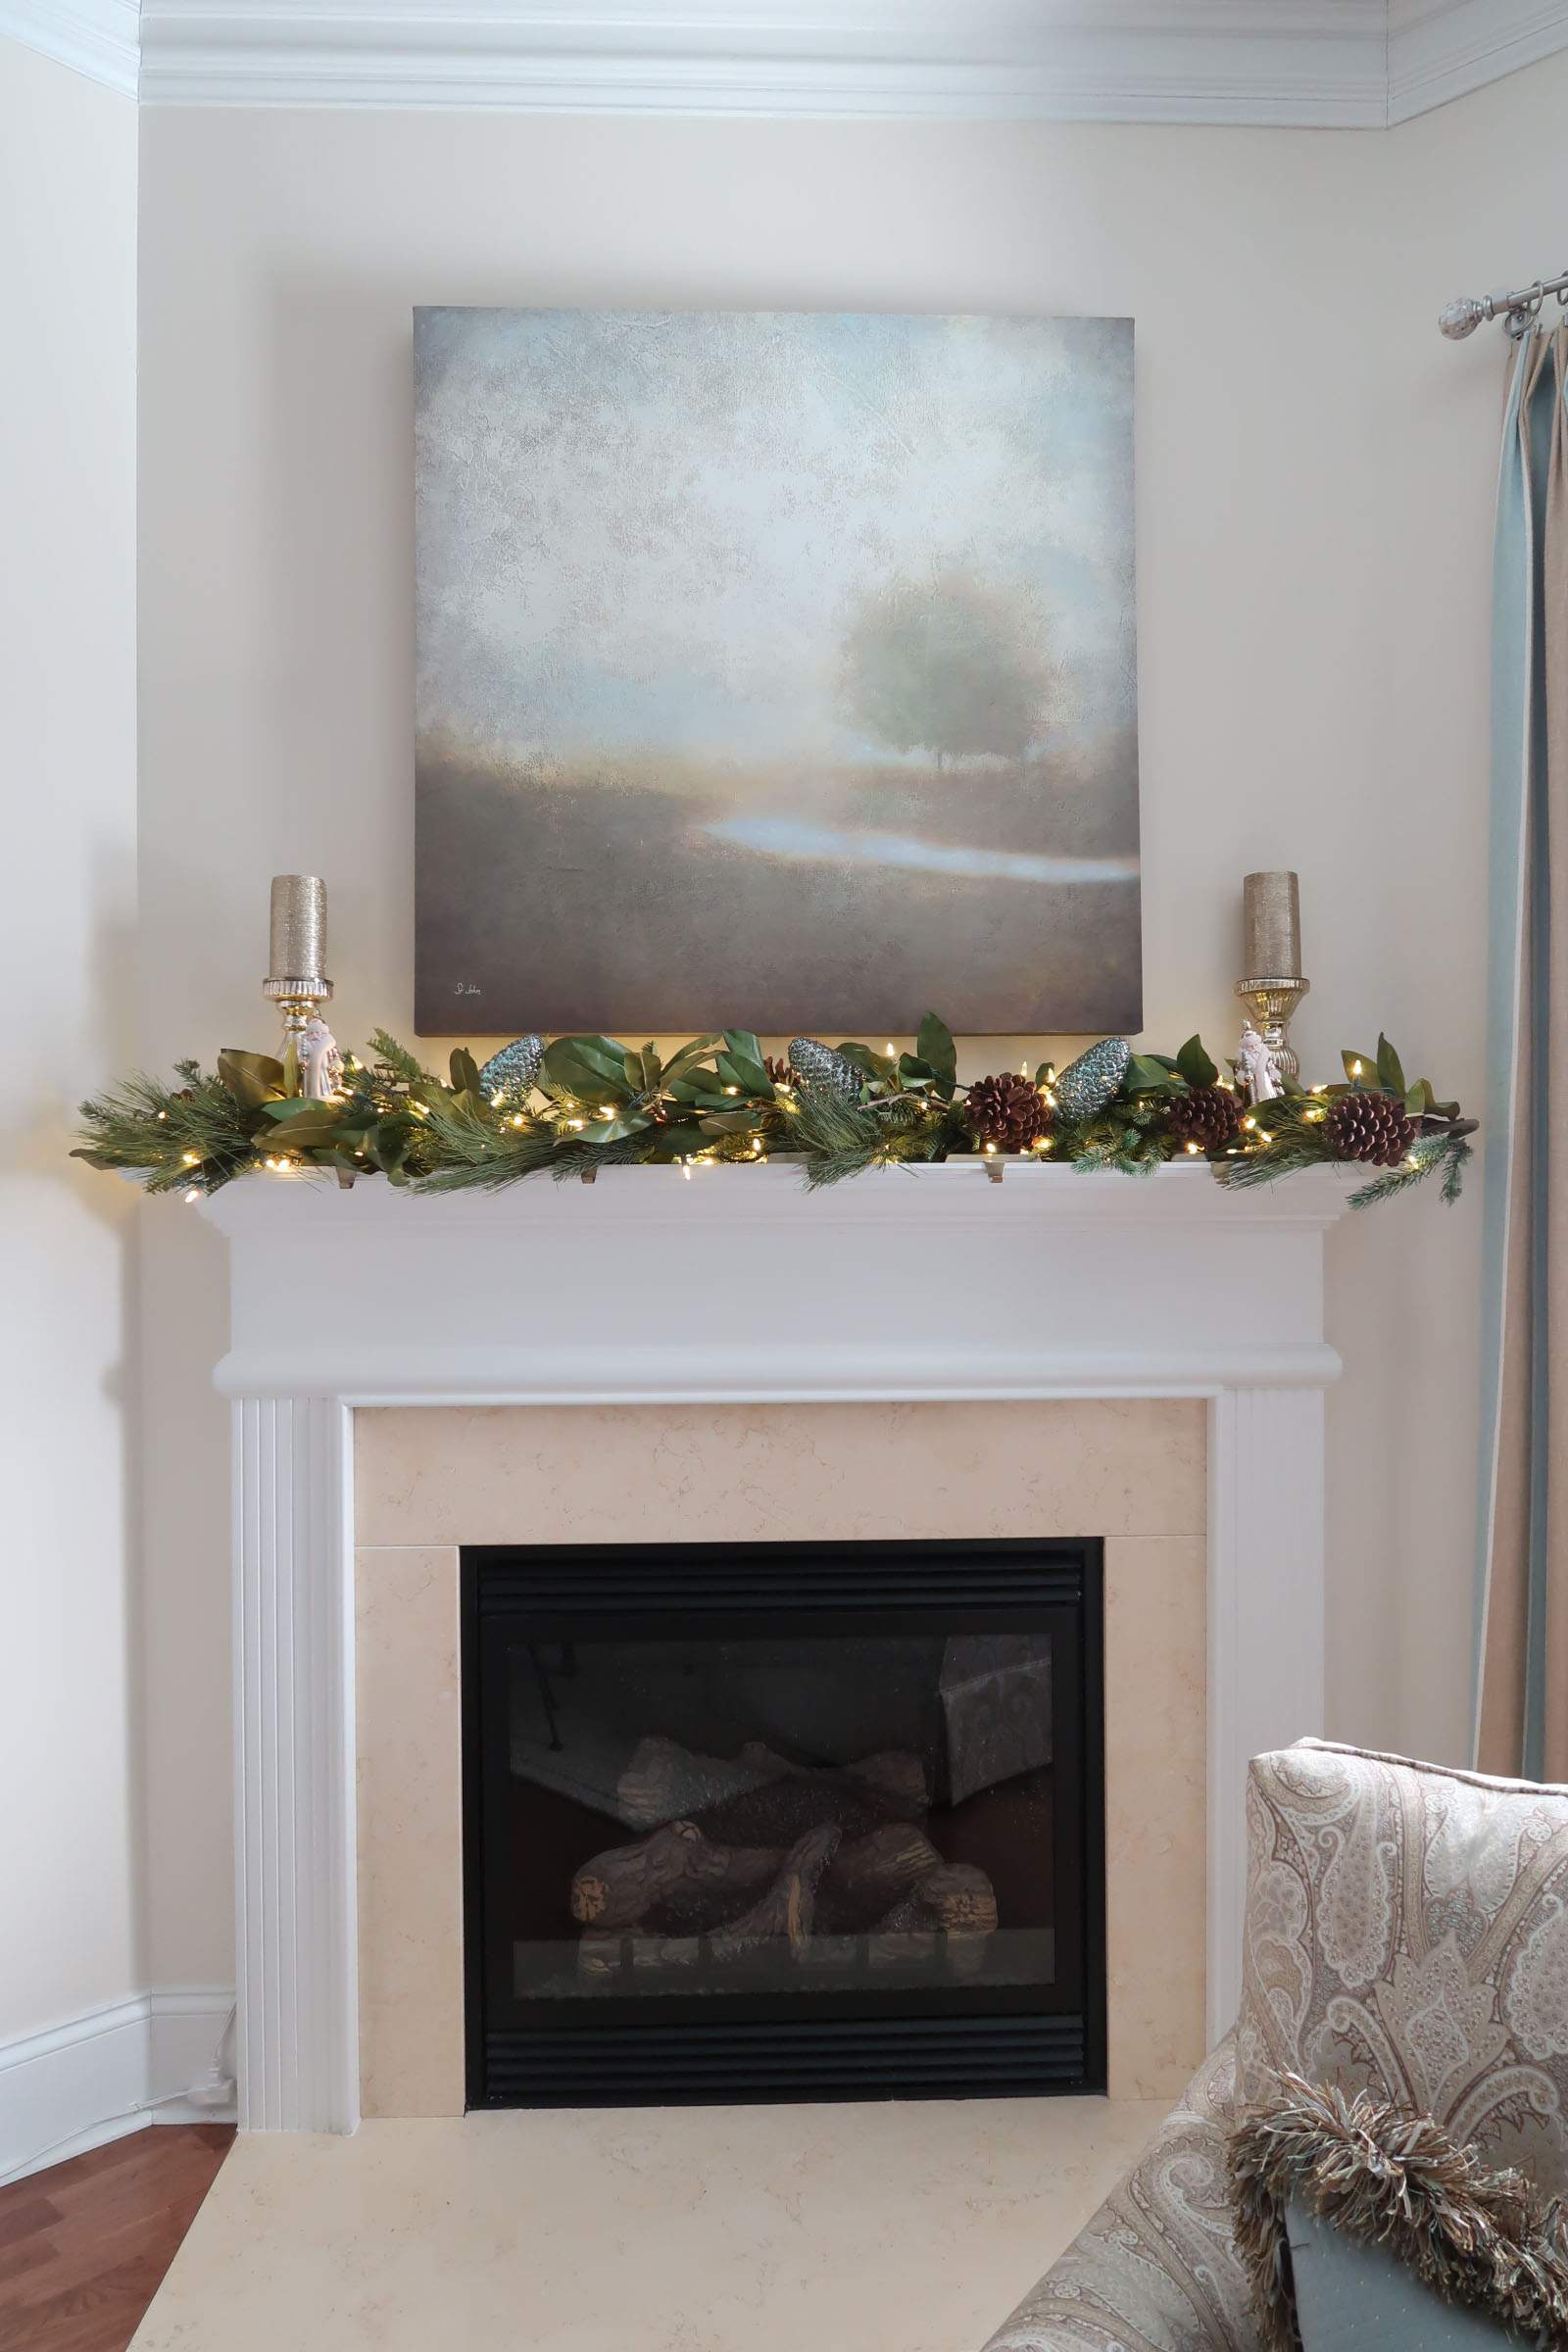

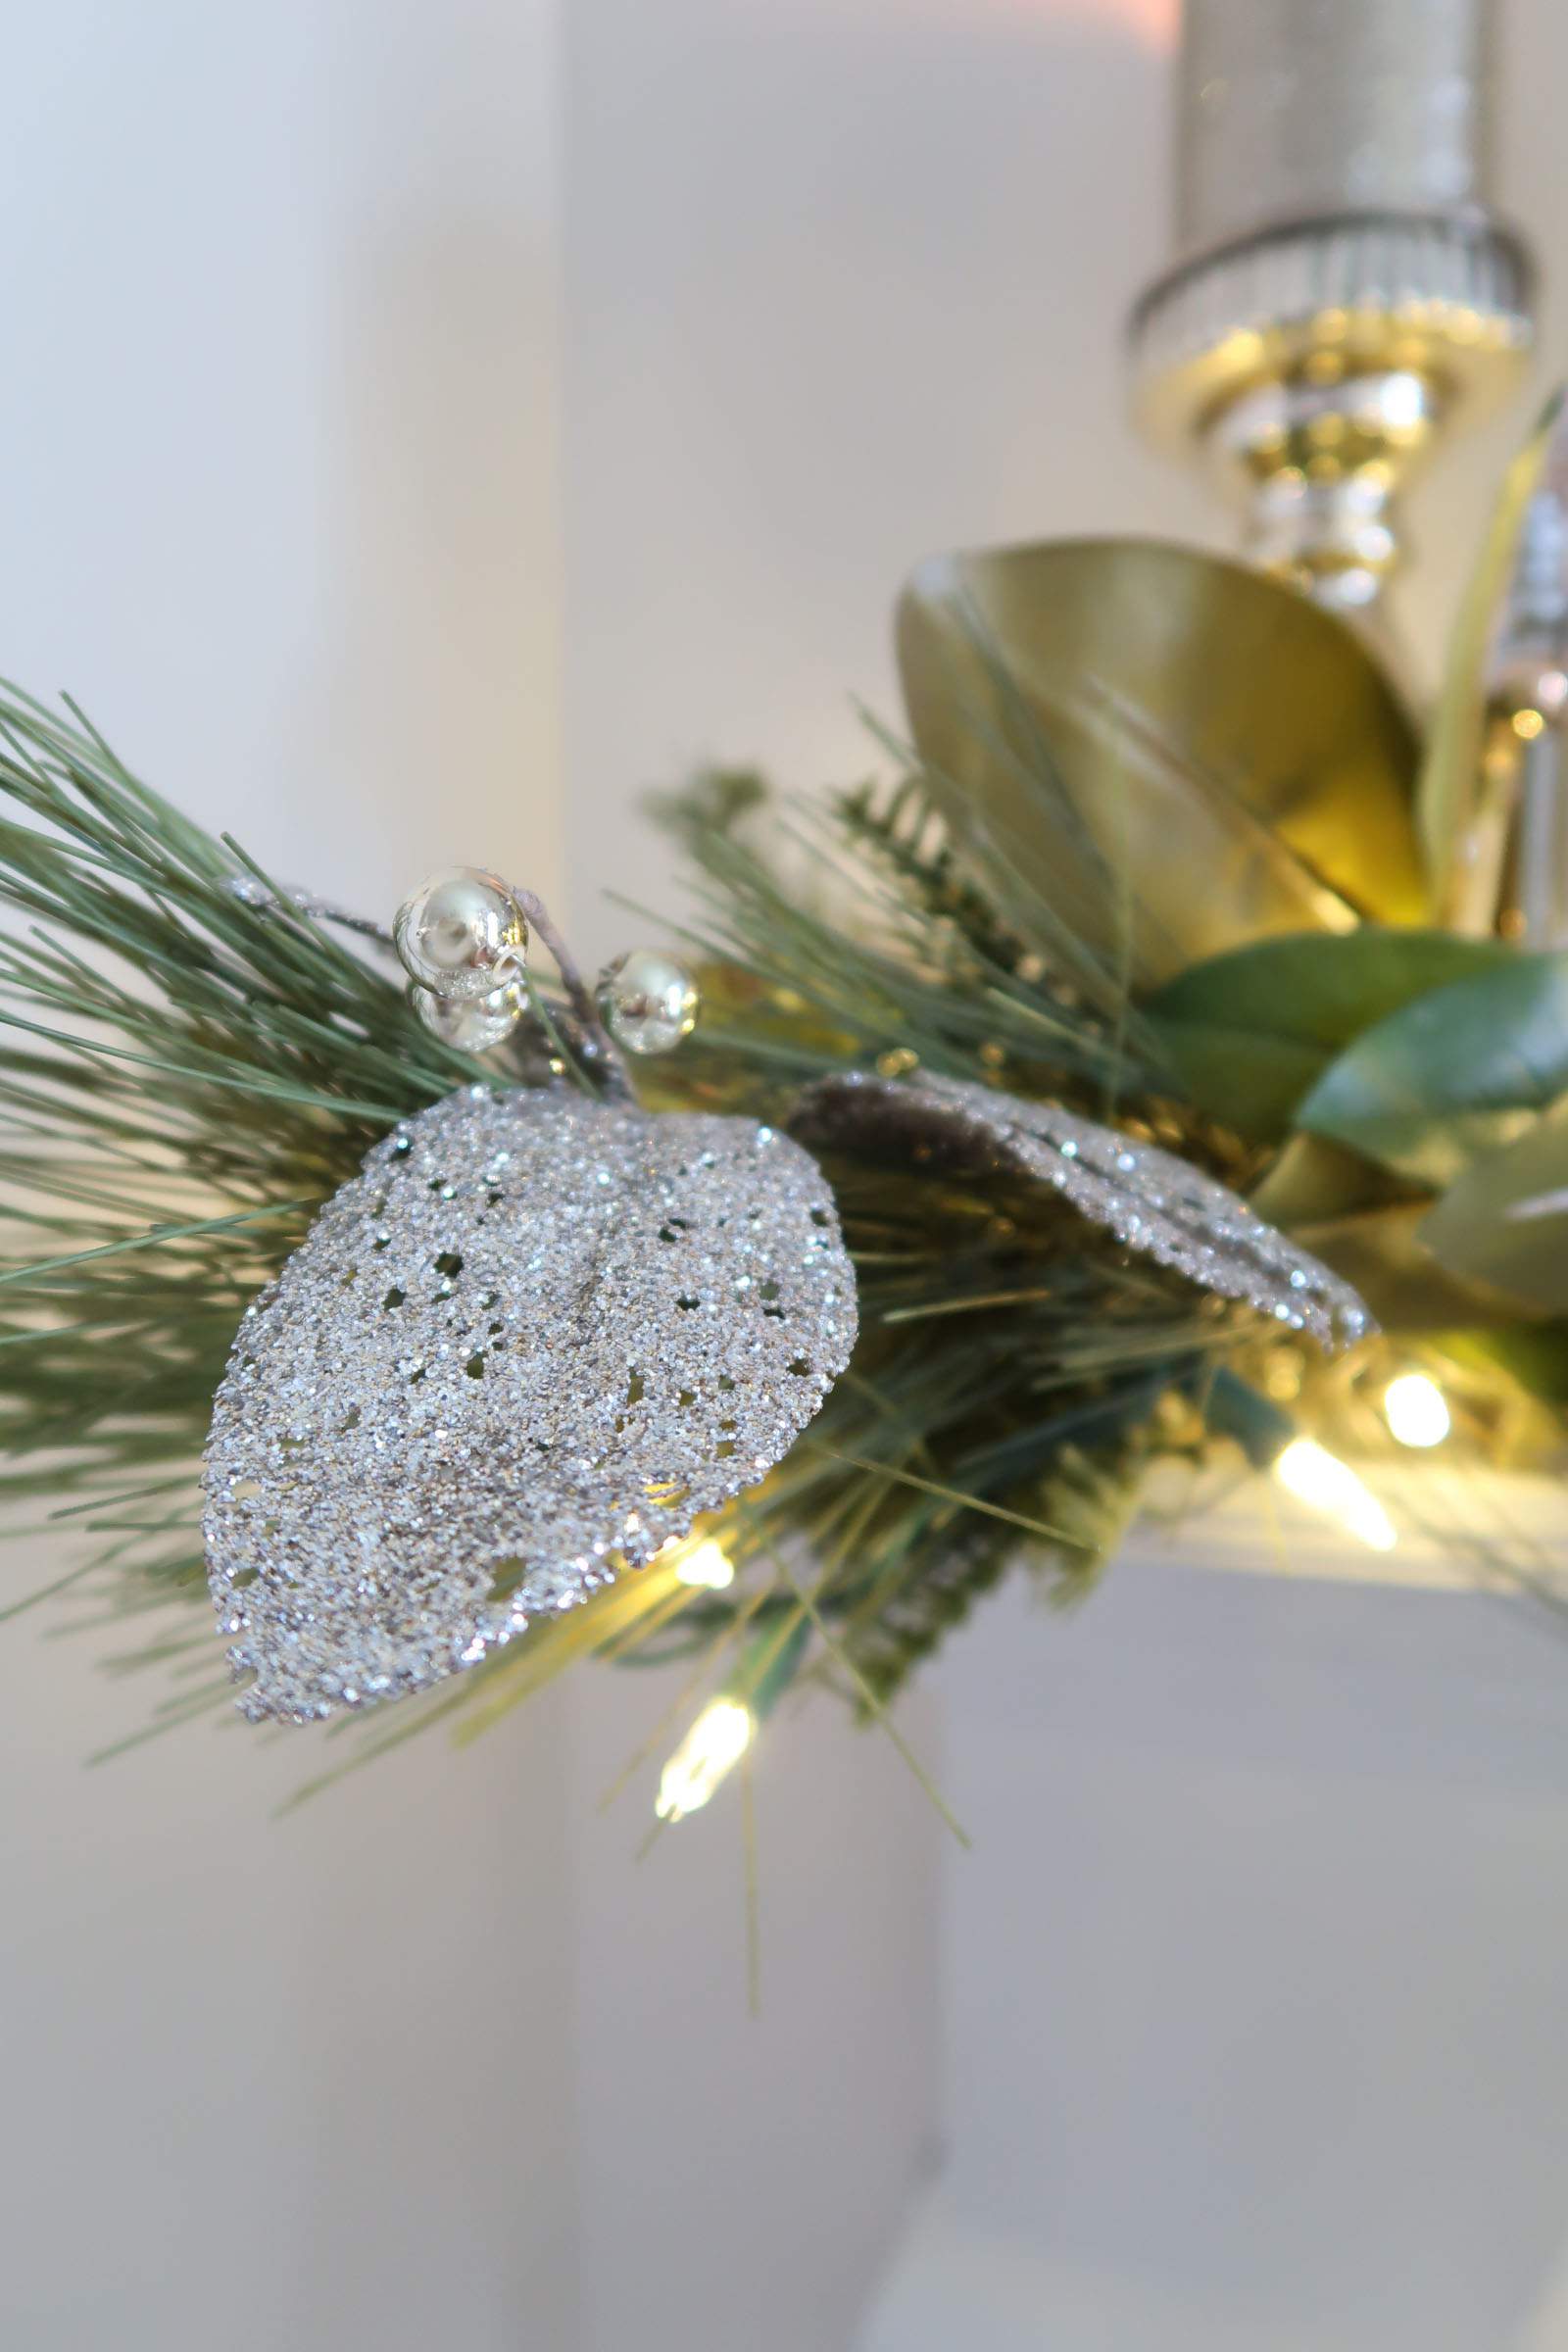
7) Add Some Sparkle
Isn’t that what Christmas is all about? Glitter and shine! Look for Christmas picks that will play off the lights and add dimension. Here is a version similar to mine and just gorgeous: Silver Leaf Pick. These are worth the investment because you can use them on your mantel and other areas around your home year after year.
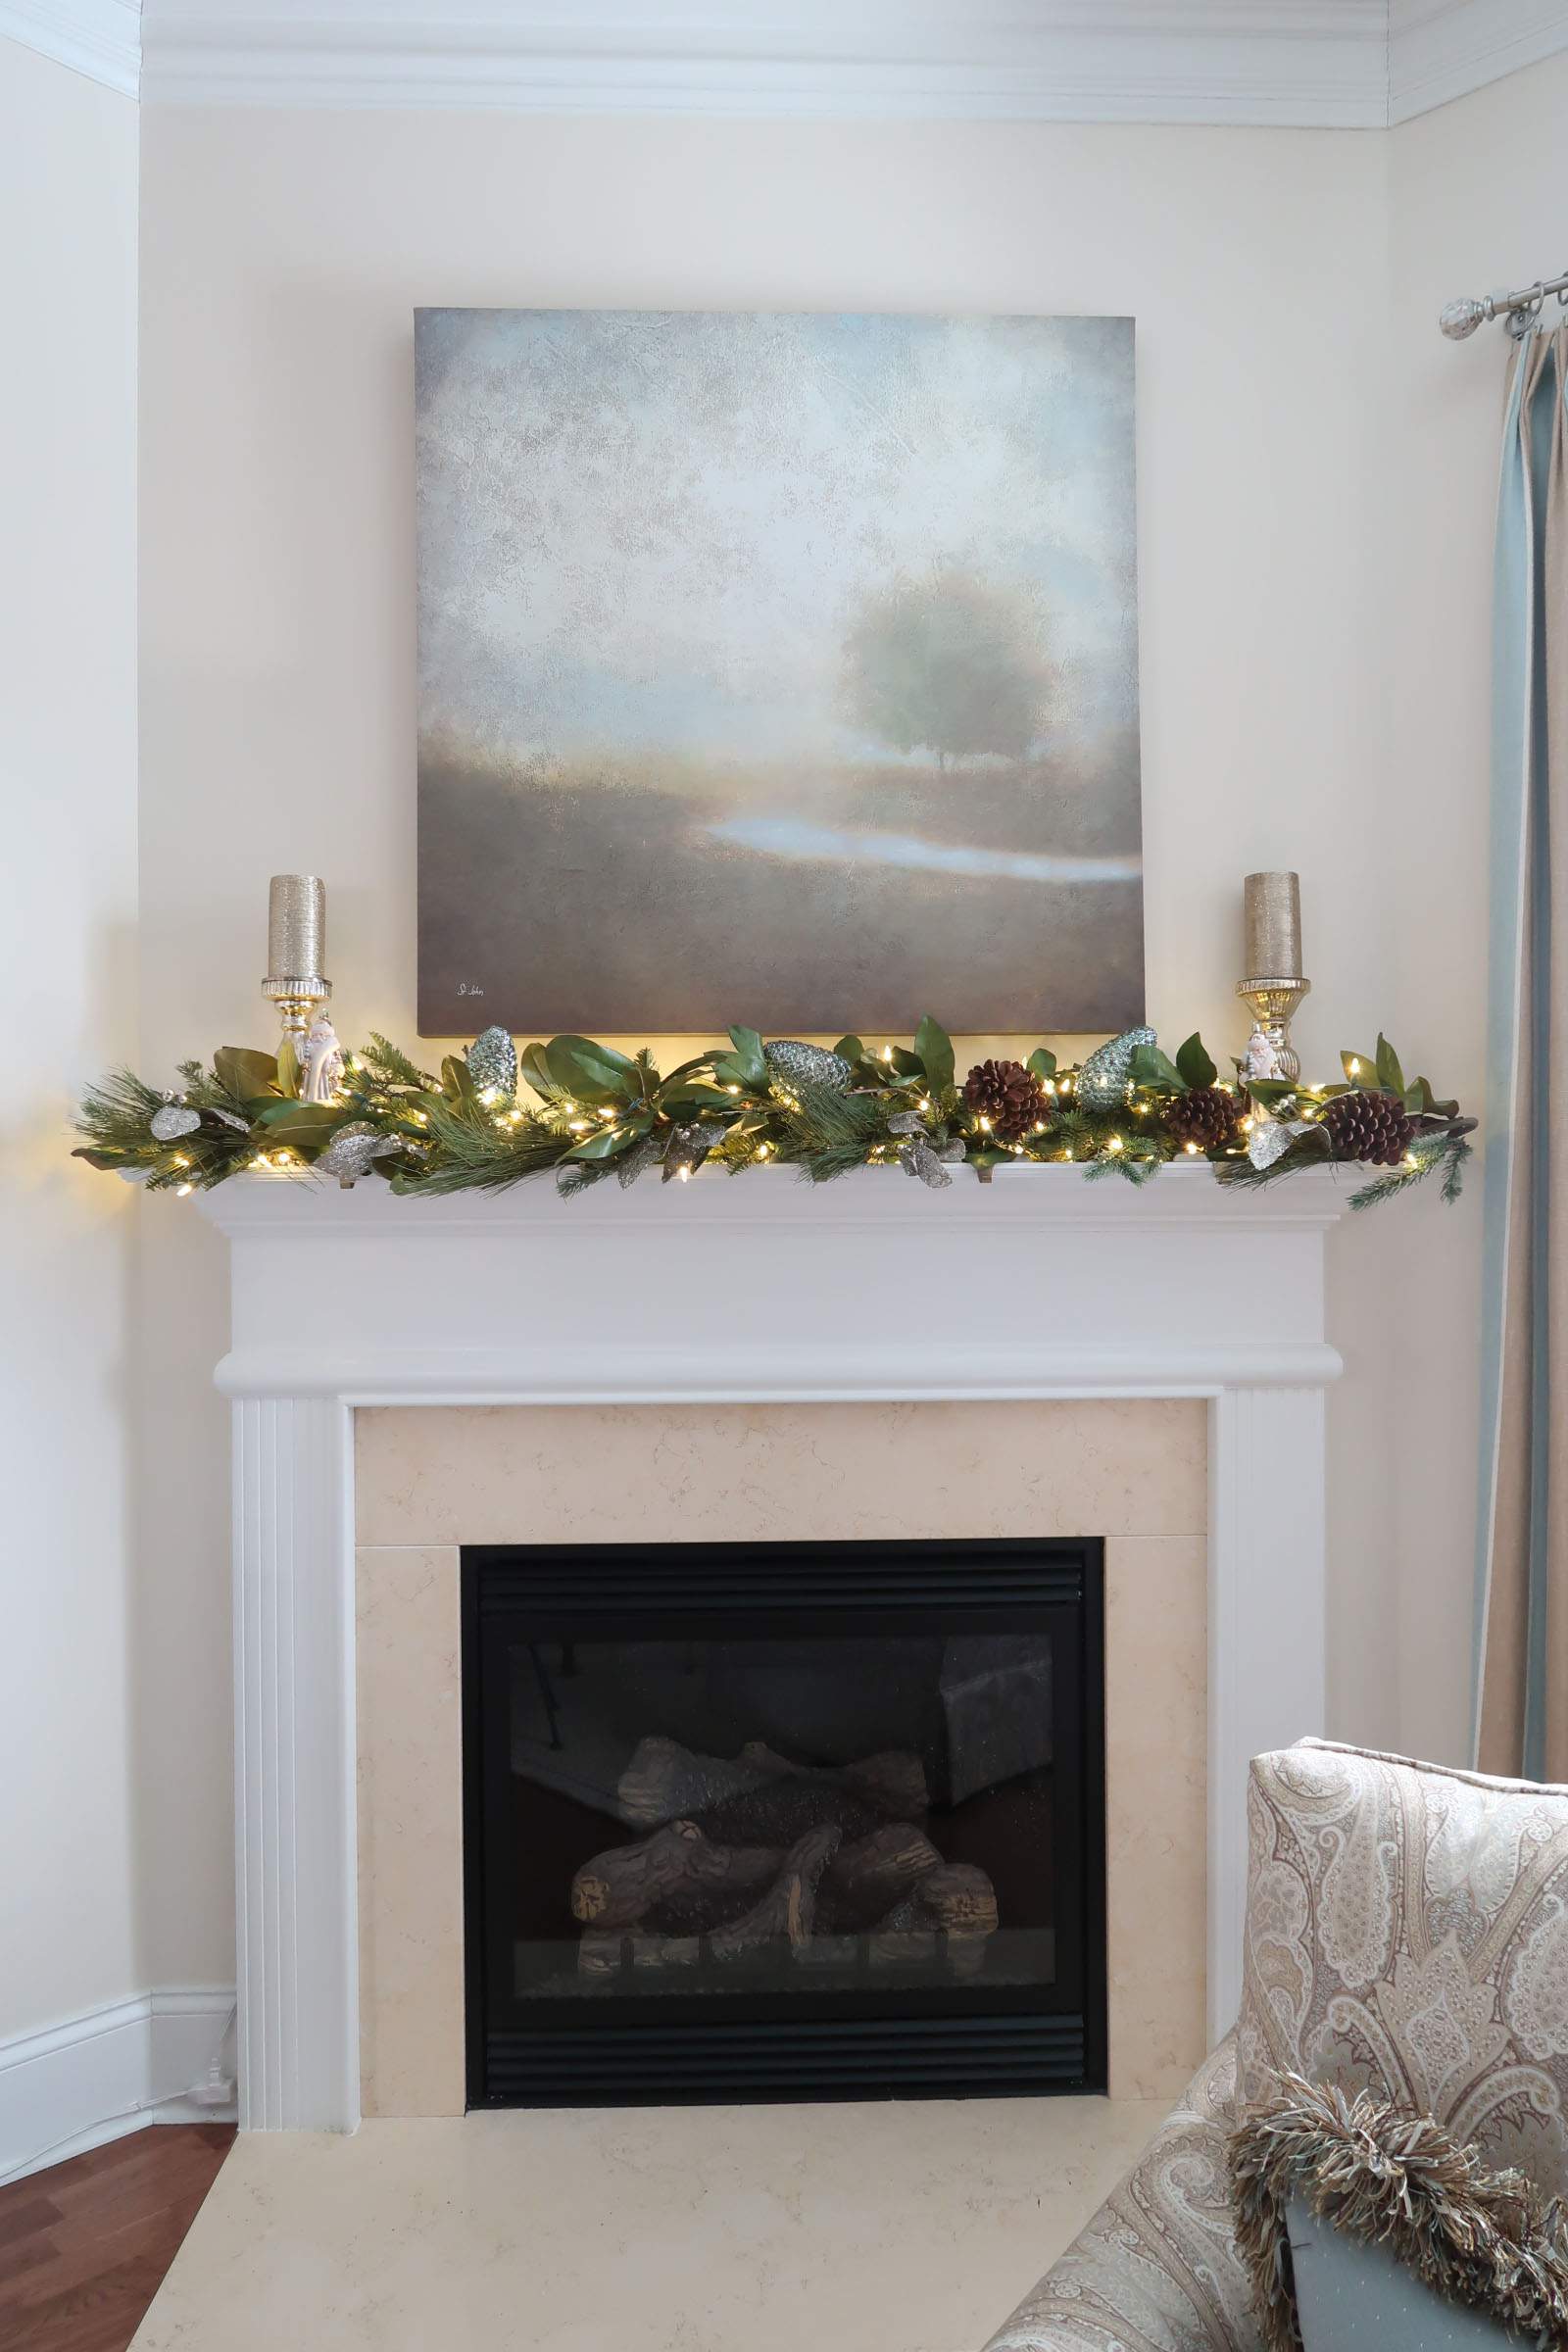
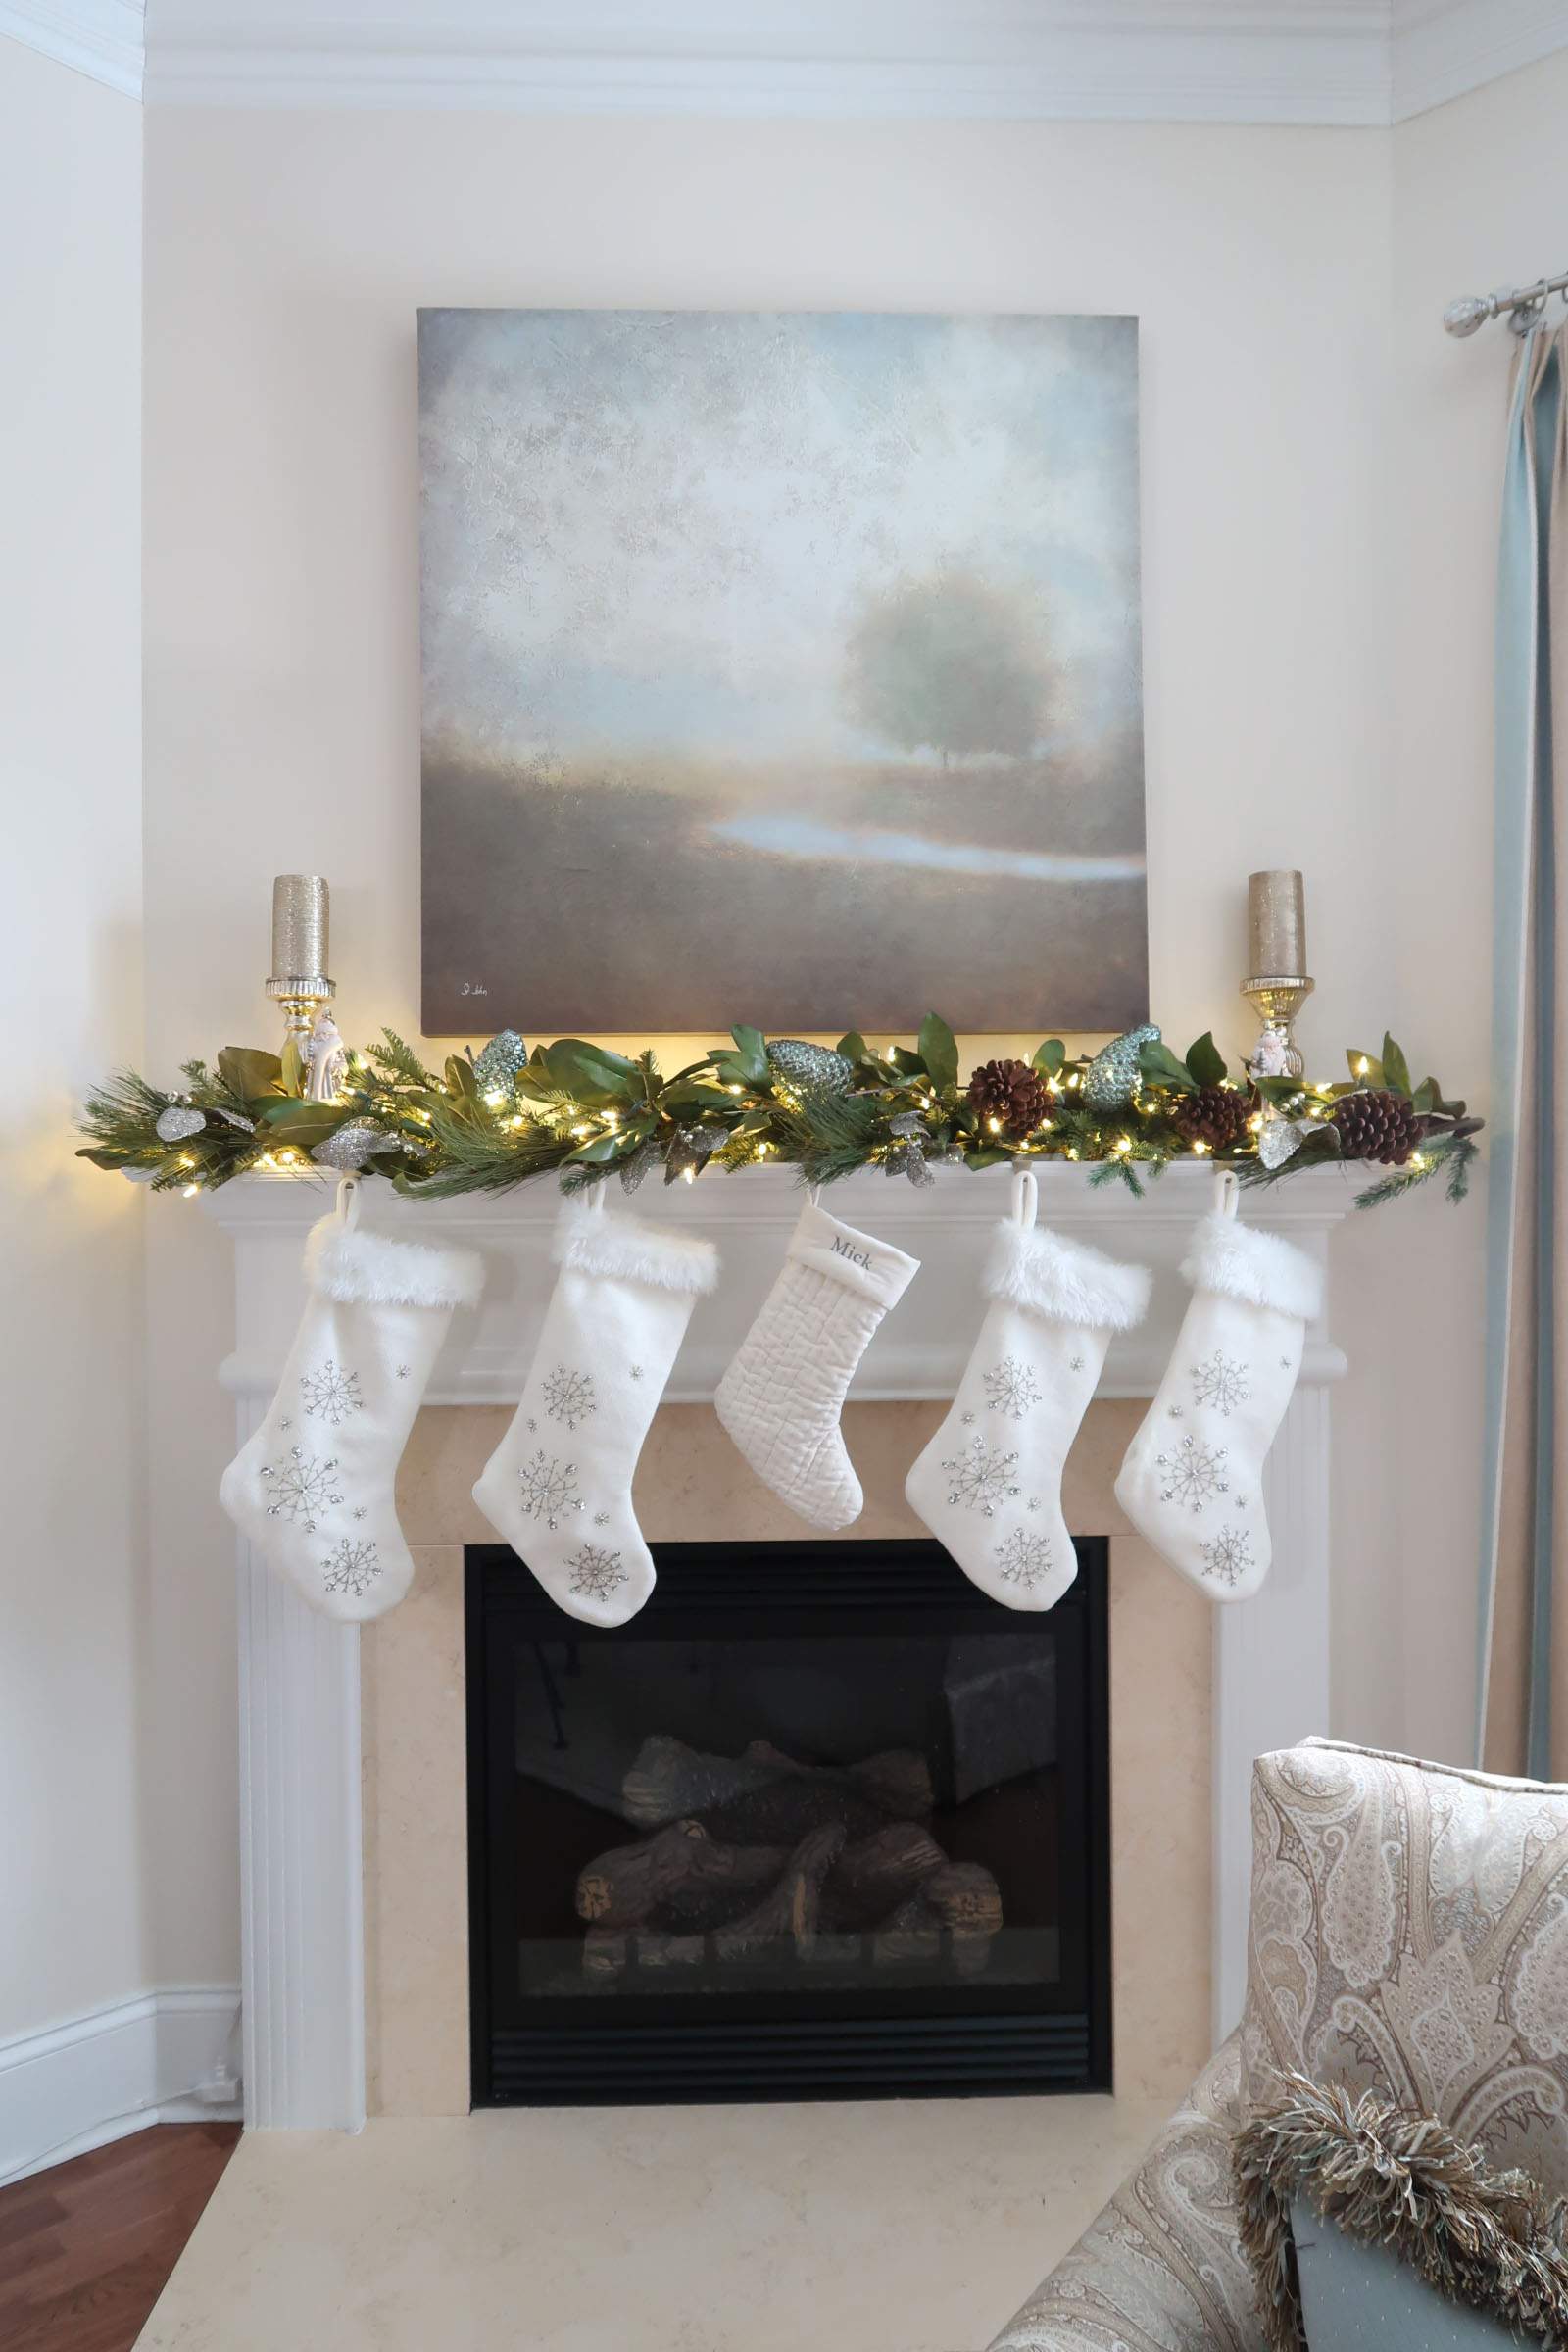
8) Hang the Stockings with Care
In my home, I like the Christmas decor to blend into my normal decor. So for the day to day look I use white stockings with fur cuffs. Then on Christmas eve we switch to our needle point embroidered stocking for Santa Claus to fill!
Shop Stockings
A personalize stocking is always a nice touch and Pottery Barn has the best options. They make for a great gift for a new baby or fur baby. Yes, my dog Mick got his own personalized stocking! Pottery Barn Velvet Stocking
9) Enjoy Your Beautiful Work
Do you feel better now that one thing is off your to-do list? Sit back and relax! Light the fire, light the candles, and darken the room to enjoy the warmth and sparkle of your hard work.
Usually I am parched after all of this work, so I’ll whip up a craft cocktail to quench my thirst! Here is an easy and refreshing Moscow Mule to try: Fig or Regular Moscow Mule
10) Dismantling the Mantel
We aren’t finish yet 🙂 It’s post Christmas and you are putting away your mantel. Maybe this year it was gathering and assembling, but next year you will have my secret to the “Christmas Mantel Tote” for a 30 minute stress-free mantel plan!
Plan ahead and buy a clear tote. Here is the size I use: 71 Qt. Locking Lid Clear Tote
How I pack my mantelat the end of the season:
- Place stocking holders in the bottom of the tote
- Garland goes in next with the lights intact (or buy one pre-lit)
- Pack the extension cord still attached to the garland
- Store decorative picks in a quart ziplock bag together
- Wrap breakable ornaments and place on top of garland to protect them
- Top all items with the stockings for another layer of protection
- Leave cord management pieces/Command Cord clips in place all year – yep I do this!
Place painters tape and label with a marker! Easy, right? With working full time and having a family we all need to share our “easy button” and this is mine 😉
Hope you found it helpful and this process can be used for any season and any area you decorate in your home! Check out another easy tutorial on how to make your OWN mini wreaths for use on the back of a chair.
Please consider signing up for my weekly email newsletter for more tips and ideas this holiday season!
Until next time…
Porch Daydreamer
Tracey