
Counter Makeover with Marble Contact Paper (5 year update!)
Are you looking for an affordable option to marble counters? Or live in a rental and hate the counters and want a temporary fix? Marble Contact Paper is for you!
Marble counters with their white glow and gorgeous gray veining make me sigh a long sigh.
They are so beautiful, but SO expensive. How did it happen that we all wanted granite everything and then BAM it was out like that!
Guess what? You can EASILY and for $50 install faux marble contact paper counters in your home. They look so good people will never know!
5 YEAR UPDATE BELOW!
Cheap and Easy Marble Counters
When I started a new job working from home, I decided it was time for an office makeover.
Luckily, the space for my office was great but it was dark and dreary.
When you see the final reveal, it doesn’t look like the same space!
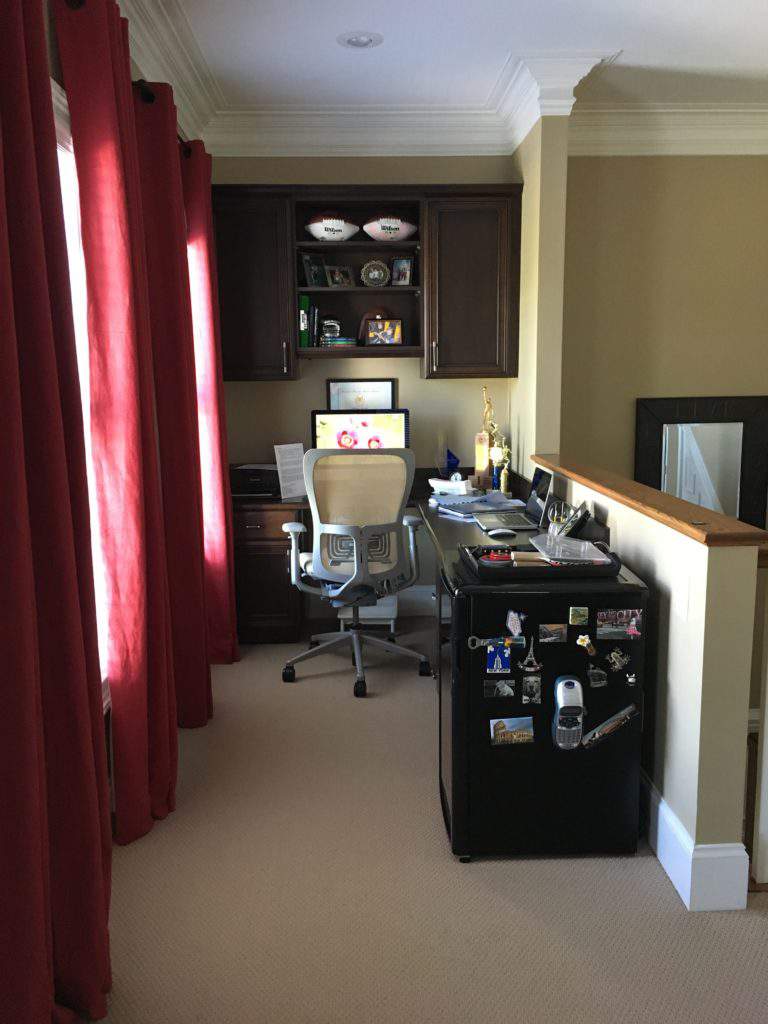
After painting the stained cabinets and installing new peel and stick wallpaper the counters were looking really dark!
What I thought would look amazing was marble or quartz counters on the office desk L-Shaped desk.
However, the budget did NOT allow for a new marble or quart counter!
So I searched high and low for an affordable option, which I thought would involve painting a faux finish (see what I did painting granite counters to look like marble).
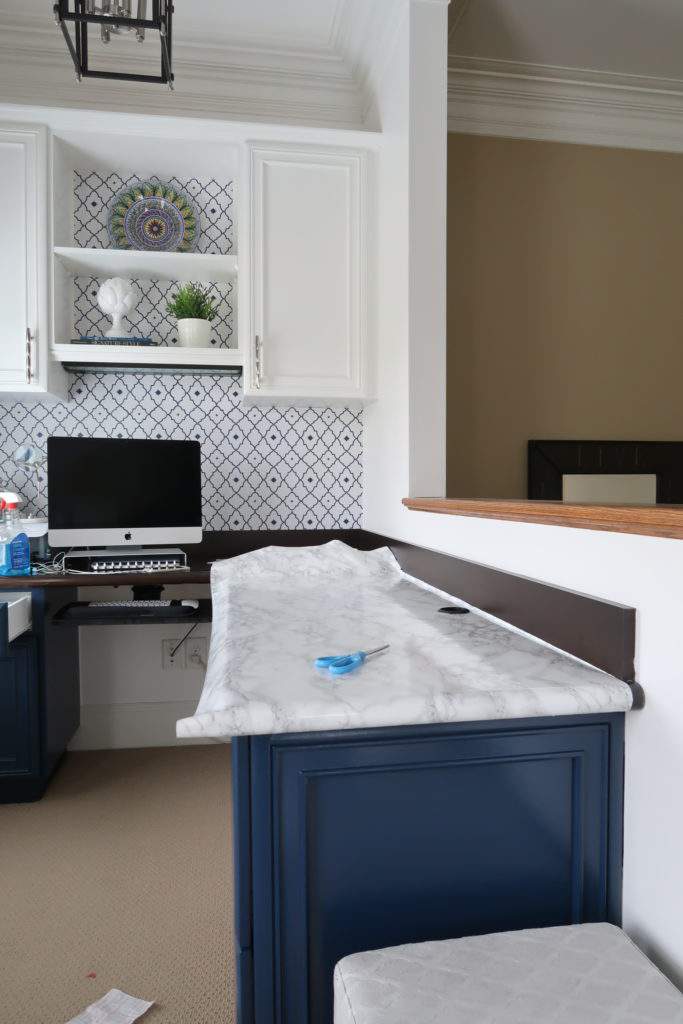
Fortunately, I found something much faster and easier! Here is the BEFORE office counter in mid-project:
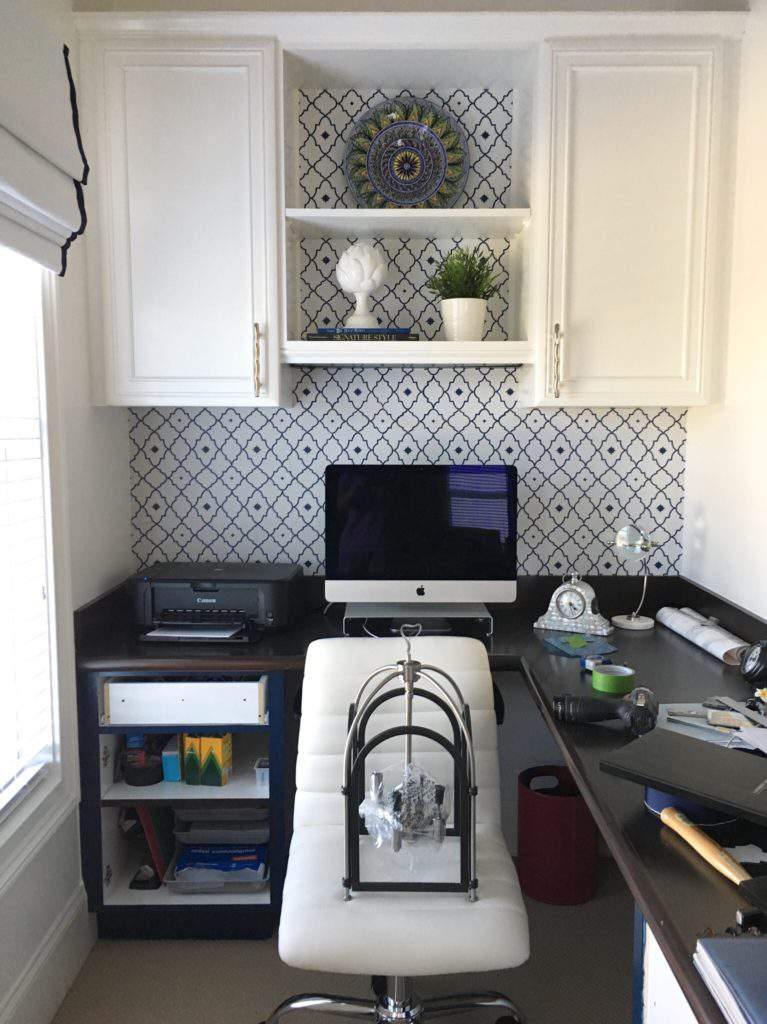
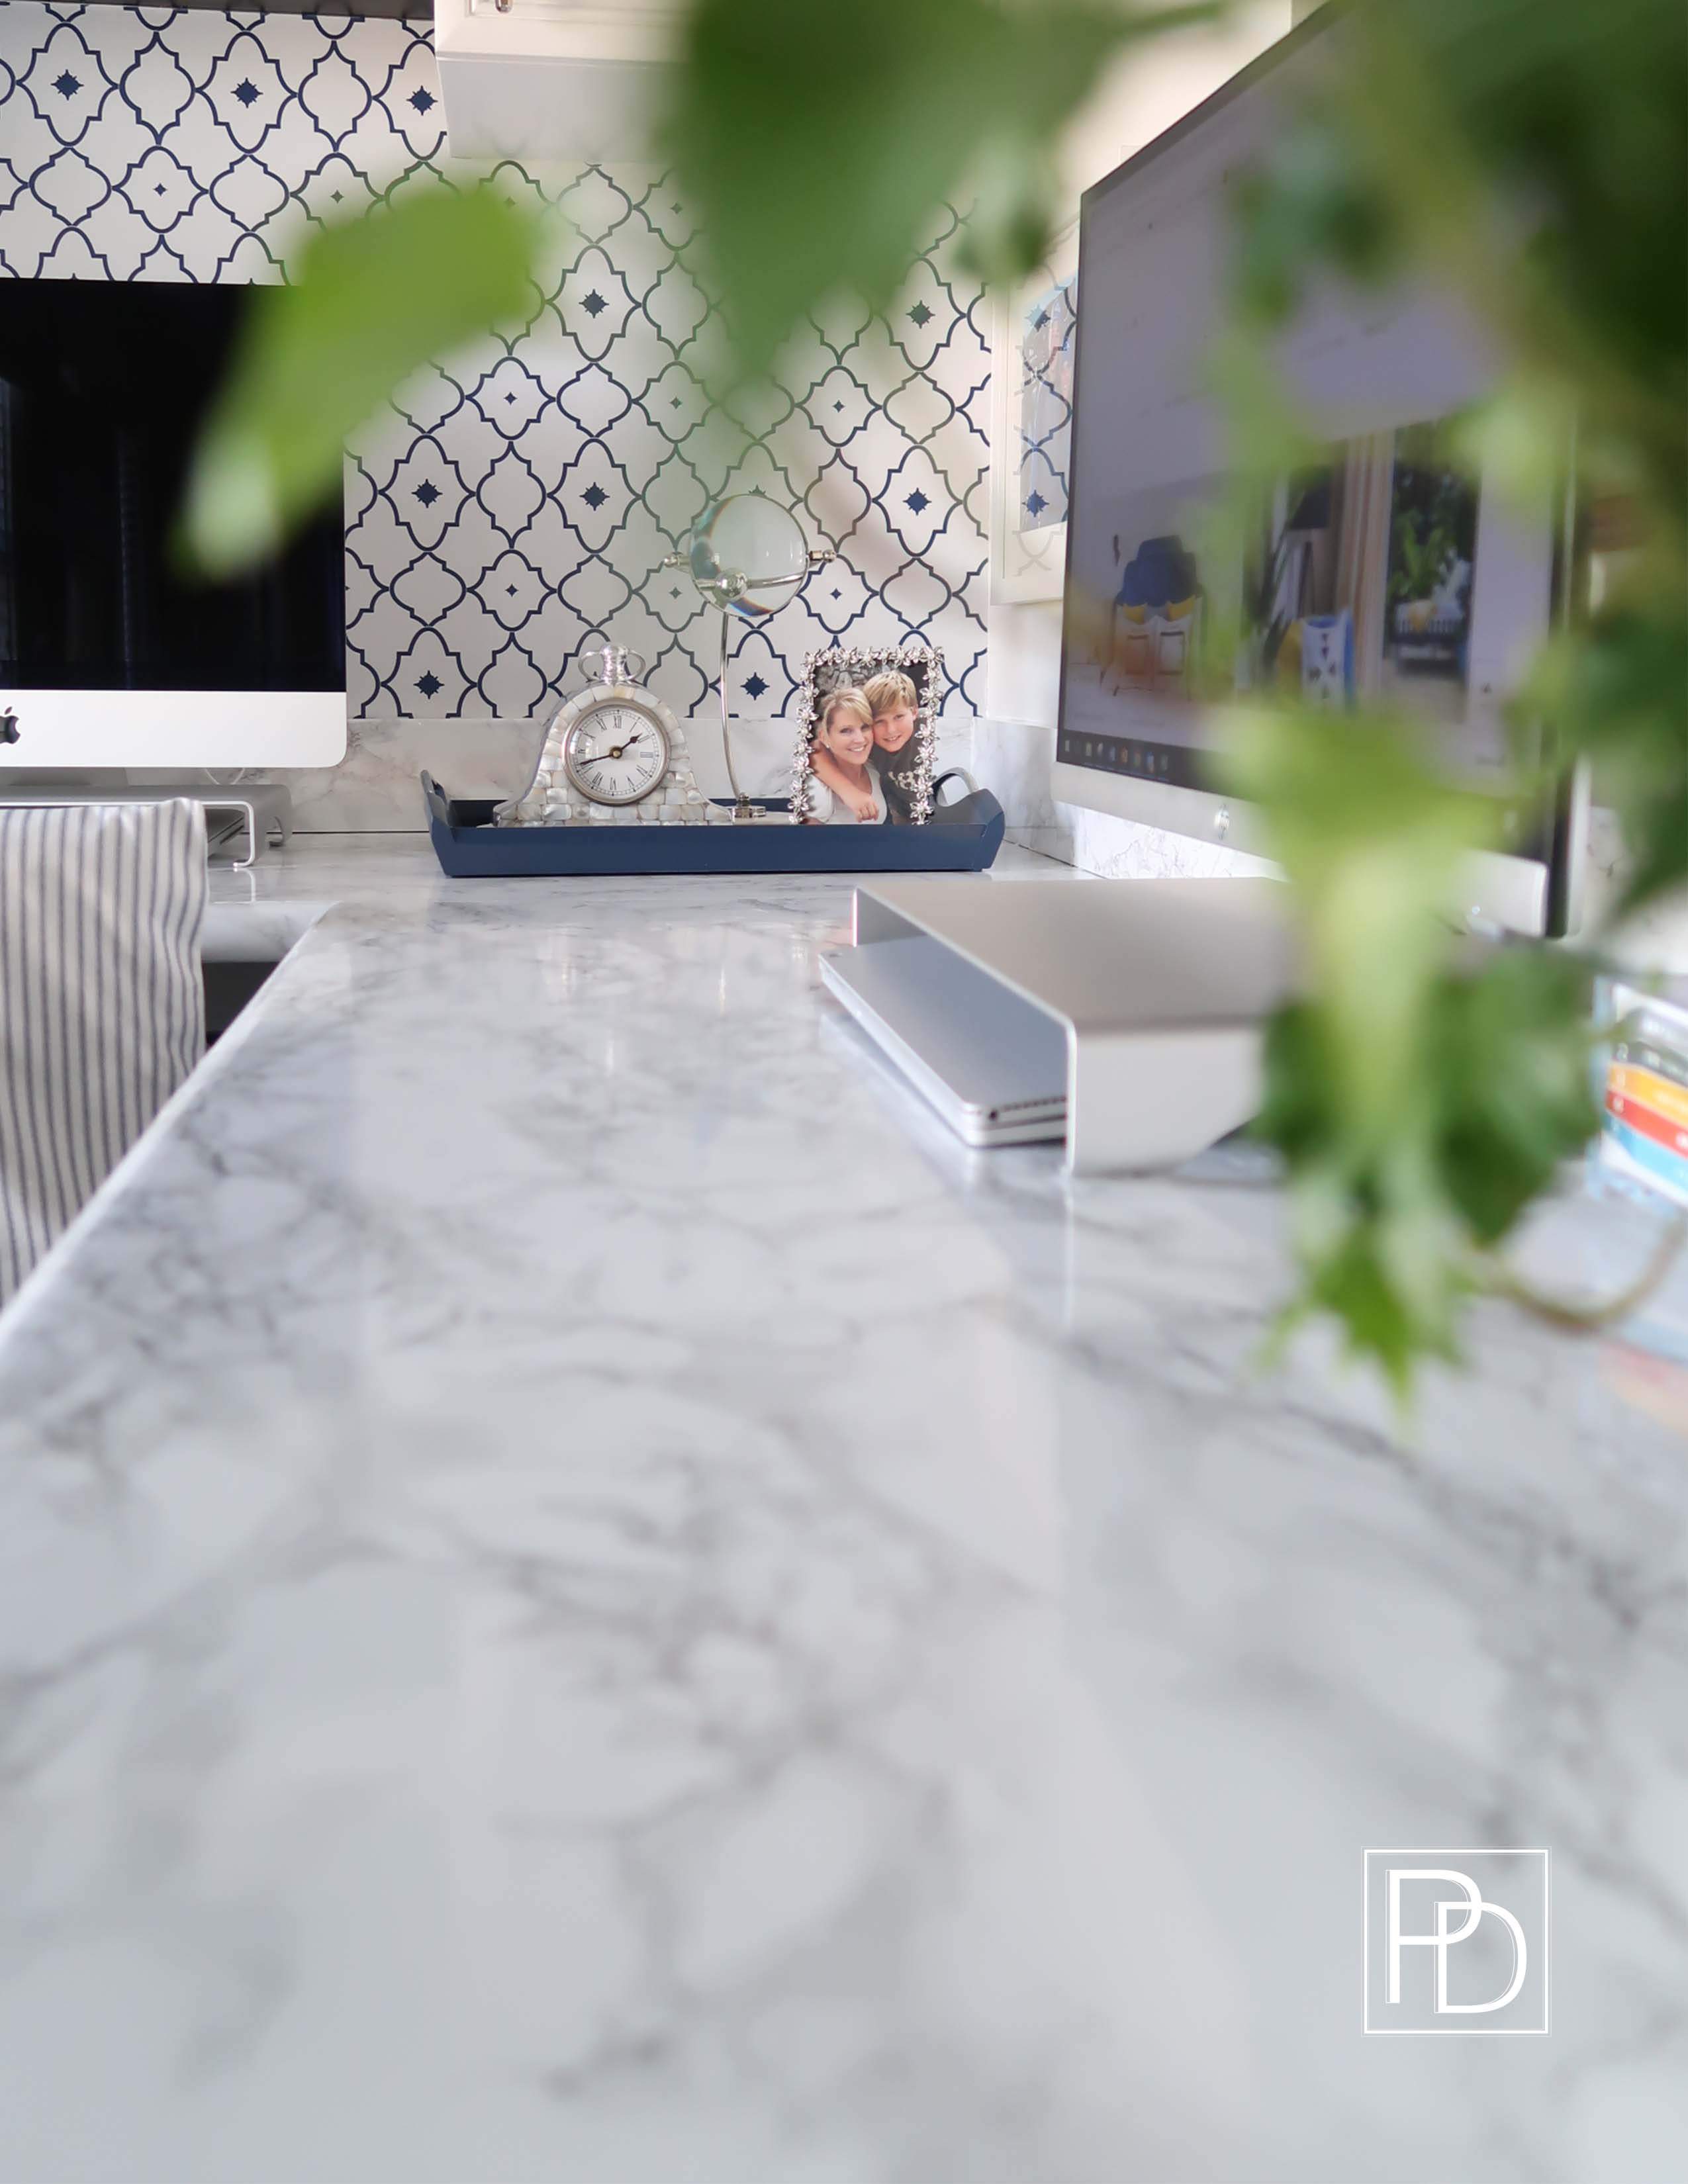
And let me tell you, as I sit here and type staring at the counters I forget they aren’t real marble!
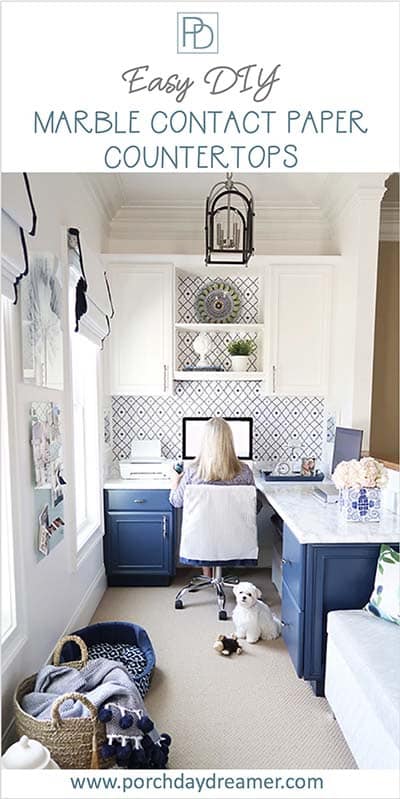
Pin for Later!
Yes, the marble contact paper solution is temporary and faux but CHEAP and EASY!
It’s kind of a miracle really. I can imagine you wouldn’t see me as the type of person who would go faux because I like authentic, but it’s so good it can’t be ignored!
What Can Be Made over with Marble Contact Paper
Seriously, the product I used is AMAZING and REMOVABLE. So you truly can stick it to just about anything since it is temporary.
If you are in a rental home or apartment, then nothing could be better to fix the counters!
Marble Contact Paper is perfect to cover:
- Counters: kitchen, bathroom, laundry room, desktop, etc
- Laptops
- Notebooks
- Planters
- Boxes
- Shelves
- Coffee table
- Kitchen table
- Lamps
- Anything you can IMAGINE!
Anything that is primarily square, can be easily wrapped, or has right angles is ideal for using contact paper.
TWO AREAS OF CONCERN: You can’t place anything hot on the contact paper and if the surface underneath isn’t “sound” it will pull up if you try to reposition the paper (more about that below).
Using Marble Contact Paper
Let’s establish a few things first. If you are a complete and total perfectionist, this product is likely not for you because it will drive you crazy!
If you are not detail oriented, then don’t install this product! Two dichotomies in one.
Yes, you need to be detail oriented as you measure, cut, and install. However, the final result will NOT be perfect or be real marble no matter how detailed you are with installation 🙂
Here is the exact marble contact paper I used:
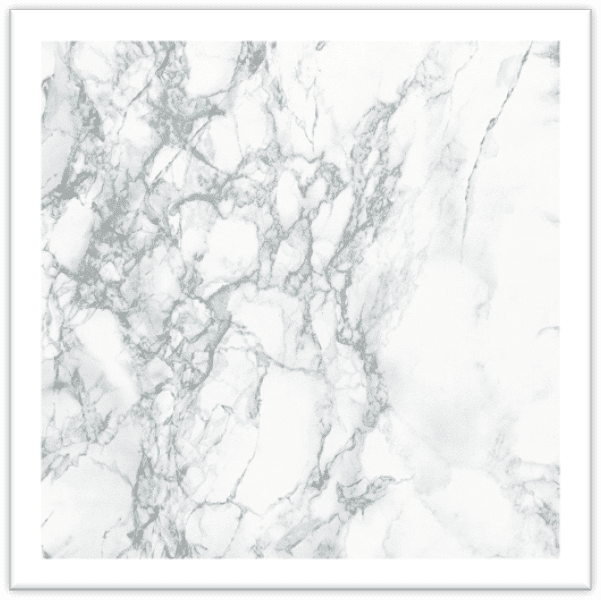
d-c-fix Decorative Self-Adhesive Film, Grey Marble, 26″x78″ Roll
Before Considering Marble Contact Paper
Use painter’s tape and test your surface in several areas to make sure it is SOUND and won’t fail as you reposition contact paper.
If it does fail, I don’t recommend using the vinyl contact paper.You don’t want to run into the issues I had!
One area of my desk has little particles where the laminate failed, but it’s not noticeable so I’m living with it! I feel it more than see it.
How-To Install Marble Contact Paper on Counters
Grab your confidence and let’s go! CLEAN YOUR COUNTERS THOROUGHLY AND MAKE SURE ALL DUST IS REMOVED BY VACUUMING!
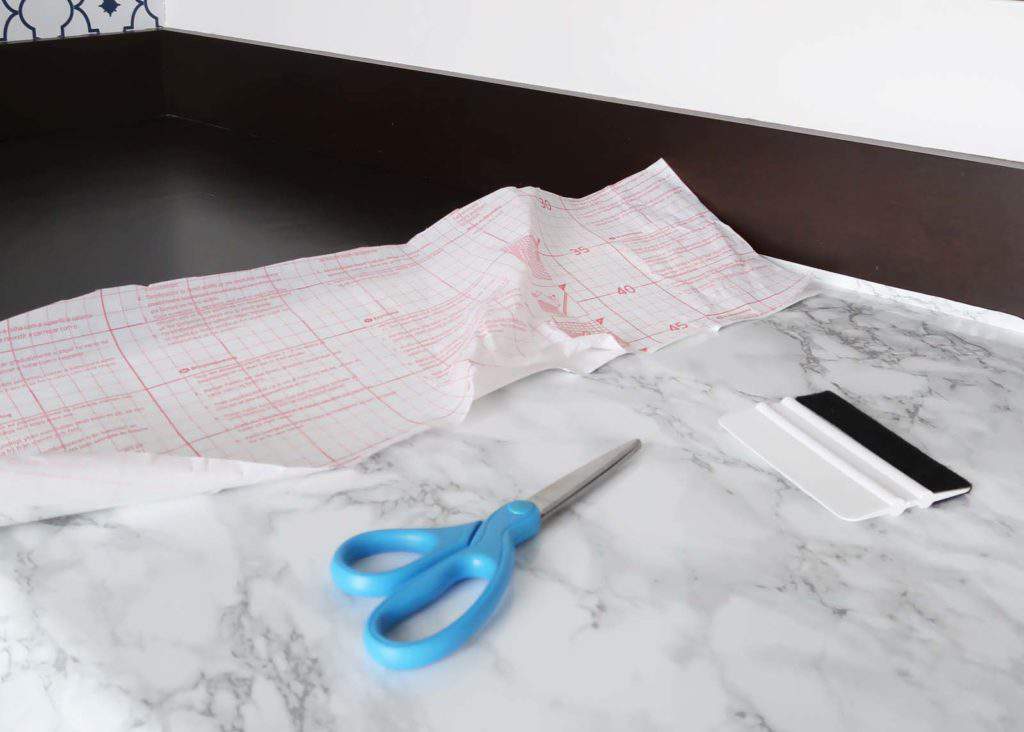
Supplies
- Marble Contact Paper – multiple rolls
- Dressmaker’s Tape
- Metal Ruler
- Utility Knife
- Smoothing Tool
- Hair Dryer
- Cardboard – Amazon Prime baby!
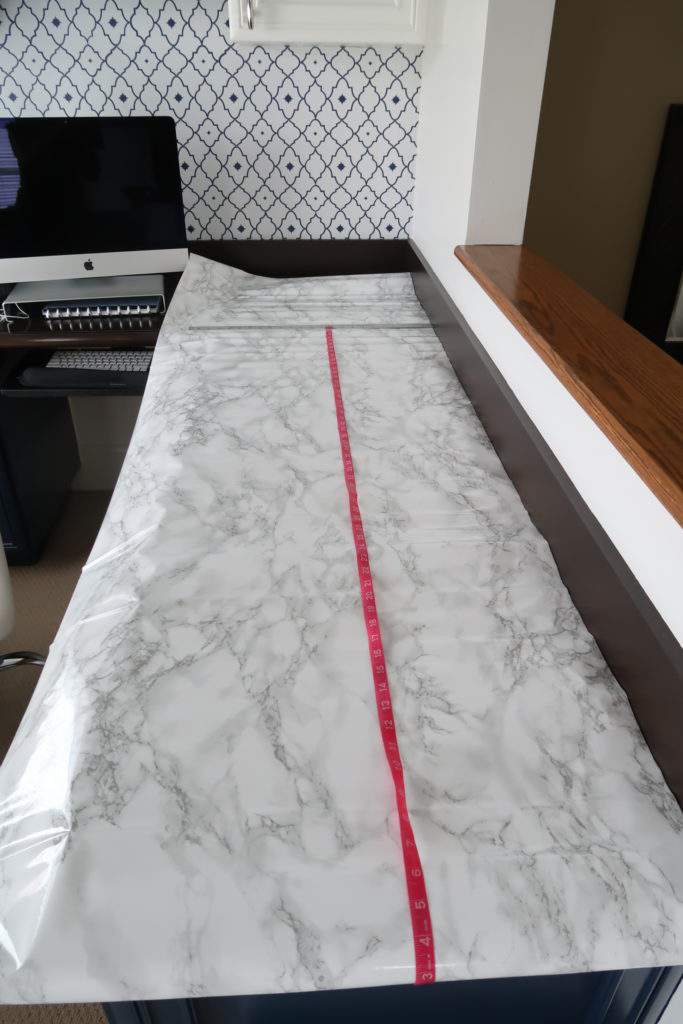
Step 1 – MEASURE AND MEASURE AGAIN!
Measure all aspects of the project, so you know how much to order.
- Don’t forget the “back splash” area that is above a counter like I have. That adds a lot of linear footage. I added 2 inches for trimming to all measurements and that served me well.
- I used a dressmaker’s tape because it could wrap around corners more easily and a small metal ruler as a secondary guide.
- Buy the LONGEST and WIDEST rolls they make to create as few seams as possible on your counter.
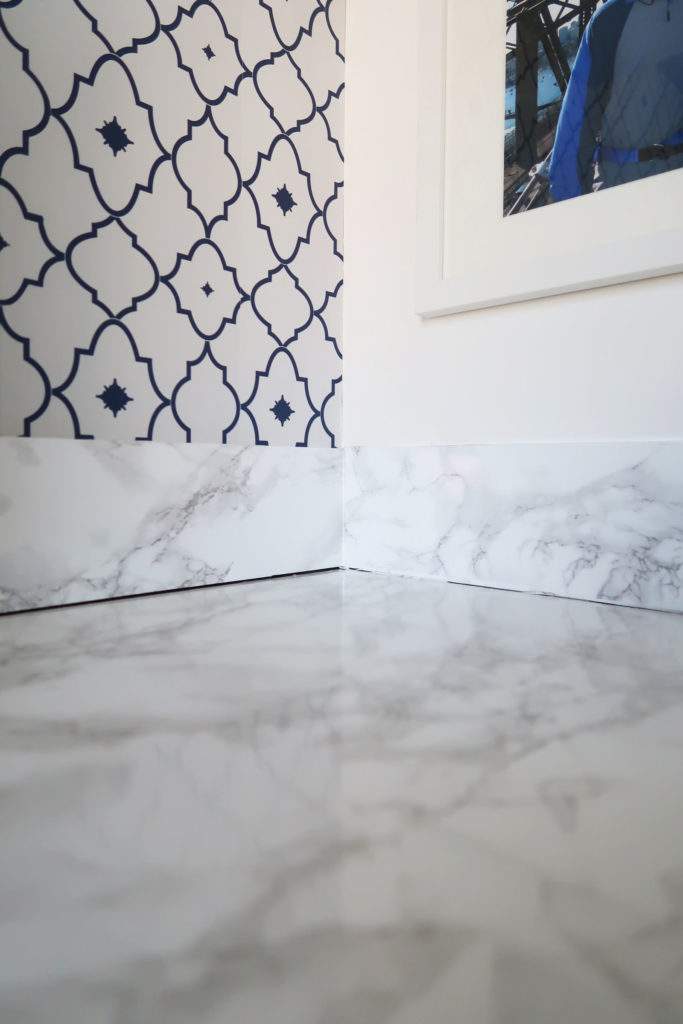
- Decide where the seams will be. I chose to meet the seams in the corner, where the metal ruler is shown below.
After lots of measuring, I decided to order the wider width they offer on Amazon to make installation as easy as possible.
My counter is 22 inches deep and with the wrap around the edges I factored 2 more inches, which was perfect.
Step 2 – Cut the Marble Contact paper
Luckily, the back of the contact paper has a grid and measurements to help you in the cutting process!
I made small pencil marks as it was laying on my desk above, on the underside with the grid and on the face of the contact paper.
- Make sure you cut with cardboard underneath! I worked on a table, which I found easy because I could spread out and get the contact paper flat. Plus I had the right leverage over the top of the table.
- You can cut with scissors, if you have a grid line to follow. At times when I wanted a section of marble to match another piece, I cut on top of the face of the contact paper.

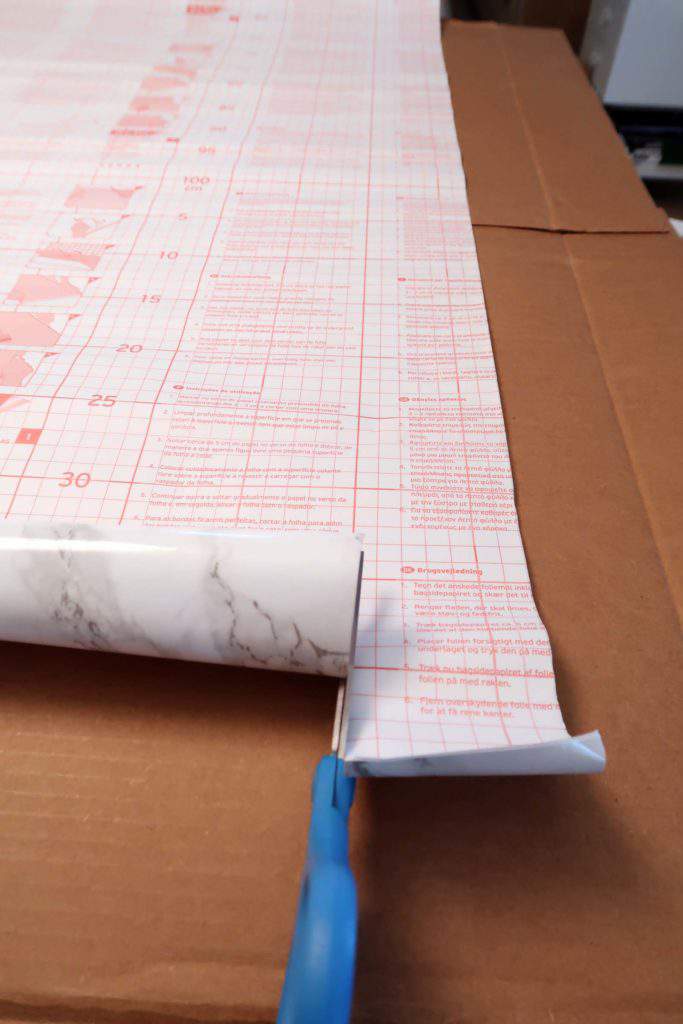
- Use a metal straight edge and line up with the grid or the pattern to make sure you are straight top to bottom. TAKE A DEEP BREATH! Seriously, I was so nervous I would mess up I noticed I was holding my breath.
- You MUST push down hard on the metal ruler so it doesn’t move!
- Slice with confidence along the edge of the ruler. In the picture I have my hand turned out to show you what I am doing, but YOUR HAND should be rolled in straight over the utility knife.
Step 3 – Place the Marble Contact Paper and Adhere
This takes some trial and error. The contact paper adhesive is VERY forgiving and is flexible so you can tug and pull it into position.
I found working along the edge where the counter and backsplash met was easiest because I had a straight line to follow.
Vinyl contact paper is VERY durable, so don’t be shy about using the smoothing tool over the top.
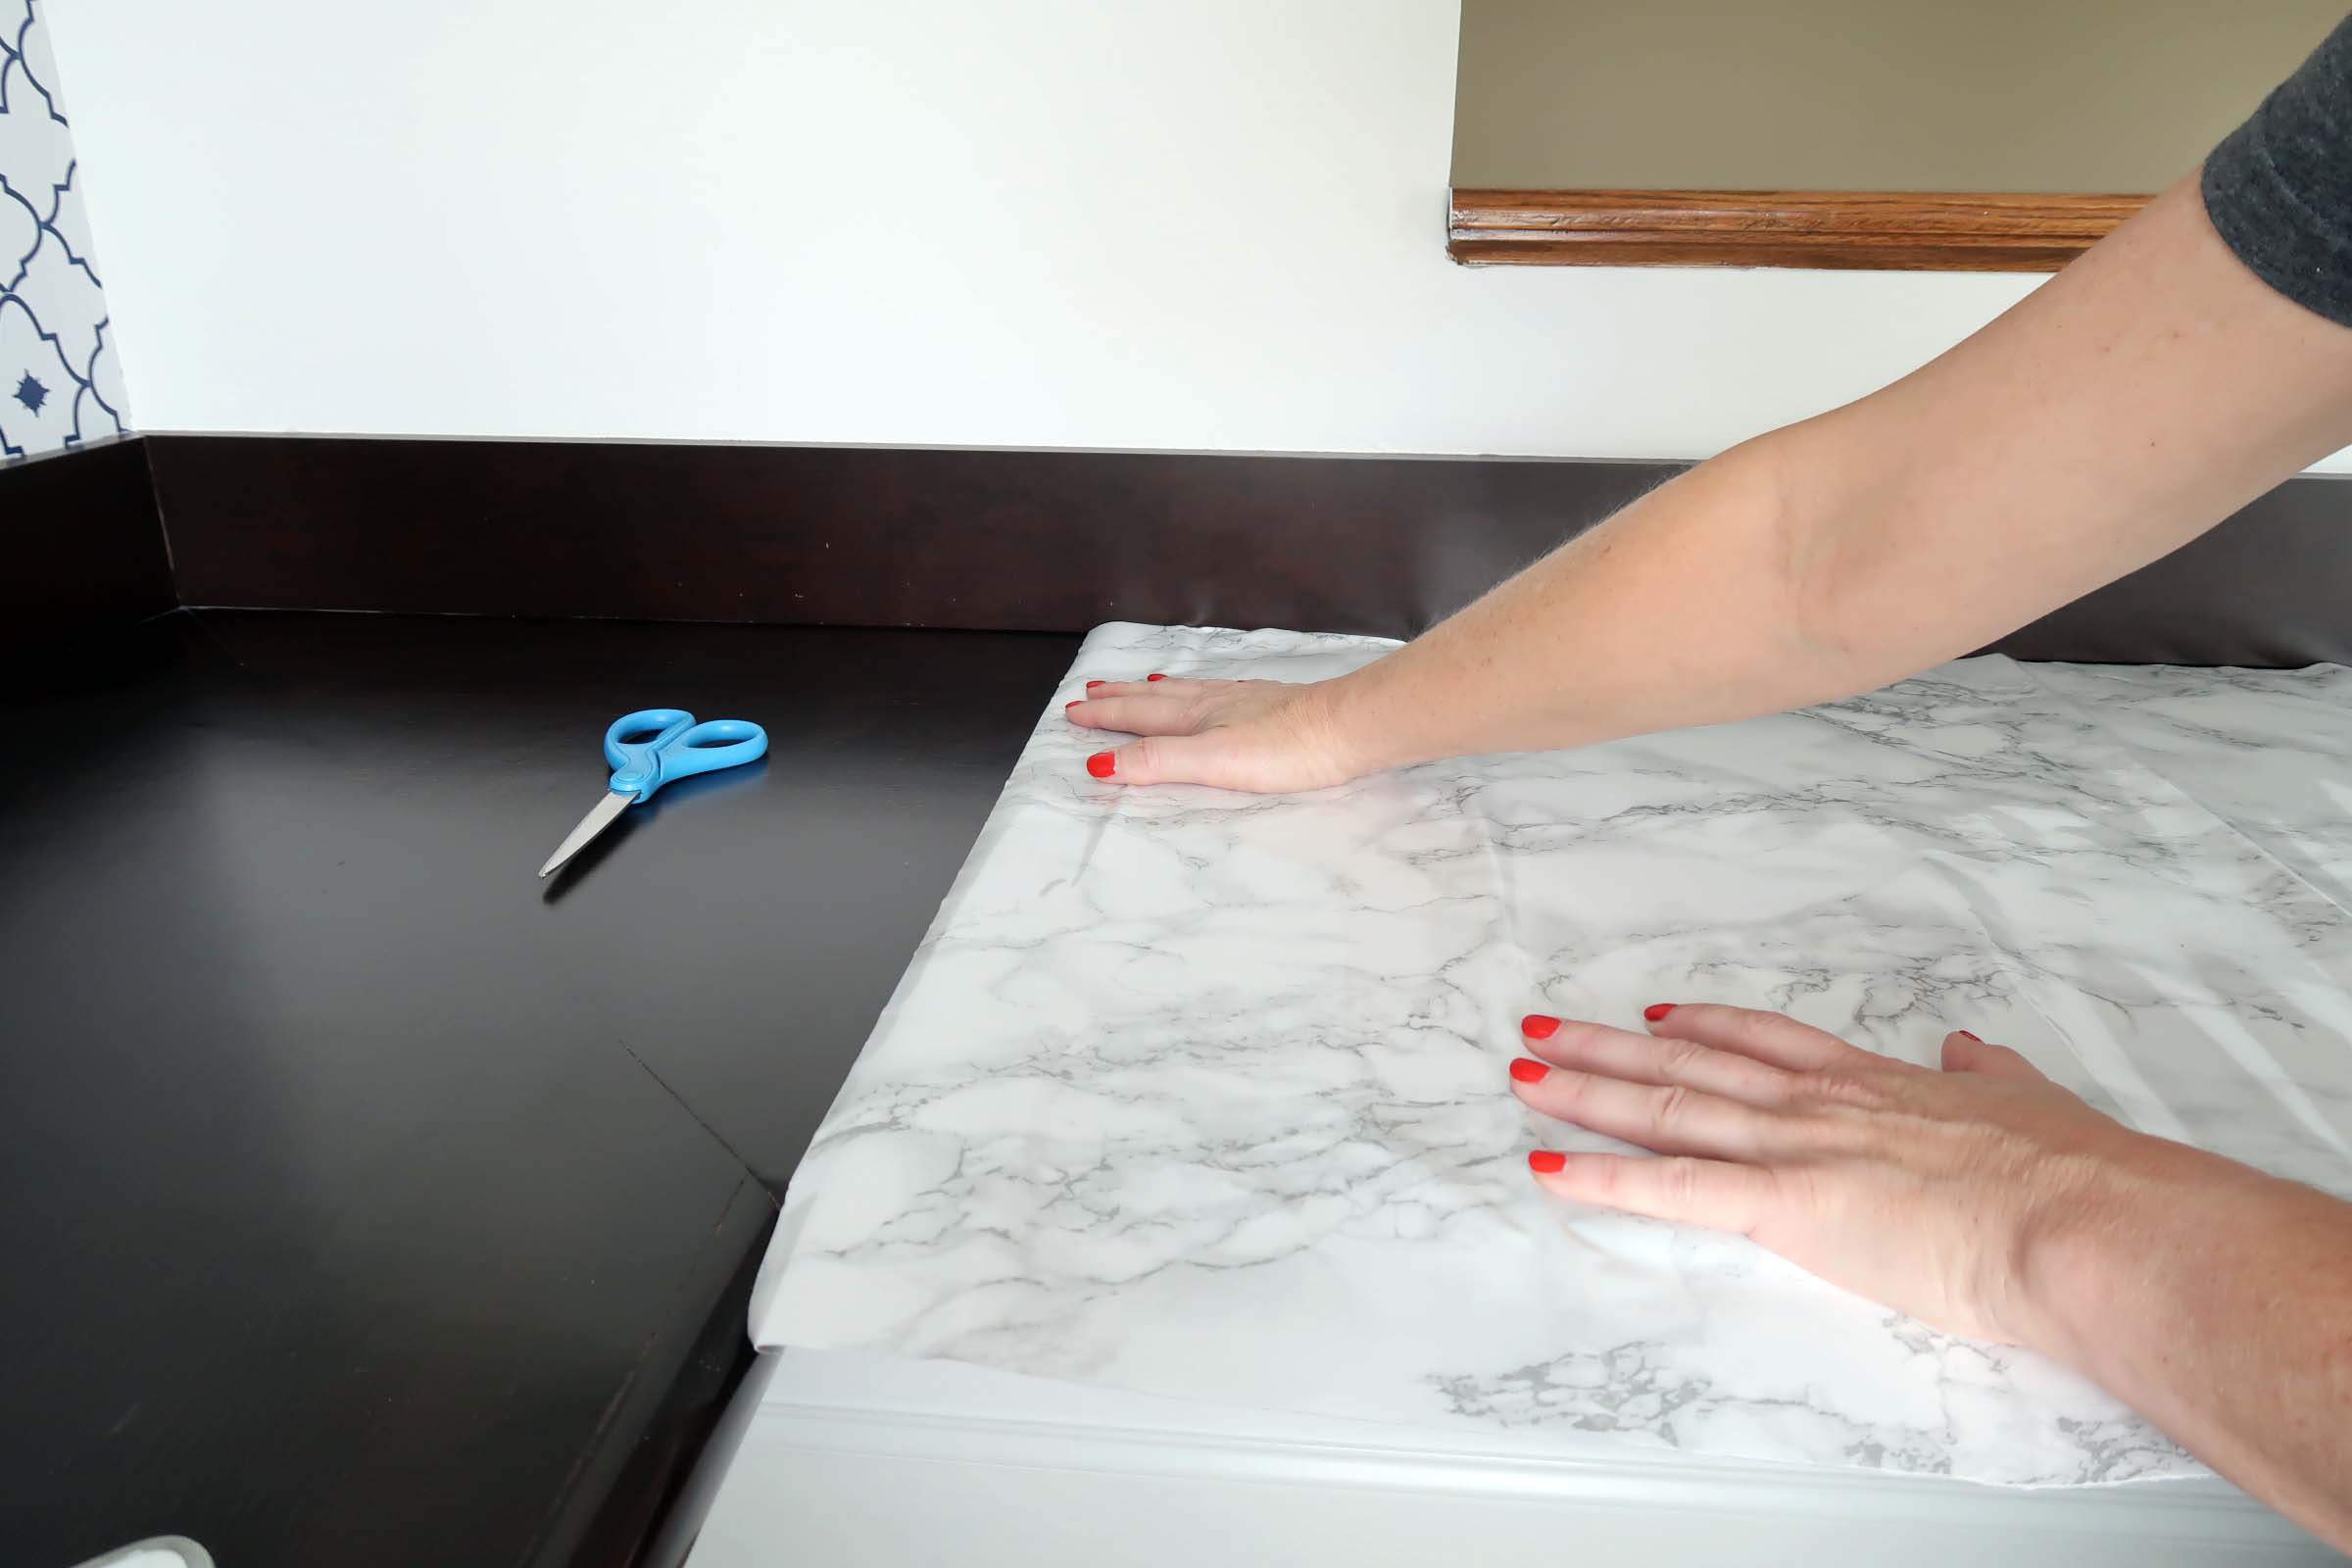
The hard edge vs. the soft felt edge smoothed out air bubbles more efficiently.
- Butt the contact paper up to the back splash area and overlap it by about a 1/4 to 1/2 inch which you will trim later.
- Peel back the grid backing to expose the adhesive. I found trimming off the paper to get it out of the way very helpful.
- Using the smoothing tool, work across and down, so you have it anchored on one end and then smooth down as you go.
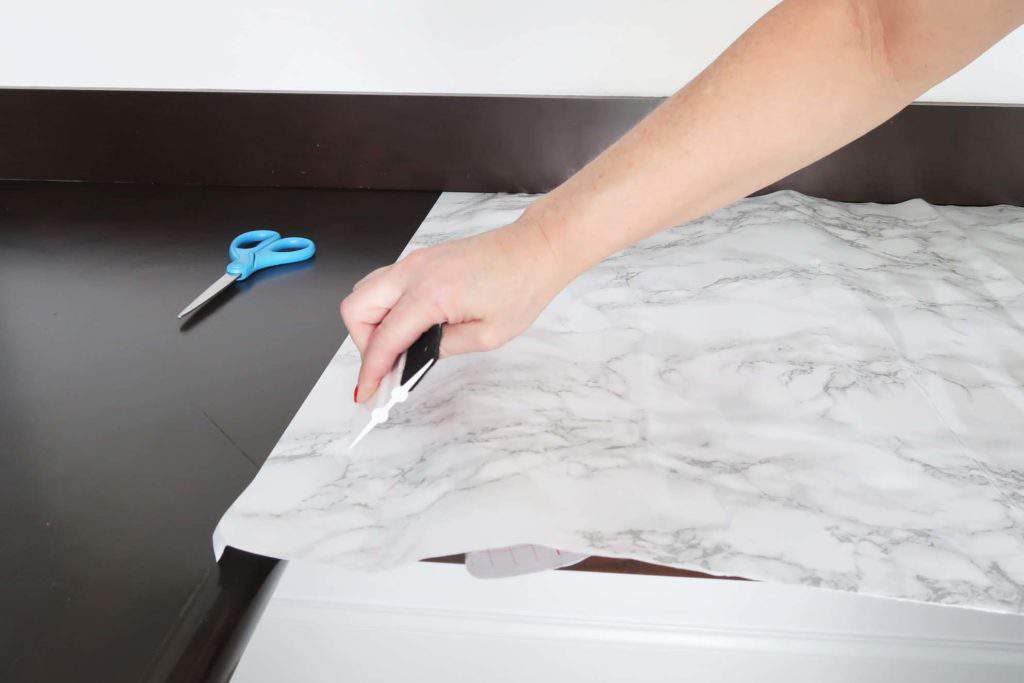
- With your hand underneath, as you smooth, keep pulling back the grid backing to expose more adhesive.
- Stop and reposition as needed. WORK OUT AS MANY AIR BUBBLES AS YOU CAN AS YOU GO!
Step 4 – Trim Off Excess
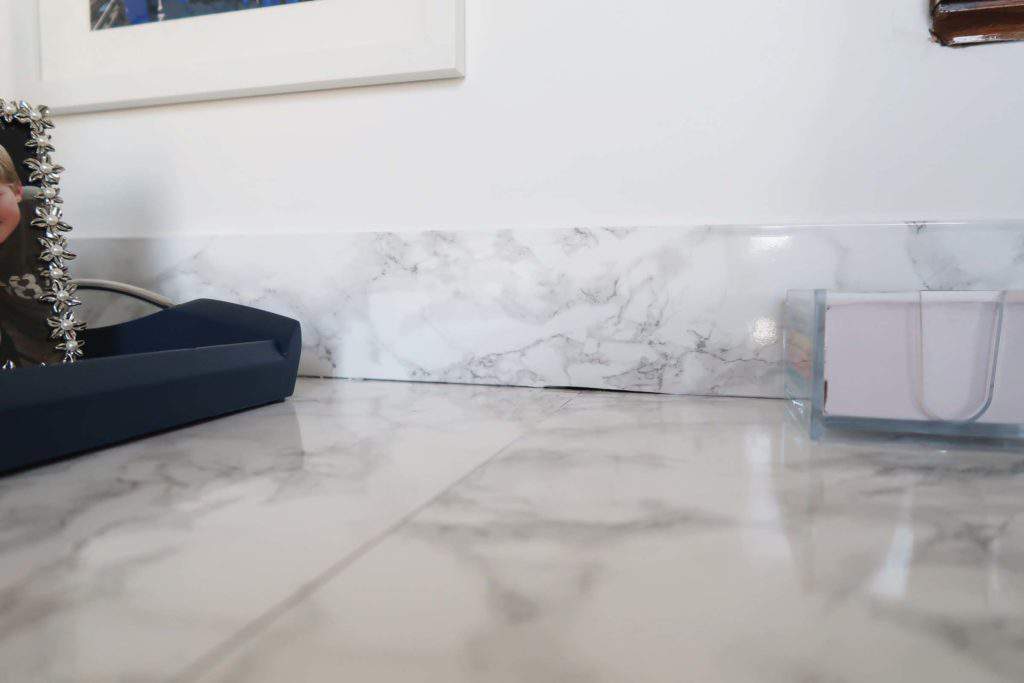
This is where I was thankful that there was a gap between the backsplash and the counter.
I literarily ran my utility blade in the seam for a straight cut.
- Trim off any excess paper after wrapping the edge of the counter and up the sides.
- The utility knife worked well in between the backsplash and counter.
- The scissors were better on the edge of the counter, where I didn’t have to be as exact because it was hidden underneath.
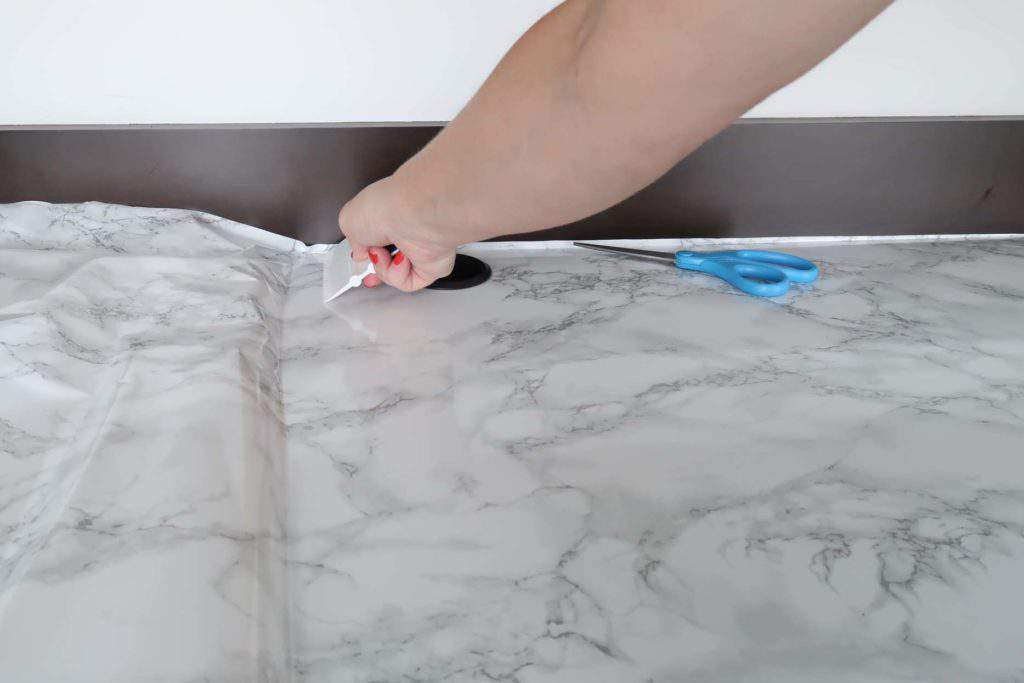
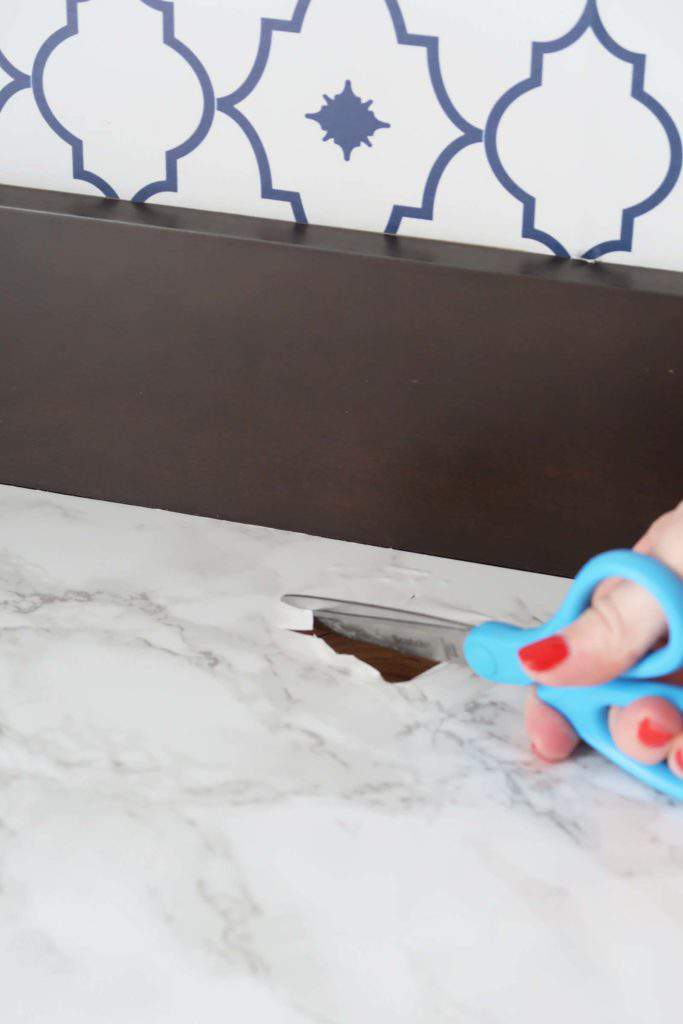
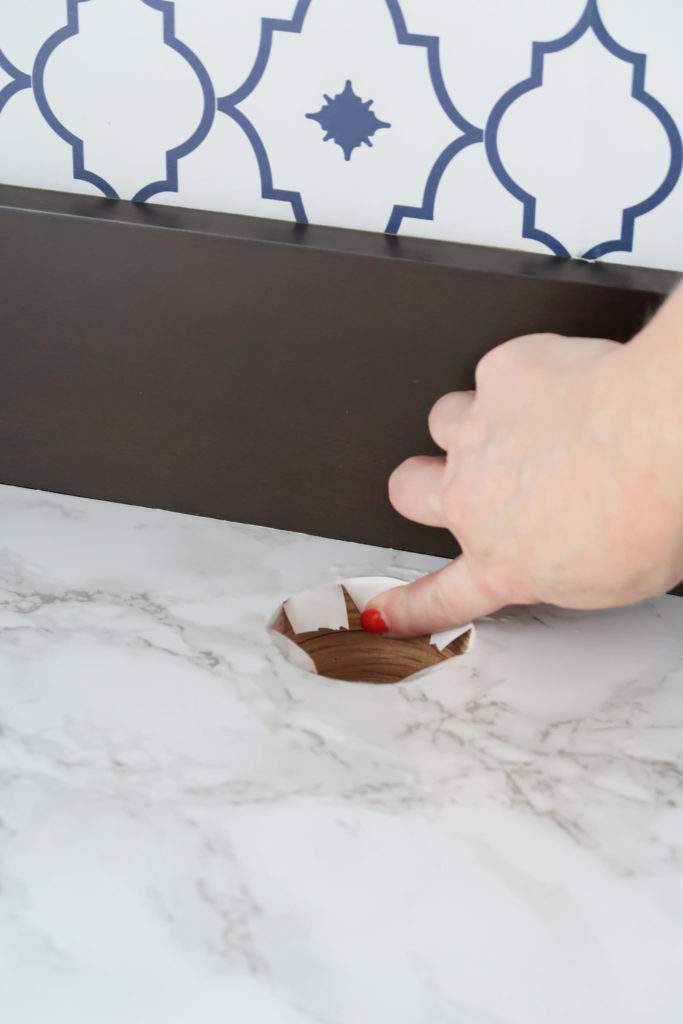
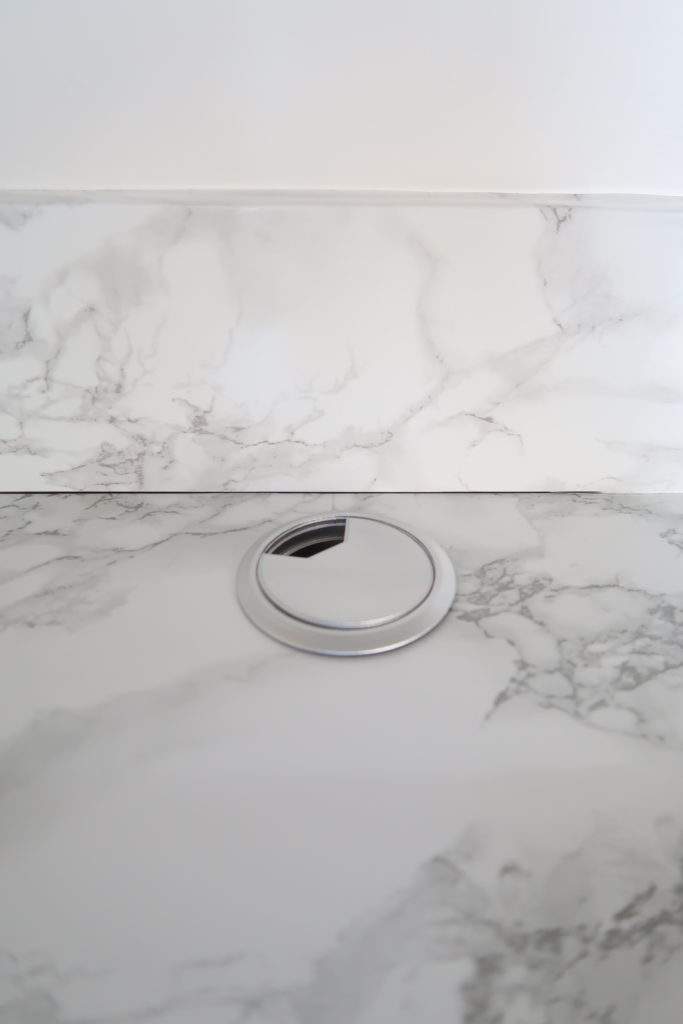
Step 5 – Trimming Around Cord Openings
This gets a little tricky, if you have this situation. I did find my methods worked well!
- Using the utility knife, cut a small hole out where the opening is.
- Using scissors, cut small slits around not quite up to the edge.
- With your fingers, push slits down into opening.
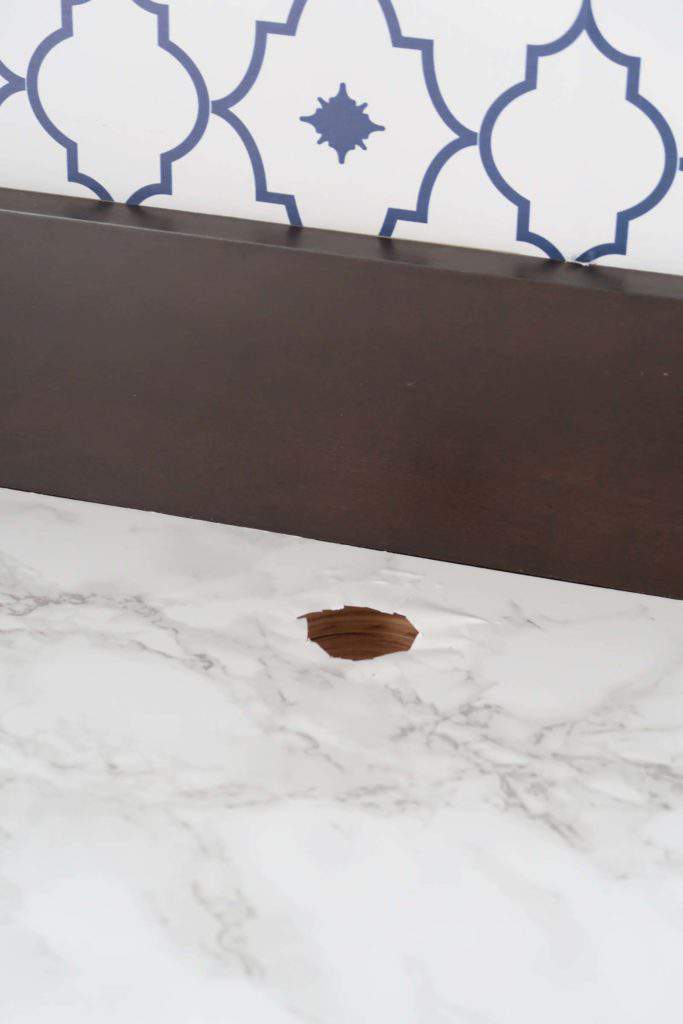

Step 6 – cutting marble contact paper around holes
This is where it is more art than science! Applying the long expanses are really straight forward, including the back splash.
- For the back splash, measure and apply it so it slightly covers over the counter and the wall.
- Use the utility blade to trim excess. Since the trimmed excess pieces are small, they are hard to get ahold of. Once you do, they come up very easily!

- You WILL have gaps that are going to require custom cuts and small pieces. My best advice is the cut them LARGER than the area you are covering and trim them down with the utility knife.
- See that little space at the end of the counter and wall? I had to cut a TINY piece to fit. PAY ATTENTION to the pattern in the marble and find a piece that follows closely, so it’s not noticeable you patched it.
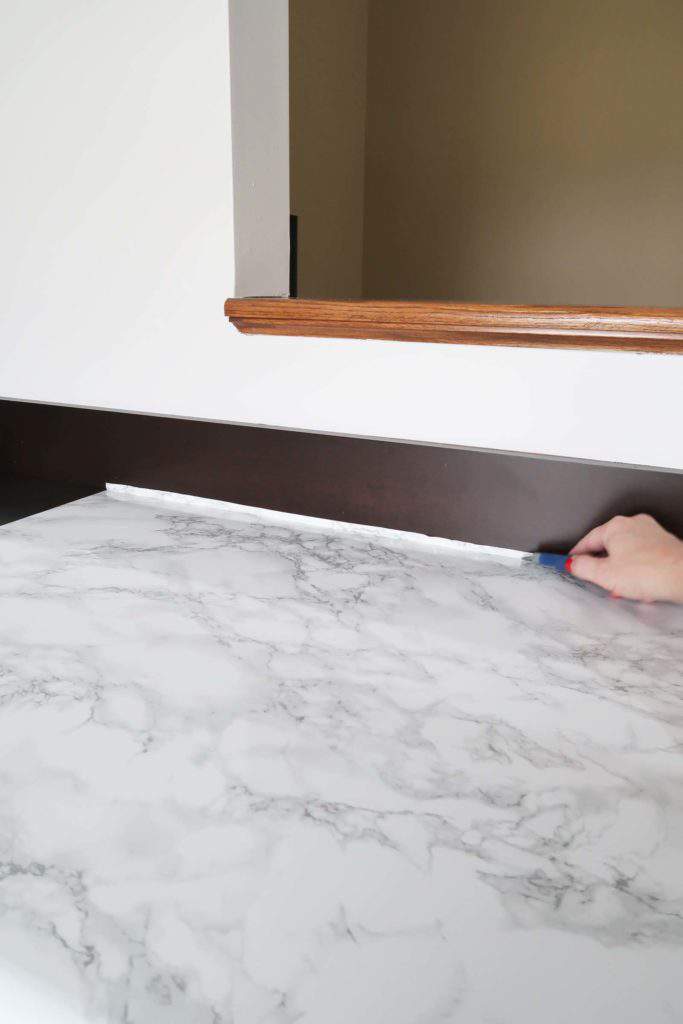
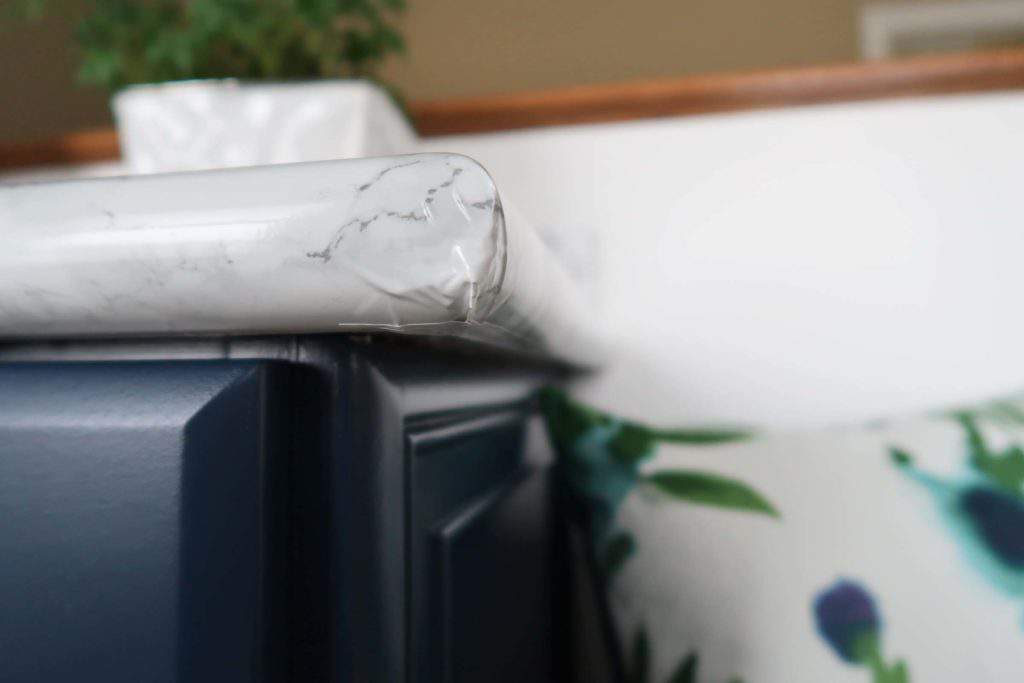
Step 7 – Corners, Edges, and Seams
This is where a HAIR DRYER comes in handy! I know weird right? Only use it at a low temp and speed because the vinyl will melt!
Unfortunately, it became impossible to take pictures of this process so I am sorry for that lack of detail.
- The corners take a little work. I cut a slit at the corner (UNDERNEATH) and used the dryer to soften the contact paper.
- Wrap down one side and fold the other over the top. Here is a close up picture of it completed.
- Also, I cut a small piece and applied it to the underside to make sure it stayed flush.
- The corners will never be perfect! So do the best you can 🙂
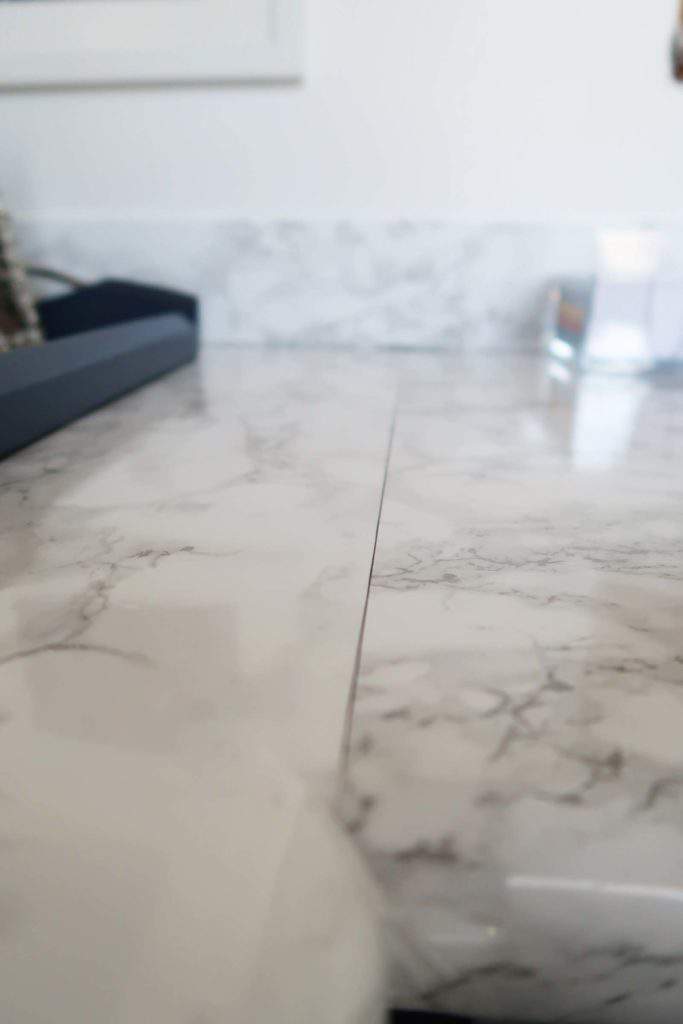
- For the seams where the two longest pieces met, I used the factory cut edge of a second piece and bumped it up to the piece I first applied.
- Then I had to slice the V where they met and fold it under the counter. This I didn’t do very well because I didn’t have anyone showing me how! So I cut it too deep and had to patch it! Hopefully, you will do a better job at this 🙂
Step 8 – Finishing Touches
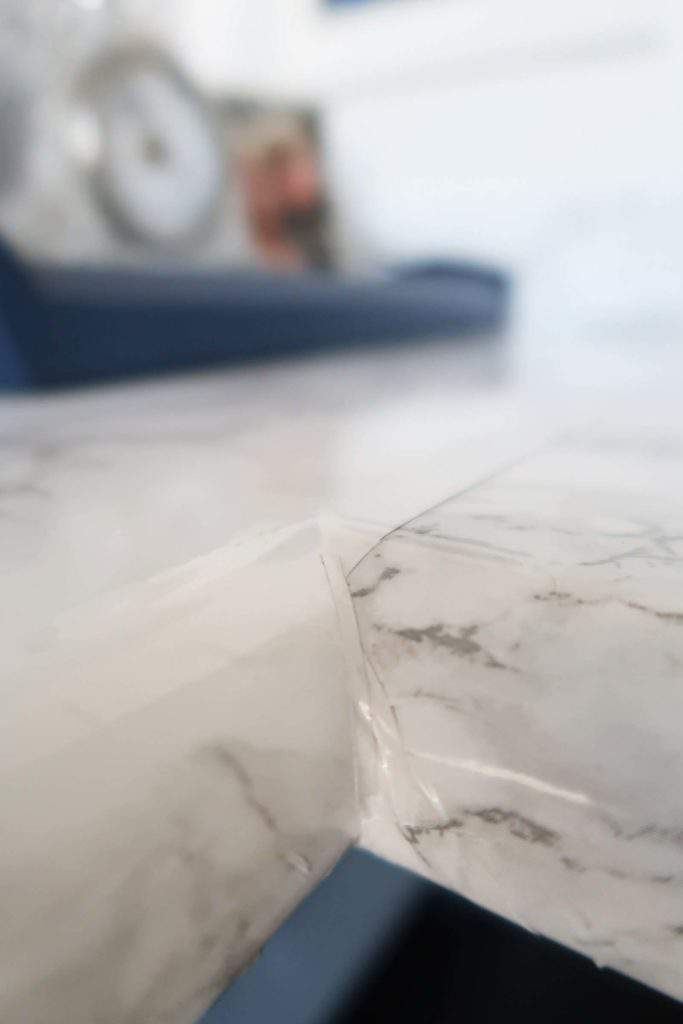
A couple of areas I had to “fuss with” were the corners and where the backsplash met the counter.
- Where my backsplash met the counter wasn’t flush creating gaps. I jammed the edge of the smoothing tool between the space to force the contact paper back so it was smooth.
- Real marble would be caulked in a gap like this, but since you may want to remove the contact paper later I’d live with the gap!
- For the corner joints, I cut tiny little pieces to cover the seams so they blended.
- Then spray painted the cord covers silver to blend in perfectly! I used Krylon Max Metallic Silver
Installed Marble Contact Paper Counters
If you don’t have the budget for real marble, then I hope marble contact paper is a solution for you!
I love how having marble counters albeit faux changed the entire look of this space.
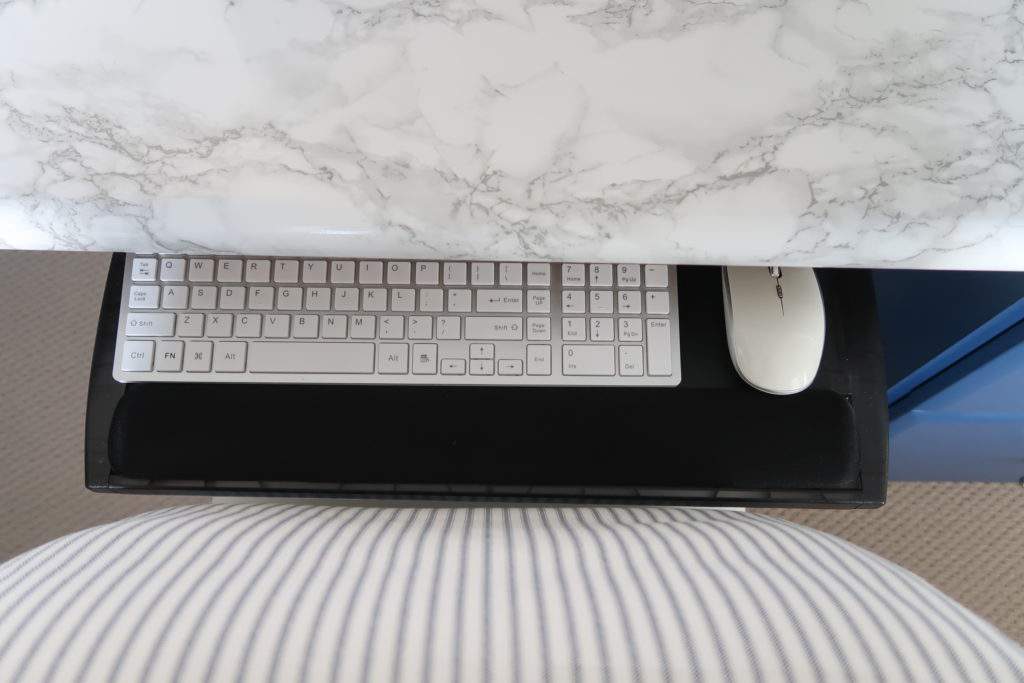
They have been in place for 5 YEARS, without issue! Please use a coaster for hot coffee cups – that is a must!
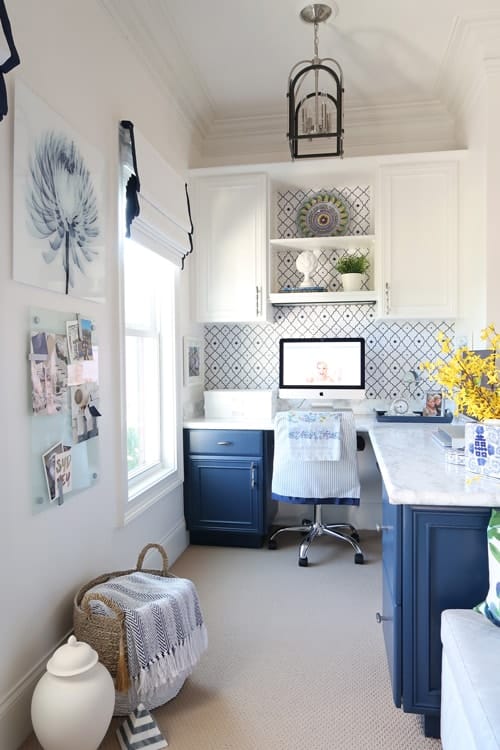
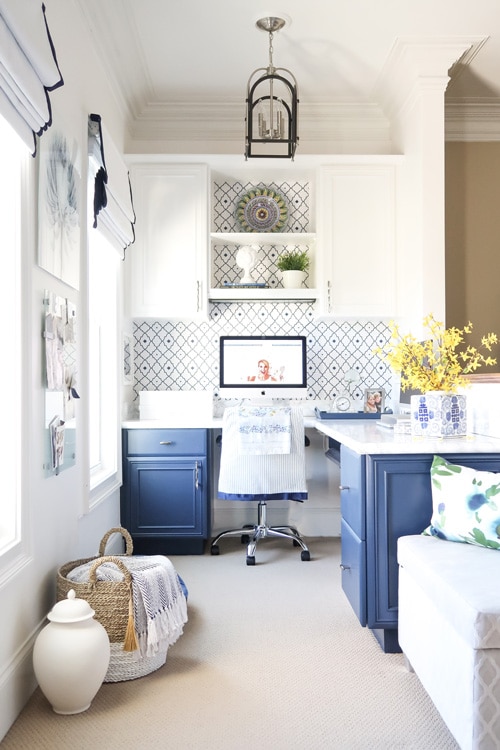
Office Paint Colors
Wall Paint: Valspar Swiss Coffee
Upper Cabinet Paint: Valspar Swiss Coffee
Lower Cabinet Paint: Valspar Indigo Streamer
I STILL love the marble contact paper and am shocked at how well they have stayed in place.
Never once has the paper peeled up or come loose, so cleaning before installing in really important.
Now I am ready for a new cabinet color and wallpaper, but likely will keep the counter in this faux marble contact paper because it looks so good!
As always, I hope I’ve introduced you to a new idea and helped build your confidence, so you can tackle this project or anything else your mind can dream up!
Here are some other posts you may enjoy with some money saving ideas!
- Paintable Option to Cover Cords and Cables
- How-to Paint Granite Counters to Look Like Marble
- Peel and Stick Tile: How-to Install on a Wall
- Peel and Stick Wallpaper: Beautiful and No Commitment!
- Small Home Office Ideas
- Easy Stick On Tiles Update Your Fireplace!
- Spray Paint Makeovers! 4 Money Saving DIY Ideas
Until next time…
Porch Daydreamer
Tracey